Love this? Save it for later!
Share the inspiration with your friends
The Fourth of July barbecue was in six hours and I’d completely forgotten I was supposed to bring dessert. Everyone else would be bringing their grandmother’s famous pies or those elaborate flag cakes that take all day to decorate. I had a carton of heavy cream, a bag of frozen berries, and a package of store-bought pound cake sitting in my kitchen. Honestly, I almost just stopped at the bakery on the way there. But I figured, how hard could a trifle be? I mean, it’s just layers, right?
So I started layering. Cubes of cake went into the bottom of a glass bowl I’d inherited from a neighbor who moved away. Then I spooned on some berries I’d defrosted in the microwave—maybe a little too long, they were pretty juicy. Then I whipped the cream until it was soft and pillowy and spread a generous layer on top. Repeat, repeat, repeat. I didn’t even have a plan. I just kept going until the bowl was full and the top was a cloud of white cream with a few blueberries and raspberries scattered on top like an afterthought.
I walked into that party feeling a little sheepish, carrying my humble trifle next to a table of showstopping desserts. But you know what happened? People went for it. Like, they really went for it. Someone asked for the recipe before the fireworks even started. And the best part? It was the easiest thing I’d ever thrown together. Maybe you’ve been there—scrambling at the last minute, hoping for the best. This easy red white and blue berry trifle is that recipe. It’s the one that saves you, and it tastes like you actually tried.
Why You’ll Love This Recipe
Let me tell you why this particular trifle has earned a permanent spot in my summer rotation. I’ve tested this version more times than I can count, tweaking the ratios and the layering order until it was just right. It’s the kind of dessert that makes you look like a hero without any of the stress.
- Quick & Easy: This comes together in about 20 minutes. No baking, no fussing with complicated custards. Just layer and go.
- Simple Ingredients: You probably already have most of what you need. A store-bought cake, frozen or fresh berries, and heavy cream. No fancy grocery trips required.
- Perfect for Patriotic Holidays: Obviously, it’s a natural fit for the Fourth of July, Memorial Day, or Labor Day. But honestly, I’ve made it for summer birthdays and backyard dinners too. The red, white, and blue just happen to look festive.
- Crowd-Pleaser: Every single time I bring this somewhere, it disappears. Kids love the creamy layers, and adults appreciate how light it feels after a heavy barbecue meal.
- Unbelievably Delicious: The combination of soft, soaked cake, tangy berries, and billowy whipped cream is pure comfort. It’s not fancy, but it’s perfect.
What makes this recipe different from the rest? It’s the texture. I don’t use a gelatin-stabilized cream or a complicated pastry cream. I use lightly sweetened whipped cream that stays soft and luscious. The berries get a quick maceration with a little sugar, which draws out their juices and creates a natural syrup that soaks into the cake. It’s simple, but it works. This isn’t just another trifle—it’s the best version, born out of a kitchen panic and perfected through repetition.
What Ingredients You Will Need
This easy red white and blue berry trifle uses simple, wholesome ingredients to deliver big flavor without the fuss. Most of these are pantry staples or easy to find at any grocery store.
- For the Cake Layer:
- 1 store-bought pound cake (about 10-12 ounces), cut into 1-inch cubes — I prefer the Sara Lee brand for its sturdy texture, but any brand works fine
- 1 tablespoon of orange liqueur or orange juice (optional, for brushing on the cake — adds a lovely brightness)
- For the Berry Layer:
- 2 cups fresh strawberries, hulled and sliced (for the red layer)
- 1 cup fresh blueberries (for the blue layer)
- 1 cup fresh raspberries (for the red layer, optional but adds great flavor)
- 2 tablespoons granulated sugar — this helps draw out the natural juices from the berries
- 1 teaspoon fresh lemon juice — balances the sweetness and keeps the berries bright
- For the Cream Layer:
- 2 cups heavy whipping cream, cold — look for cream with at least 36% milk fat for the best volume
- 3 tablespoons powdered sugar — dissolves more easily than granulated sugar
- 1 teaspoon vanilla extract — pure vanilla extract makes a difference here
- For Garnish (optional but recommended):
- Extra fresh berries, mint sprigs, or a sprinkle of white chocolate shavings
Ingredient Tips: If you’re using frozen berries, thaw them first and drain off any excess liquid. Otherwise, your trifle might get too soupy. I’ve made that mistake before—trust me on this one. For a dairy-free version, you can use a chilled can of full-fat coconut cream instead of heavy cream. Whip it the same way, and it works beautifully. Also, look for berries that are firm and not mushy. They hold their shape better in the layers and look prettier through the glass.
Equipment Needed
You don’t need much to pull this trifle together. Here’s what I use every time:
- A large glass trifle bowl or a clear glass serving dish: The whole point of a trifle is seeing those beautiful layers. A 3- to 4-quart bowl works perfectly. If you don’t have a trifle dish, a large glass mixing bowl or even a wide-mouth mason jar for individual servings works too.
- An electric mixer: A hand mixer or a stand mixer with the whisk attachment will whip your cream in minutes. You can do it by hand with a whisk, but your arm will definitely get a workout.
- A large mixing bowl: For whipping the cream. Make sure it’s chilled if you can—cold cream whips up faster and holds its shape better.
- A medium mixing bowl: For tossing the berries with sugar and lemon juice.
- A sharp knife and cutting board: For cubing the pound cake and slicing the strawberries.
- A rubber spatula: For folding and spreading the cream layers neatly.
I remember the first time I made this, I used a plastic salad bowl because I couldn’t find my trifle dish. It worked, but you couldn’t see the layers. Half the fun is the visual, so use something clear if you can. If you’re buying a trifle bowl, look for one with a pedestal—it makes for a pretty presentation on the table.
Preparation Method
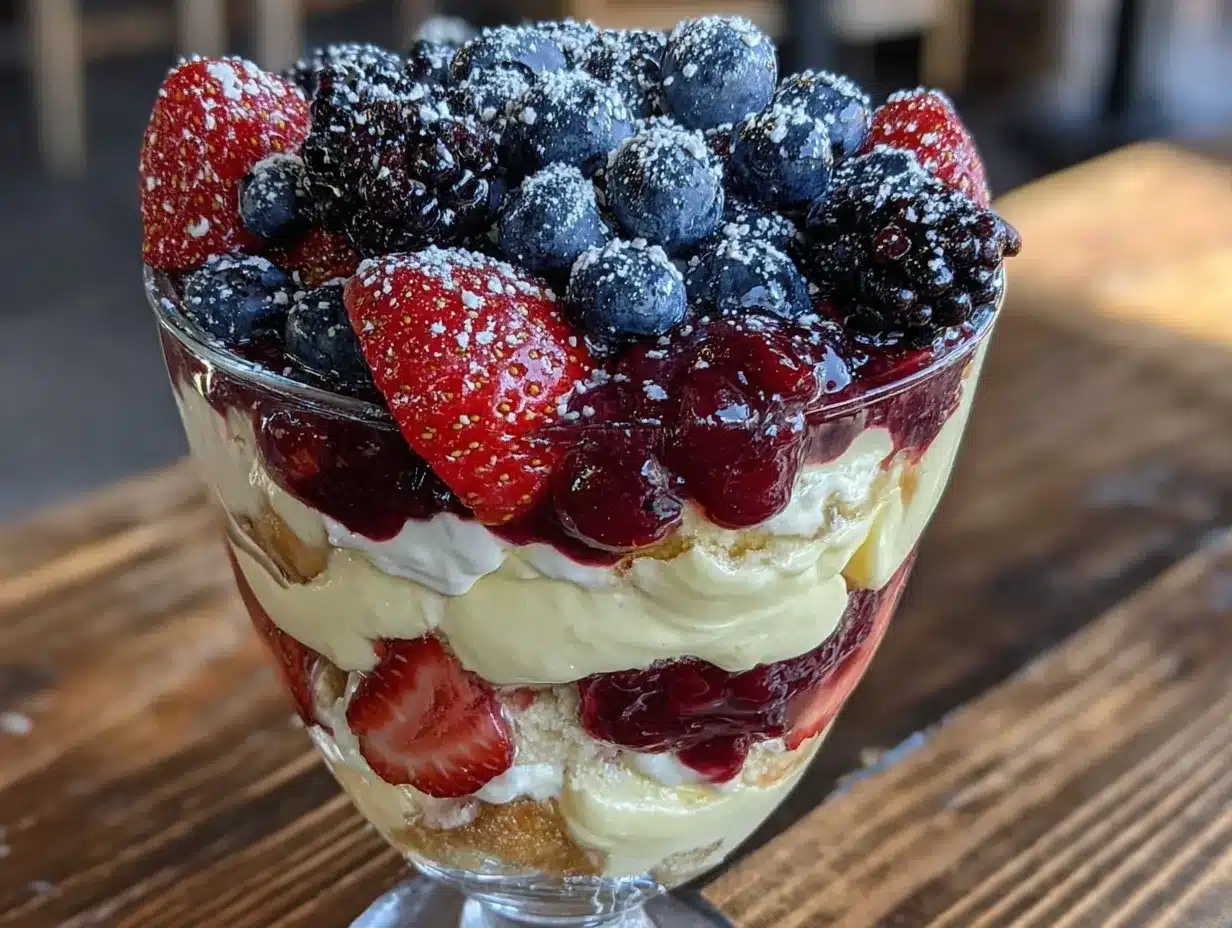
Alright, let’s get to the fun part. Here’s how to build this easy red white and blue berry trifle, step by step.
- Prepare the berries. In a medium bowl, combine the sliced strawberries, blueberries, and raspberries. Sprinkle the granulated sugar and lemon juice over the top. Gently toss everything together with a spatula until the berries are evenly coated. Let them sit for about 10 minutes. This maceration process draws out the natural juices, creating a light syrup that will soak into the cake layers. You’ll see the liquid pooling at the bottom of the bowl—that’s exactly what you want.
- Whip the cream. Pour the cold heavy whipping cream into a large mixing bowl (chill the bowl beforehand if you can). Add the powdered sugar and vanilla extract. Using an electric mixer on medium-high speed, whip the cream until soft peaks form. This usually takes about 3 to 4 minutes. Be careful not to overwhip—you want the cream to be light and billowy, not stiff and buttery. When you lift the beaters, the cream should hold a soft peak that gently flops over. If it looks grainy, you’ve gone too far.
- Cut the cake. Slice the pound cake into 1-inch cubes. I like to leave the crust on for texture, but you can trim it off if you prefer a softer bite. If you’re using the orange liqueur or juice, lightly brush it onto the cake cubes now. This step is optional, but it adds a lovely brightness that complements the berries.
- Start layering. Place a single layer of cake cubes at the bottom of your trifle bowl. You want enough to cover the bottom completely, about one-third of the cake cubes. Spoon about one-third of the macerated berries over the cake, including some of the juices. Then spread one-third of the whipped cream over the berries, using your spatula to create an even layer.
- Repeat the layers. Add another layer of cake cubes, followed by another layer of berries, and another layer of cream. Repeat one more time until you’ve used all the ingredients. You should end with a top layer of whipped cream. If you have any berries left, reserve them for the garnish.
- Garnish and chill. Arrange the reserved fresh berries on top of the cream in a pretty pattern. I like to do a few rows of strawberries, then blueberries, then raspberries for a patriotic look. Cover the bowl loosely with plastic wrap and refrigerate for at least 2 hours. This resting time is crucial—it allows the flavors to meld and the cake to absorb the berry juices. The trifle gets better as it sits.
- Serve cold. Spoon the trifle into individual bowls or glasses. Make sure each serving gets a little bit of every layer. That’s the magic of a trifle—every bite is a complete experience.
Troubleshooting Tip: If your trifle looks a little dry after chilling, you probably didn’t use enough berry juice. Next time, let the berries macerate longer, or add a splash of orange juice to the cake layer. If it’s too soupy, you might have used too much juice or not drained your frozen berries properly. Adjust as you go—you’ll get a feel for it.
Cooking Tips & Techniques
Over the years, I’ve learned a few things about making a truly great trifle. Some of these came from happy accidents, others from full-on disasters. Here’s what I wish I’d known from the start.
Don’t skip the maceration. I know it seems like an extra step, but tossing the berries with sugar and lemon juice makes all the difference. The sugar pulls out the natural juices, creating a syrup that soaks into the cake. Without this step, your trifle will be dry and the flavors won’t meld together. I once skipped it because I was in a hurry, and the result was a sad, bland dessert. Never again.
Whip your cream to soft peaks, not stiff peaks. Stiff cream can feel heavy and almost buttery in a trifle. Soft peaks give you that light, airy texture that makes every bite feel like a cloud. If you accidentally overwhip, you can try folding in a little bit of unwhipped cream to loosen it up. It’s not perfect, but it works in a pinch.
Layer with intention. Don’t just dump everything in randomly. Place the cake cubes in a single, even layer. Spoon the berries and their juices evenly over the top. Spread the cream gently so you don’t disturb the layers underneath. The visual payoff is worth the extra minute of care.
Let it rest. This is the hardest part, I know. You want to dig in immediately. But trust me, the trifle needs at least 2 hours in the fridge to reach its full potential. The cake absorbs the berry juices, the cream sets slightly, and the flavors marry together. It’s like magic. I’ve made this the night before a party, and it’s actually better the next day.
Use a clear bowl. I mentioned this before, but it’s worth repeating. A trifle is as much about the visual as it is about the taste. Seeing those distinct layers of red, white, and blue is half the joy. If you don’t have a trifle bowl, use a large glass mixing bowl or even individual mason jars for a fun, portable option.
Variations & Adaptations
One of the best things about this easy red white and blue berry trifle is how adaptable it is. Here are some of my favorite variations.
Dairy-Free Version: Swap the heavy cream with a chilled can of full-fat coconut cream. Whip it the same way, with powdered sugar and vanilla. It’s rich, creamy, and completely dairy-free. I’ve served this to a crowd that included a few lactose-intolerant friends, and nobody noticed the difference.
Gluten-Free Option: Use a gluten-free pound cake or even gluten-free vanilla cake cubes. Most store-bought versions work well. Just make sure to check the label. I’ve also used gluten-free angel food cake, which is lighter and fluffier—a great choice for summer.
Seasonal Berry Swap: This recipe works with any combination of berries. In the summer, use fresh strawberries, blueberries, and raspberries. In the winter, frozen berries work perfectly—just thaw and drain them first. I’ve even made a version with blackberries and sliced peaches for a late-summer twist. It’s not red, white, and blue anymore, but it’s delicious.
Lemon Curd Layer: For an extra punch of flavor, add a thin layer of lemon curd between the cake and the berries. It adds a tangy brightness that cuts through the sweetness. I tried this on a whim one year, and it was such a hit that it’s now my go-to for special occasions.
Individual Servings: Instead of one large trifle, layer everything into small mason jars or clear plastic cups. This is perfect for picnics, barbecues, or kids’ parties. Everyone gets their own little parfait, and there’s no fighting over the last scoop.
Serving & Storage Suggestions
This trifle is best served cold, straight from the refrigerator. The chilled cream and juicy berries are incredibly refreshing on a hot summer day. I like to spoon it into individual glass bowls or wide-mouth cups so everyone can see the layers.
What to Serve With It: This trifle is rich enough to stand on its own, but it pairs beautifully with a cup of hot coffee or iced tea. If you’re serving it after a heavy barbecue, keep the sides light—maybe a simple green salad or grilled vegetables. For a brunch spread, it’s lovely alongside a fruit platter and some fresh pastries.
Storage Instructions: Cover the trifle bowl tightly with plastic wrap and store it in the refrigerator for up to 2 days. The texture is best on the first day, but it’s still delicious on the second. After that, the cake can get a bit too soft and the cream may start to separate. I don’t recommend freezing this dessert—the cream will become grainy when thawed.
Reheating Notes: This is a cold dessert, so no reheating needed. If you’ve stored it in the fridge, just let it sit at room temperature for about 10 minutes before serving to take the chill off. The flavors are more pronounced when it’s not ice-cold.
One thing I love about this trifle is how the flavors develop over time. On the first day, the layers are distinct and the cake is still a little firm. By the second day, everything has melded together into a soft, creamy, berry-infused pudding-like texture. Both versions are wonderful, so don’t be afraid to make it ahead.
Nutritional Information & Benefits
Here’s an estimated nutritional breakdown for one serving of this easy red white and blue berry trifle (based on 8 servings):
- Calories: 320
- Fat: 20g
- Carbohydrates: 34g
- Protein: 3g
- Sugar: 24g
- Fiber: 3g
Health Benefits of Key Ingredients: Berries are packed with antioxidants, vitamin C, and fiber. They’re one of the best things you can eat for overall health. The heavy cream provides calcium and vitamin D, though it’s best enjoyed in moderation. If you’re looking for a lighter option, you can use a mixture of half heavy cream and half Greek yogurt—it cuts the calories while adding protein.
Dietary Considerations: This recipe contains gluten, dairy, and eggs (from the pound cake). For a gluten-free version, use a gluten-free cake. For a dairy-free version, use coconut cream. This recipe is naturally nut-free and can be made soy-free by choosing the right cake.
I personally love that this dessert feels indulgent but still includes a good amount of fruit. It’s the kind of treat that satisfies your sweet tooth without leaving you feeling heavy or guilty. And honestly, any dessert that makes you eat a serving of berries is a win in my book.
Conclusion
So there you have it—my easy red white and blue berry trifle, born out of a last-minute panic and perfected through many happy accidents. This recipe is proof that you don’t need complicated techniques or a list of fancy ingredients to create something truly memorable. It’s simple, it’s beautiful, and it tastes like summer in a bowl.
I hope you’ll give this recipe a try, whether it’s for a patriotic holiday, a backyard barbecue, or just a Tuesday night when you’re craving something sweet. Feel free to customize it with your favorite berries, swap in different cakes, or add your own special touch. That’s the beauty of a trifle—it’s forgiving, flexible, and always delicious.
If you make this, I’d love to hear about it! Leave a comment below and let me know how it turned out. Did you try a variation? Did your family love it? Share your photos and tag me on social media—I can’t wait to see your creations. Until next time, happy layering!
Frequently Asked Questions
Can I use frozen berries for this trifle?
Yes, absolutely. Just make sure to thaw them first and drain off any excess liquid. Frozen berries tend to release more juice than fresh ones, so you might want to reduce the maceration time slightly. I’ve used frozen berries many times, and the trifle turns out great.
How far in advance can I make this trifle?
You can make this trifle up to 24 hours in advance. In fact, it often tastes better the next day because the flavors have had time to meld. Just cover it tightly with plastic wrap and keep it refrigerated. I wouldn’t recommend making it more than 2 days ahead, as the cake can become too soft.
Can I use a different type of cake?
Absolutely. Angel food cake, sponge cake, or even vanilla cupcakes work beautifully. If you’re feeling ambitious, you can make your own pound cake from scratch. Just make sure the cake is sturdy enough to hold up to the berries and cream. Avoid very light, airy cakes that might dissolve completely.
How do I prevent the trifle from getting soggy?
The key is to not over-macerate the berries and to drain any excess liquid before layering. Also, don’t let the trifle sit for more than 2 days. The cake will naturally absorb some liquid—that’s part of the charm—but you want it to be soft, not mushy. If you’re using very juicy berries, you can also brush the cake cubes with a little melted white chocolate to create a barrier.
Can I make this trifle in individual servings?
Yes, and I highly recommend it for parties. Use small mason jars, clear plastic cups, or even wine glasses. Layer the ingredients the same way, but in smaller portions. Individual servings are easier to serve, travel well, and look adorable. Plus, everyone gets their own little masterpiece.
Pin This Recipe!
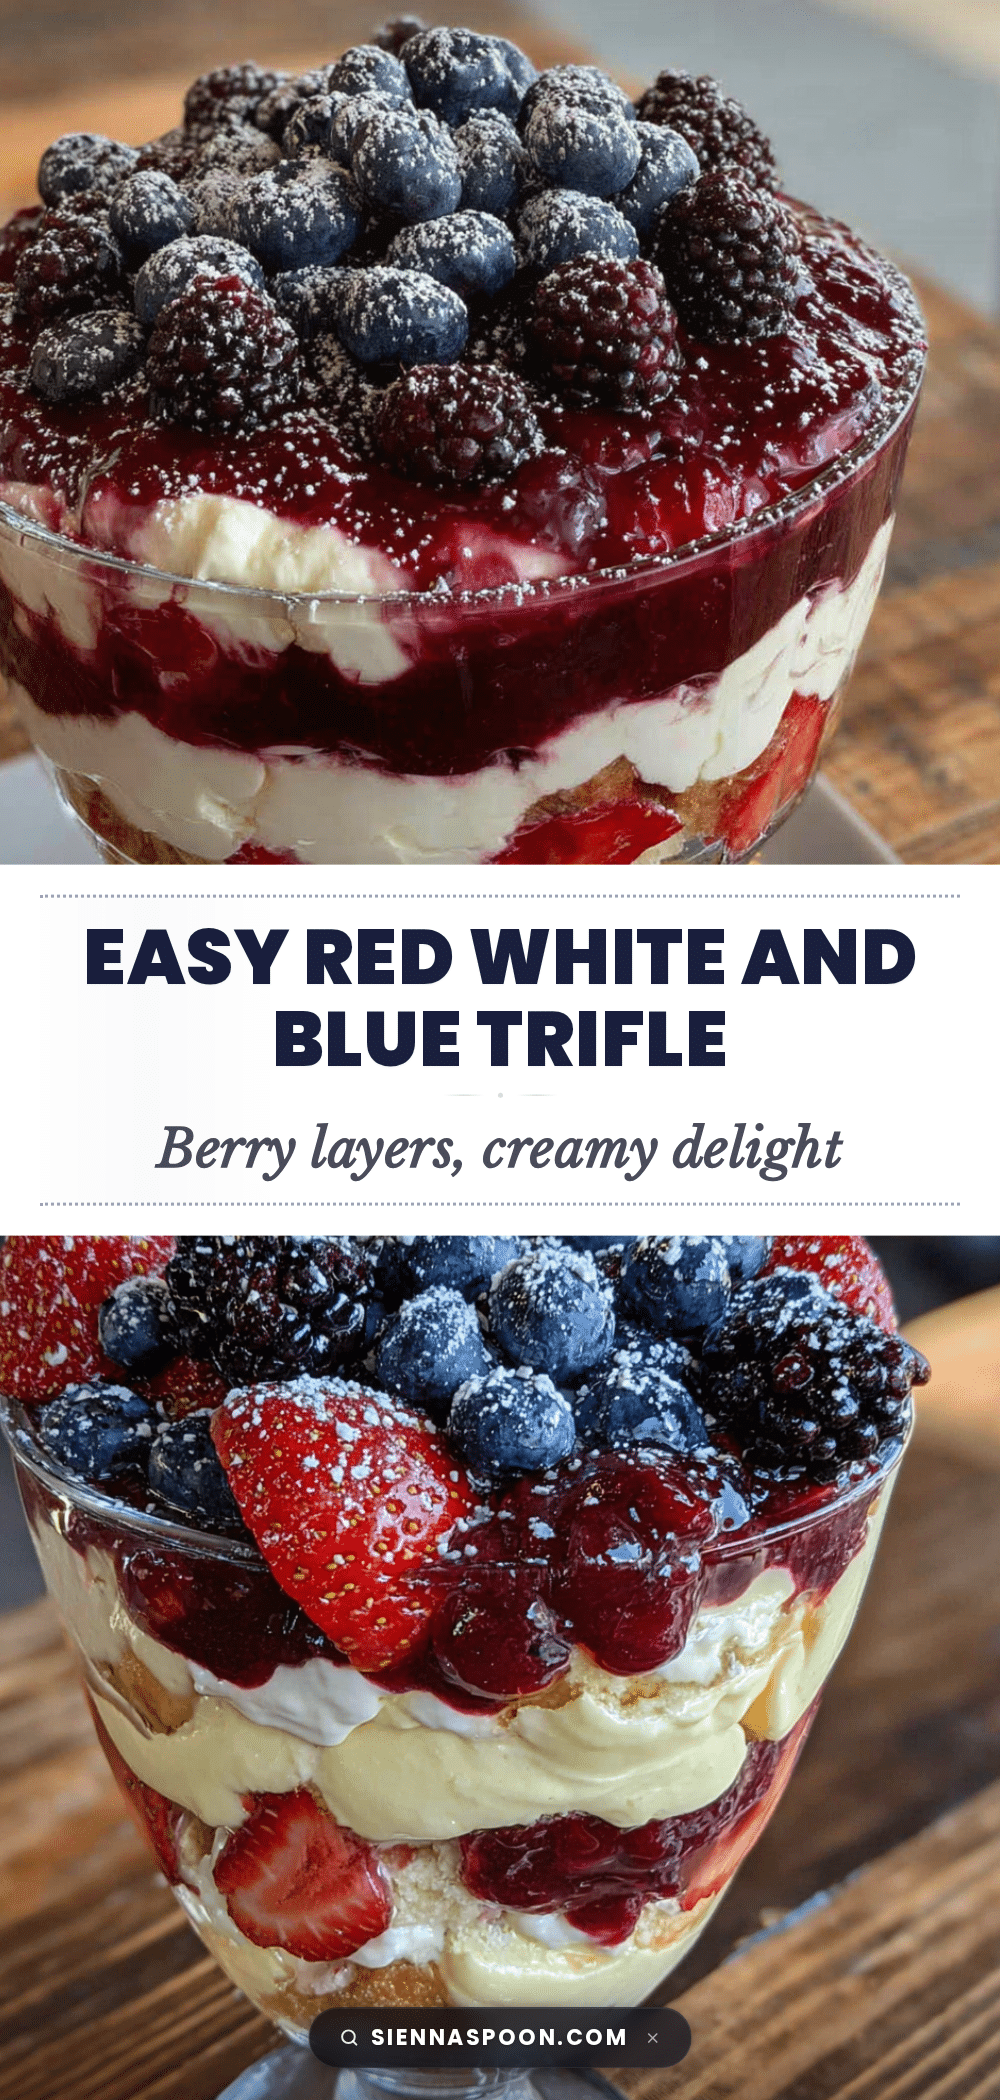
Easy Red White and Blue Berry Trifle Recipe
This easy red white and blue berry trifle is a quick, no-bake dessert perfect for patriotic holidays. Layers of store-bought pound cake, macerated berries, and lightly sweetened whipped cream create a beautiful and delicious treat that looks like you tried, but comes together in just 20 minutes.
- Prep Time: 20 minutes
- Cook Time: 0 minutes
- Total Time: 2 hours 20 minutes (includes chilling time)
- Yield: 8 servings 1x
- Category: Dessert
- Cuisine: American
Ingredients
- 1 store-bought pound cake (about 10–12 ounces), cut into 1-inch cubes
- 1 tablespoon orange liqueur or orange juice (optional)
- 2 cups fresh strawberries, hulled and sliced
- 1 cup fresh blueberries
- 1 cup fresh raspberries (optional)
- 2 tablespoons granulated sugar
- 1 teaspoon fresh lemon juice
- 2 cups heavy whipping cream, cold
- 3 tablespoons powdered sugar
- 1 teaspoon vanilla extract
- Extra fresh berries, mint sprigs, or white chocolate shavings for garnish (optional)
Instructions
- Prepare the berries: In a medium bowl, combine sliced strawberries, blueberries, and raspberries. Sprinkle with granulated sugar and lemon juice. Gently toss to coat. Let sit for about 10 minutes to macerate.
- Whip the cream: In a large chilled mixing bowl, combine cold heavy whipping cream, powdered sugar, and vanilla extract. Using an electric mixer on medium-high speed, whip until soft peaks form (about 3-4 minutes). Do not overwhip.
- Cut the cake: Slice the pound cake into 1-inch cubes. If using, lightly brush the cubes with orange liqueur or orange juice.
- Start layering: Place a single layer of cake cubes at the bottom of a large glass trifle bowl (about one-third of the cubes). Spoon about one-third of the macerated berries (including juices) over the cake. Spread one-third of the whipped cream over the berries.
- Repeat layers: Add another layer of cake cubes, followed by another layer of berries, and another layer of cream. Repeat one more time until all ingredients are used, ending with a top layer of whipped cream.
- Garnish and chill: Arrange reserved fresh berries on top of the cream in a decorative pattern. Cover loosely with plastic wrap and refrigerate for at least 2 hours (or up to 24 hours) to allow flavors to meld.
- Serve cold: Spoon into individual bowls or glasses, ensuring each serving gets a bit of every layer.
Notes
For best results, let the trifle rest in the refrigerator for at least 2 hours (or overnight) to allow the cake to absorb the berry juices and the flavors to meld. If using frozen berries, thaw and drain them first to avoid a soupy trifle. For a dairy-free version, use chilled full-fat coconut cream instead of heavy cream. For a gluten-free version, use a gluten-free pound cake.
Nutrition
- Serving Size: 1 serving (about 1 c
- Calories: 320
- Sugar: 24
- Sodium: 180
- Fat: 20
- Saturated Fat: 12
- Carbohydrates: 34
- Fiber: 3
- Protein: 3
Keywords: trifle, berry trifle, red white and blue, Fourth of July, patriotic dessert, no-bake dessert, easy dessert, summer dessert


