Love this? Save it for later!
Share the inspiration with your friends
The work week was staring me down on a Sunday night and I had absolutely nothing prepped. My fridge held a sad collection of condiment bottles, some wilting scallions, and exactly two chicken breasts that were about to hit their expiration date. I needed something that would come together fast, taste good cold or hot, and not leave me staring at a sink full of dishes at 10 PM. That’s when this easy meal prep teriyaki chicken and rice bowls idea was born out of pure, panicked necessity.
I grabbed a bottle of soy sauce, some honey I found hiding in the back of the cabinet, and started winging it. Honestly, I wasn’t trying to create anything special. I was just trying to survive Monday through Friday without spending $15 on lunch every single day. The rice cooker did its thing while I whisked together a quick sauce that smelled so good I almost ate it with a spoon right then and there. By the time I had everything portioned into containers, I felt like I had actually outsmarted the week ahead. Maybe you’ve been there—staring at a blank meal plan and feeling the pressure of the upcoming chaos.
That first bite of teriyaki chicken on Tuesday at my desk was a total revelation. It was just as good as the night I made it, maybe even better. The sauce had soaked into the rice just enough, and the chicken was still tender and flavorful. I mean, I couldn’t believe something this simple could taste so satisfying. I’ve made these bowls every single week since then, tweaking the sauce ratios and the veggie combos until it became my go-to. This recipe saved my sanity, my wallet, and my lunch break. It’s the kind of meal that proves you don’t need a culinary degree or a ton of time to eat well all week long.
Why You’ll Love This Recipe
Let me tell you why these easy meal prep teriyaki chicken and rice bowls have earned a permanent spot in my weekly rotation. I’ve tested this recipe at least a dozen times, tweaking the sauce and the cooking method until it was absolutely foolproof. This isn’t just another teriyaki recipe—it’s the one that actually works for busy people who need real food without the stress.
- Quick & Easy: From start to finish, these bowls come together in about 30 minutes. That’s faster than ordering takeout and waiting for delivery.
- Simple Ingredients: You probably already have soy sauce, honey, garlic, and rice in your pantry. No weird specialty items required.
- Perfect for Meal Prep: These bowls actually get better after a day or two in the fridge. The flavors meld together beautifully, making your Tuesday lunch taste even better than your Sunday dinner.
- Crowd-Pleaser: My picky-eating nephew devours these bowls, and so do my foodie friends. It’s that rare recipe that pleases everyone at the table.
- Unbelievably Delicious: The homemade teriyaki sauce is the real star here. It’s sticky, savory, slightly sweet, and absolutely addictive. You’ll never go back to bottled sauce again.
What makes this recipe different from the rest is the technique. Instead of marinating the chicken for hours, you let it simmer in the sauce as it cooks. This locks in moisture and infuses every bite with that deep, umami flavor. Plus, I’ve cracked the code on getting that perfect glossy glaze without burning the sugar. It’s a small trick that makes a huge difference. These bowls are comfort food reimagined—healthier, faster, and with the same soul-soothing satisfaction that makes you close your eyes after the first bite.
What Ingredients You Will Need
This recipe uses simple, wholesome ingredients to deliver bold flavor and satisfying texture without the fuss. Most of these items are pantry staples, so you can whip up these bowls anytime the craving hits.
- Boneless, skinless chicken breasts (about 1.5 pounds or 680 grams) – I prefer using chicken breasts for lean protein, but thighs work great too if you want extra juiciness. Trim any excess fat before cooking.
- Soy sauce (½ cup or 120 ml) – Use low-sodium soy sauce to control the salt level. I recommend Kikkoman for consistent flavor, but any brand works. For gluten-free, swap with tamari or coconut aminos.
- Honey (¼ cup or 85 grams) – This adds natural sweetness and helps create that sticky glaze. Local honey adds a nice floral note, but any honey works. Maple syrup is a good vegan alternative.
- Rice vinegar (2 tablespoons or 30 ml) – The acidity balances the sweetness and adds brightness. Unseasoned rice vinegar is best. If you don’t have it, use apple cider vinegar with a pinch of sugar.
- Fresh garlic (4 cloves, minced) – Fresh garlic is non-negotiable here. It provides that pungent, aromatic kick that powdered garlic just can’t match. Mince it finely so it dissolves into the sauce.
- Fresh ginger (1 tablespoon, grated) – Ginger adds warmth and a slight peppery zing. Grate it on a microplane for the best texture. Frozen ginger cubes work in a pinch.
- Sesame oil (1 tablespoon or 15 ml) – Toasted sesame oil adds that signature nutty flavor. A little goes a long way, so measure carefully. Don’t substitute with regular vegetable oil.
- Cornstarch (1 tablespoon) – This is the secret to a glossy, thick sauce. Mix it with 2 tablespoons of cold water to make a slurry before adding it to the pan.
- Cooked white rice (4 cups or 600 grams) – Jasmine rice is my go-to for its fragrant, slightly sticky texture. Sushi rice works beautifully too. For meal prep, cook the rice a day ahead so it’s perfectly chilled.
- Broccoli florets (2 cups or 200 grams) – Broccoli adds crunch and nutrients. Cut them into uniform bite-sized pieces so they cook evenly. Frozen broccoli works if you’re short on time.
- Carrots (2 medium, julienned or sliced) – Carrots add sweetness and color. Use a vegetable peeler to create ribbons for a prettier presentation.
- Edamame (1 cup or 150 grams, shelled) – These little green beans add protein and a pop of color. Frozen edamame is perfectly fine—just thaw and drain them.
- Sesame seeds (for garnish) – Toasted sesame seeds add a nutty crunch. Black and white sesame seeds mixed together look stunning.
- Sliced green onions (for garnish) – Green onions add freshness and a mild onion bite. Slice them on a bias for a professional look.
Equipment Needed
You don’t need a fancy kitchen to make these easy meal prep teriyaki chicken and rice bowls. Here’s what you’ll need:
- Large skillet or wok (12-inch or 30 cm) – A non-stick skillet works best for preventing the sauce from sticking and burning. Cast iron works too, but you’ll need to watch the heat carefully.
- Rice cooker or medium saucepan – A rice cooker makes perfectly fluffy rice with zero effort. If using a saucepan, use a tight-fitting lid and don’t peek while it cooks.
- Cutting board and sharp knife – A good chef’s knife makes dicing chicken and slicing vegetables a breeze. Keep your knife sharp for clean cuts.
- Microplane or fine grater – This is essential for grating ginger and garlic into a paste. A box grater’s finest side works too.
- Small bowl – For mixing the cornstarch slurry. A ramekin or small prep bowl works perfectly.
- Measuring cups and spoons – Accurate measurements matter for the sauce. Use liquid measuring cups for soy sauce and honey.
- Meal prep containers (4 to 6 containers) – Glass containers with airtight lids are ideal. They’re microwave-safe and don’t stain or absorb odors.
I’ve made this recipe with a cheap non-stick skillet from the grocery store, and it worked just fine. Don’t let fancy equipment stop you. The only thing I’d recommend splurging on is a good rice cooker—it’s a game-changer for meal prep.
Preparation Method
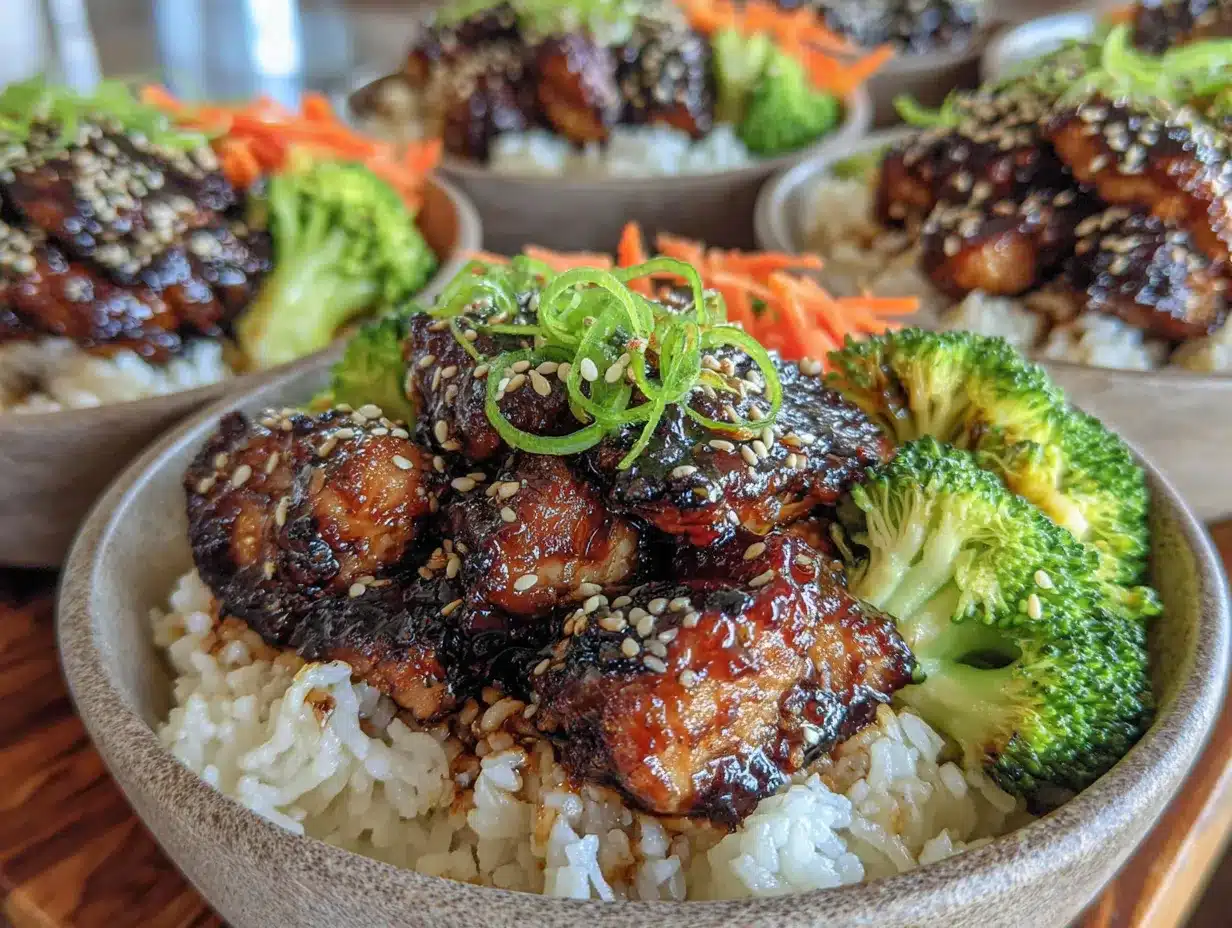
- Cook the rice first. Rinse 2 cups (400 grams) of jasmine rice under cold water until the water runs clear. This removes excess starch and prevents gummy rice. Add the rice and 3 cups (720 ml) of water to your rice cooker and start it. If using a saucepan, bring the water and rice to a boil, cover, reduce heat to low, and simmer for 18 minutes. Let it sit covered for 5 minutes before fluffing. Set aside to cool slightly.
- Make the teriyaki sauce. In a small bowl, whisk together ½ cup (120 ml) low-sodium soy sauce, ¼ cup (85 grams) honey, 2 tablespoons (30 ml) rice vinegar, 4 minced garlic cloves, and 1 tablespoon grated ginger. Taste it and adjust—if you like it sweeter, add another tablespoon of honey. If you want more tang, add an extra splash of rice vinegar. Set the sauce aside.
- Prepare the chicken. Pat the chicken breasts dry with paper towels. This helps them sear instead of steam. Cut them into 1-inch (2.5 cm) cubes. Season lightly with a pinch of salt and black pepper. Don’t over-salt since the soy sauce will add plenty of sodium.
- Sear the chicken. Heat 1 tablespoon of sesame oil in your large skillet over medium-high heat. Once the oil shimmers, add the chicken pieces in a single layer. Don’t overcrowd the pan—work in batches if needed. Let the chicken cook undisturbed for 3-4 minutes until golden brown on the bottom. Flip and cook another 3-4 minutes until cooked through. The internal temperature should reach 165°F (74°C). Remove the chicken from the pan and set aside.
- Cook the vegetables. In the same skillet, add the broccoli florets and julienned carrots. Stir-fry for 2-3 minutes until the broccoli turns bright green and is tender-crisp. Add the shelled edamame and cook for another minute. The vegetables should still have some bite—they’ll soften slightly when you reheat the bowls later. Remove the vegetables from the pan.
- Combine the sauce and chicken. Reduce the heat to medium-low. Pour the teriyaki sauce into the skillet. Let it simmer for 1 minute. In a small bowl, mix 1 tablespoon of cornstarch with 2 tablespoons of cold water until smooth. Slowly pour the cornstarch slurry into the simmering sauce while stirring constantly. The sauce will thicken almost immediately into a glossy glaze.
- Return the chicken to the pan. Add the cooked chicken back to the skillet. Toss to coat every piece in the thick, shiny sauce. Let it simmer together for 1-2 minutes so the chicken absorbs some of that flavor. The sauce should cling to the chicken like a blanket.
- Assemble the bowls. Divide the cooked rice evenly among your meal prep containers. Top with the glazed teriyaki chicken. Arrange the stir-fried vegetables on the side. Sprinkle each bowl with sesame seeds and sliced green onions. Let the bowls cool completely at room temperature before sealing the lids—this prevents condensation from making everything soggy.
Pro tip: If your sauce gets too thick while sitting, don’t panic. Just add a splash of water when you reheat the bowl and stir it in. The sauce will loosen right up.
Cooking Tips & Techniques
I’ve made plenty of mistakes with teriyaki chicken over the years, and I’m sharing them so you don’t have to repeat them. Here’s what I’ve learned the hard way.
Don’t boil the sauce too early. The biggest mistake I made was adding the cornstarch slurry before the sauce had a chance to develop flavor. Let the soy sauce, honey, garlic, and ginger simmer together for at least a minute before thickening. This allows the flavors to meld and the alcohol from the rice vinegar to cook off.
Watch the heat like a hawk. Teriyaki sauce burns faster than you think. The sugar in the honey can scorch in seconds if the heat is too high. Keep the burner on medium-low once you add the sauce. If you see the sauce bubbling aggressively, turn the heat down immediately. Burnt teriyaki tastes bitter and smoky—not in a good way.
Patience with the sear. When browning the chicken, resist the urge to stir it constantly. Let it sit in the hot oil for a full 3-4 minutes before flipping. This creates a beautiful golden crust that adds texture and flavor. If you move the chicken too soon, it will stick and tear.
Multitask like a pro. While the rice is cooking, prep your vegetables and make the sauce. While the chicken is searing, steam your broccoli in the microwave for 2 minutes. This shaves off at least 10 minutes from the total prep time. I set a timer for the rice and use that as my anchor for everything else.
Cool completely before storing. This is crucial for meal prep. If you put hot food into containers and seal them, condensation builds up and makes the rice mushy and the chicken soggy. Spread the rice on a baking sheet to cool faster. Let the chicken cool in a single layer on a plate. Trust me on this one—I learned it the hard way with a container of sad, wet rice.
Variations & Adaptations
One of the best things about these easy meal prep teriyaki chicken and rice bowls is how customizable they are. Here are some variations I’ve tried and loved.
Spicy Teriyaki Bowls: Add 1 tablespoon of sriracha or chili garlic sauce to the teriyaki sauce. For extra heat, toss in some red pepper flakes while the sauce simmers. I did this on a whim one Sunday and it became my husband’s favorite version. The heat cuts through the sweetness beautifully.
Vegetarian Teriyaki Bowls: Swap the chicken for extra-firm tofu or tempeh. Press the tofu for 30 minutes to remove excess moisture, then cube it and pan-fry until golden brown before adding the sauce. You can also use chickpeas for a quick protein boost. The sauce works with literally anything.
Low-Carb Teriyaki Bowls: Replace the rice with cauliflower rice or zucchini noodles. Cook the cauliflower rice in the microwave for 4 minutes, then squeeze out the excess water with a clean kitchen towel. This version is surprisingly satisfying and keeps the carb count low.
Seasonal Veggie Swap: In the summer, I use bell peppers and snap peas instead of broccoli and carrots. In the fall, roasted butternut squash cubes add a sweet, earthy element. The teriyaki sauce pairs well with almost any vegetable, so feel free to clean out your crisper drawer.
Baked Teriyaki Chicken: If you prefer hands-off cooking, bake the chicken breasts at 400°F (200°C) for 20-25 minutes. Brush the sauce on during the last 5 minutes of baking for a caramelized finish. Slice and serve over rice. This method is great when you’re already using the oven for something else.
Serving & Storage Suggestions
These bowls are designed to be eaten cold or reheated, which makes them perfect for meal prep. Here’s how to serve and store them for the best results.
Serving Temperature: These bowls are delicious straight out of the fridge on a hot day. The cold rice and chicken have a refreshing, almost sushi-like quality. For a warm meal, microwave the bowl for 2-3 minutes, stirring halfway through. Add a splash of water before microwaving to rehydrate the rice.
Presentation Tips: When serving to guests, arrange the chicken and vegetables artfully on top of the rice. Drizzle a little extra teriyaki sauce over the top. Garnish with a generous sprinkle of sesame seeds and a handful of sliced green onions. A sprinkle of furikake (Japanese rice seasoning) adds an authentic touch.
Storage Instructions: Store the assembled bowls in airtight glass containers in the refrigerator for up to 4 days. Keep the garnishes (sesame seeds and green onions) separate and add them just before eating to maintain their crunch. Do not freeze these bowls—the rice becomes mushy and the sauce separates upon thawing.
Reheating Tips: For the best texture, reheat the chicken and vegetables in a skillet over medium heat with a splash of water. This restores the glaze and prevents the chicken from drying out. If using a microwave, cover the bowl with a damp paper towel to create steam and prevent the rice from hardening.
Flavor Development: These bowls taste even better on day two or three. The rice absorbs the teriyaki sauce, and the flavors meld together in a way that’s truly magical. I actually look forward to my Tuesday lunch more than my Sunday dinner when I make these bowls.
Nutritional Information & Benefits
These easy meal prep teriyaki chicken and rice bowls are not just delicious—they’re also packed with nutrition. Here’s a breakdown of what you’re getting in each serving (based on 4 servings).
| Nutrient | Amount per Serving |
|---|---|
| Calories | 485 kcal |
| Protein | 38 grams |
| Carbohydrates | 52 grams |
| Fat | 12 grams |
| Fiber | 6 grams |
| Sugar | 18 grams |
| Sodium | 780 mg |
Health Benefits: The chicken provides lean protein that keeps you full and supports muscle repair. Broccoli and carrots are loaded with vitamins A, C, and K, plus fiber for digestive health. Edamame adds plant-based protein and heart-healthy omega-3 fatty acids. Ginger and garlic have anti-inflammatory properties that support your immune system.
Dietary Considerations: This recipe is dairy-free and nut-free. For a gluten-free version, use tamari or coconut aminos instead of soy sauce. For a lower-sodium option, reduce the soy sauce to ⅓ cup and add 2 tablespoons of water. The honey makes this recipe unsuitable for strict keto, but the low-carb variation with cauliflower rice works well.
Potential Allergens: Soy (from soy sauce) and sesame (from sesame oil and seeds). If you have a soy allergy, use coconut aminos and skip the sesame oil. The recipe is naturally free of eggs, dairy, and gluten (with the right soy sauce substitute).
I love that this meal feels indulgent but is actually quite balanced. It’s the kind of food that fuels your body without making you feel heavy or sluggish. That’s a win in my book.
Conclusion
These easy meal prep teriyaki chicken and rice bowls have genuinely changed the way I approach my work week. They’re proof that you don’t need complicated techniques or exotic ingredients to eat well every single day. The homemade teriyaki sauce is the star of the show—it’s sticky, savory, and just sweet enough to satisfy that takeout craving without the guilt or the cost.
I hope you give these bowls a try and make them your own. Swap in your favorite vegetables, adjust the sweetness of the sauce, or pile on extra edamame. The beauty of this recipe is how forgiving and adaptable it is. Whether you’re meal prepping for a busy week or just looking for a quick dinner that tastes like you put in way more effort than you actually did, these bowls deliver every single time.
I’d love to hear how your teriyaki chicken bowls turn out! Drop a comment below and let me know what variations you tried. Did you go spicy? Did you add pineapple? Did your picky eater actually clean their bowl? Share your wins, your tweaks, and your questions. And if you loved this recipe, don’t forget to pin it for later or share it with a friend who needs a little meal prep magic in their life. Happy cooking, friends!
Frequently Asked Questions
Can I use chicken thighs instead of chicken breasts?
Absolutely! Chicken thighs are more forgiving and stay juicier during reheating. Just increase the cooking time by 2-3 minutes per side since thighs are thicker. Boneless, skinless thighs work best for this recipe.
How do I prevent the rice from getting mushy in meal prep?
The key is to cool the rice completely before assembling the bowls. Spread the cooked rice on a baking sheet in a thin layer and let it sit at room temperature for 15-20 minutes. This stops the cooking process and prevents excess moisture from making the rice soggy.
Can I make the teriyaki sauce ahead of time?
Yes! The sauce can be made up to 5 days in advance. Store it in an airtight jar in the refrigerator. Give it a good shake or whisk before using, as the honey will settle at the bottom. Don’t add the cornstarch slurry until you’re ready to cook.
What’s the best way to reheat these bowls without drying out the chicken?
Add a tablespoon of water to the bowl before microwaving. Cover with a damp paper towel and microwave for 2 minutes, then stir and heat for another 30 seconds if needed. The steam from the water keeps the chicken moist and rehydrates the sauce.
Can I freeze these teriyaki chicken bowls?
I don’t recommend freezing these bowls. The rice becomes mushy and grainy upon thawing, and the sauce can separate and become watery. These bowls are best enjoyed within 4 days of preparation. If you need to freeze, store the cooked chicken and sauce separately from the rice and vegetables.
Pin This Recipe!
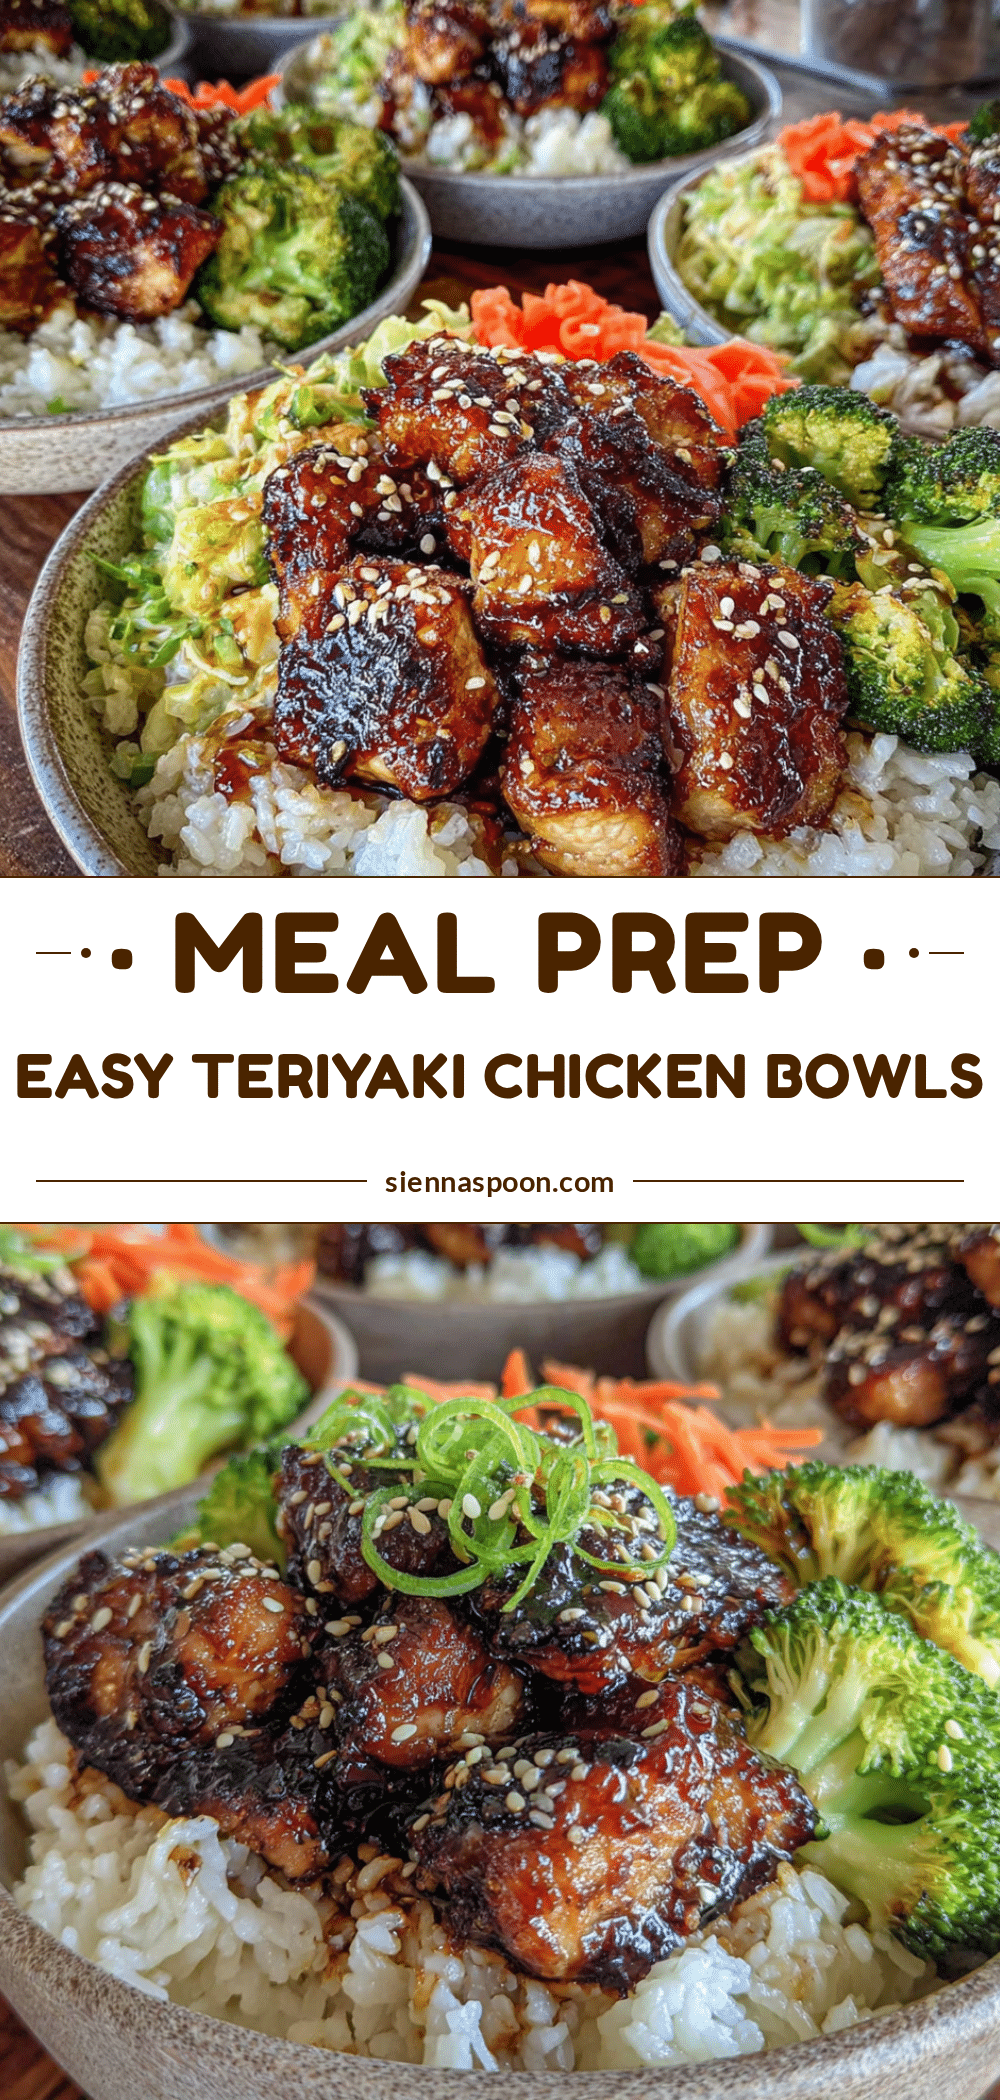
Easy Meal Prep Teriyaki Chicken and Rice Bowls
These easy meal prep teriyaki chicken and rice bowls come together in about 30 minutes with simple ingredients. The homemade teriyaki sauce is sticky, savory, and slightly sweet, making these bowls perfect for busy weeks.
- Prep Time: 15 minutes
- Cook Time: 15 minutes
- Total Time: 30 minutes
- Yield: 4 servings 1x
- Category: Main Course
- Cuisine: Japanese
Ingredients
- 1.5 pounds (680 grams) boneless, skinless chicken breasts
- ½ cup (120 ml) low-sodium soy sauce
- ¼ cup (85 grams) honey
- 2 tablespoons (30 ml) rice vinegar
- 4 cloves fresh garlic, minced
- 1 tablespoon fresh ginger, grated
- 1 tablespoon (15 ml) sesame oil
- 1 tablespoon cornstarch
- 2 tablespoons cold water
- 4 cups (600 grams) cooked white rice (jasmine or sushi rice)
- 2 cups (200 grams) broccoli florets
- 2 medium carrots, julienned or sliced
- 1 cup (150 grams) shelled edamame
- Sesame seeds for garnish
- Sliced green onions for garnish
Instructions
- Cook the rice first. Rinse 2 cups (400 grams) of jasmine rice under cold water until the water runs clear. Add the rice and 3 cups (720 ml) of water to a rice cooker and start it. If using a saucepan, bring to a boil, cover, reduce heat to low, and simmer for 18 minutes. Let sit covered for 5 minutes before fluffing. Set aside to cool slightly.
- Make the teriyaki sauce. In a small bowl, whisk together ½ cup (120 ml) low-sodium soy sauce, ¼ cup (85 grams) honey, 2 tablespoons (30 ml) rice vinegar, 4 minced garlic cloves, and 1 tablespoon grated ginger. Adjust sweetness or tang to taste. Set aside.
- Prepare the chicken. Pat the chicken breasts dry with paper towels. Cut into 1-inch (2.5 cm) cubes. Season lightly with salt and black pepper.
- Sear the chicken. Heat 1 tablespoon of sesame oil in a large skillet over medium-high heat. Add the chicken pieces in a single layer (work in batches if needed). Cook undisturbed for 3-4 minutes until golden brown, then flip and cook another 3-4 minutes until cooked through (internal temperature 165°F/74°C). Remove from pan and set aside.
- Cook the vegetables. In the same skillet, add broccoli florets and julienned carrots. Stir-fry for 2-3 minutes until broccoli is bright green and tender-crisp. Add shelled edamame and cook for another minute. Remove from pan.
- Combine the sauce and chicken. Reduce heat to medium-low. Pour the teriyaki sauce into the skillet and let simmer for 1 minute. In a small bowl, mix 1 tablespoon cornstarch with 2 tablespoons cold water until smooth. Slowly pour the slurry into the simmering sauce while stirring constantly until thickened into a glossy glaze.
- Return the chicken to the pan. Add the cooked chicken back to the skillet and toss to coat. Let simmer for 1-2 minutes so the chicken absorbs flavor.
- Assemble the bowls. Divide the cooked rice evenly among meal prep containers. Top with glazed teriyaki chicken and arrange stir-fried vegetables on the side. Sprinkle each bowl with sesame seeds and sliced green onions. Cool completely before sealing lids.
Notes
Cool the rice completely before assembling bowls to prevent sogginess. If the sauce gets too thick while sitting, add a splash of water when reheating. These bowls taste even better on day two or three as flavors meld.
Nutrition
- Serving Size: 1 bowl
- Calories: 485
- Sugar: 18
- Sodium: 780
- Fat: 12
- Saturated Fat: 2
- Carbohydrates: 52
- Fiber: 6
- Protein: 38
Keywords: teriyaki chicken, meal prep, rice bowls, easy dinner, healthy lunch, chicken and rice, teriyaki sauce


