Love this? Save it for later!
Share the inspiration with your friends
There used to be a tiny bakery tucked behind a laundromat on Elm Street that made the most perfect chocolate chip cookies I have ever eaten. When they closed their doors three summers ago — the owner retired, leaving a handwritten note taped to the window — I honestly felt a little lost. Those cookies were my Tuesday afternoon ritual, the thing I looked forward to after a long morning of recipe testing. After seventeen attempts — some burnt, some flat as pancakes, one that tasted suspiciously like baking soda — I finally cracked the code. This easy small-batch chocolate chip cookies for two recipe is that exact bakery experience, scaled down for those evenings when you want something warm and nostalgic without committing to three dozen cookies. Let me tell you, the first bite had me closing my eyes. The edges were crisp, the centers were soft, and the chocolate was melty in that dangerous way. You know that feeling when something tastes exactly like a memory? That is what this recipe does. I keep a bag of chocolate chips in my pantry just for these nights, and honestly, it has saved me from buying way too many bakery cookies that never taste quite right anyway.
Why You’ll Love This Recipe
This isn’t just another cookie recipe. It is the one you will come back to again and again, and here is why it works so well.
- Quick & Easy: From start to finish, you are looking at about 20 minutes. No chilling the dough, no waiting around — just mix, scoop, and bake.
- Simple Ingredients: You probably already have everything in your kitchen right now. Butter, sugar, an egg, flour, and chocolate chips. That is it.
- Perfect for a Cozy Night: Whether you are having a movie night with someone special or just treating yourself after a long week, this batch is exactly the right amount.
- No Waste: How many times have you made a full batch of cookies and ended up eating twelve because they were sitting there? This recipe gives you exactly four cookies — no more, no less.
- Unbelievably Delicious: The texture is what gets me every time. Crispy edges, soft centers, and chocolate in every single bite. It is comfort food at its finest.
What makes this version different from all those other small-batch recipes out there is the technique. I tested this using melted butter instead of softened butter, and it changed everything. The cookies spread just enough, the edges get that perfect golden crunch, and the centers stay soft for days. I have made this recipe for friends, for my neighbor who was having a rough week, and for myself on a random Wednesday night. Every single time, it delivers. This is the kind of recipe that makes you feel like you have a secret weapon in your back pocket.
What Ingredients You Will Need
This recipe uses simple, everyday ingredients to create something truly special. No fancy extracts, no obscure flours — just the basics done right.
- Unsalted butter – 4 tablespoons, melted and slightly cooled. I use Kerrygold because the flavor is richer, but any unsalted butter works. Melting the butter is the secret to that chewy texture.
- Granulated sugar – 3 tablespoons. This gives the cookies their crisp edges and helps them spread just right.
- Light brown sugar – 2 tablespoons, packed. The molasses in brown sugar adds moisture and that deep, caramel-like flavor. If you only have dark brown sugar, that works too — the cookies will be slightly darker and even more flavorful.
- Vanilla extract – 1/2 teaspoon. Pure vanilla extract makes a difference here. I have tried imitation vanilla in a pinch, and honestly, the cookies tasted flat. Use the good stuff.
- One large egg yolk – You only need the yolk, not the whole egg. This is what makes the cookies tender and rich without making the dough too wet. Save the egg white for breakfast or a quick omelet.
- All-purpose flour – 1/2 cup, spooned and leveled. Do not scoop directly into the bag with your measuring cup — that packs the flour and gives you dry, dense cookies. Spoon it in, then level it off.
- Baking soda – 1/4 teaspoon. Make sure your baking soda is fresh. If it has been sitting in your cabinet for a year, it might not work as well.
- Salt – 1/4 teaspoon. I use fine sea salt for the dough and a pinch of flaky sea salt on top before baking. That little sprinkle on top makes a huge difference.
- Semi-sweet chocolate chips – 1/3 cup. I prefer Ghirardelli semi-sweet chips because they hold their shape and melt beautifully. You can also chop up a good quality chocolate bar for those irregular, melty pools of chocolate.
For substitutions, you can use dairy-free butter in place of regular butter, and coconut sugar works in place of granulated sugar if you want something less refined. The texture will be slightly different — a bit more rustic — but still delicious. If you are gluten-free, swap the all-purpose flour with a good 1-to-1 gluten-free baking flour. I have tested this with King Arthur’s gluten-free blend, and it worked beautifully.
Equipment Needed
You do not need much for this recipe, which is part of why I love it so much. Here is what you will need:
- Mixing bowl – Any medium-sized bowl works. I use a glass mixing bowl because I can see when the butter and sugar are fully combined.
- Whisk – For mixing the wet ingredients together smoothly.
- Spatula or wooden spoon – For folding in the flour and chocolate chips. A rubber spatula is my go-to because it scrapes the sides of the bowl well.
- Measuring cups and spoons – Accurate measurements are key here since the batch is so small. A digital kitchen scale is even better if you have one.
- Baking sheet – A small baking sheet works perfectly. If you only have a large one, that is fine too — just make sure the cookies have space between them.
- Parchment paper or silicone baking mat – This prevents sticking and helps the cookies bake evenly. I have forgotten the parchment paper before, and let me tell you, scraping cookies off a bare pan is not fun.
- Cooling rack – Optional but helpful for letting the cookies cool without getting soggy on the bottom.
If you do not have a whisk, a fork works in a pinch. If you do not have a baking sheet, a cast iron skillet actually works really well for small batches — just reduce the baking time by a minute or two. I have done this when my baking sheet was covered in roasted vegetables, and the cookies turned out great.
Preparation Method
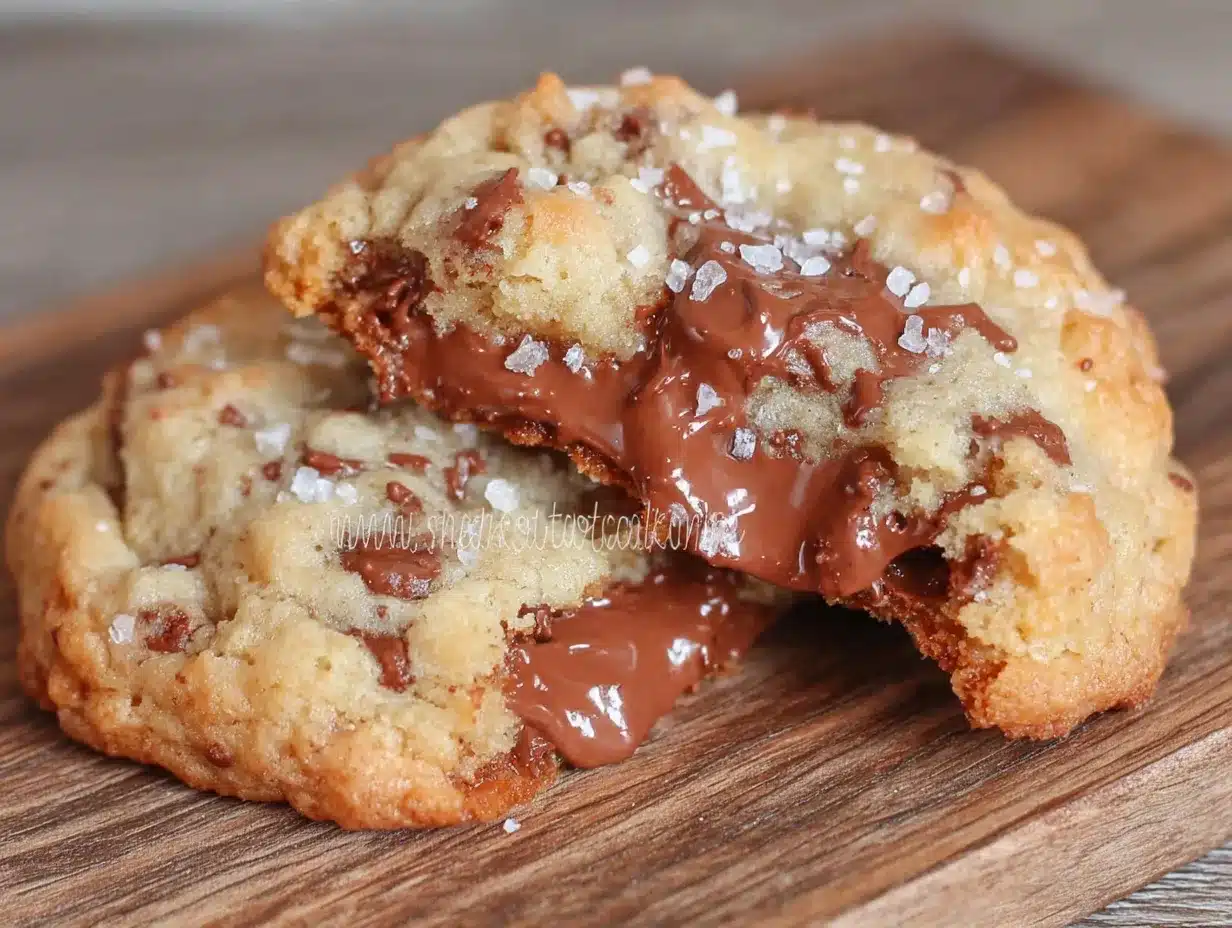
Preheat your oven to 350°F (175°C) and line a small baking sheet with parchment paper. This recipe comes together fast, so having the oven ready is important.
- Melt the butter – Place 4 tablespoons of unsalted butter in a microwave-safe bowl and heat in 20-second intervals until fully melted. Let it cool for about 2 minutes — you want it warm, not hot. If the butter is too hot, it will cook the egg yolk when you mix them together.
- Mix the sugars and butter – Add 3 tablespoons of granulated sugar and 2 tablespoons of packed light brown sugar to the melted butter. Whisk vigorously for about 30 seconds until the mixture looks smooth and slightly thickened. This step is important — you want the sugar to start dissolving into the butter.
- Add the vanilla and egg yolk – Whisk in 1/2 teaspoon of vanilla extract and one large egg yolk. Keep whisking until everything is fully combined and the mixture looks glossy. It should smell amazing at this point — like vanilla and caramel.
- Combine the dry ingredients – In a small bowl, whisk together 1/2 cup of all-purpose flour, 1/4 teaspoon of baking soda, and 1/4 teaspoon of salt. Make sure the baking soda is evenly distributed so you do not end up with a weird metallic taste in one spot.
- Mix the wet and dry ingredients – Pour the dry ingredients into the wet mixture. Use a spatula to fold everything together gently. Stop mixing as soon as you no longer see streaks of flour. Overmixing will make the cookies tough, and nobody wants a tough cookie.
- Fold in the chocolate chips – Add 1/3 cup of semi-sweet chocolate chips and fold them in gently. Make sure they are evenly distributed throughout the dough. If you want chocolate in every bite, press a few extra chips onto the tops of the dough balls before baking.
- Scoop and shape the dough – Divide the dough into 4 equal portions. Roll each portion into a ball and place them on the prepared baking sheet, spacing them about 2 inches apart. Do not flatten them — they will spread on their own in the oven.
- Sprinkle with salt – This is optional but highly recommended. Sprinkle a tiny pinch of flaky sea salt on top of each dough ball. It sounds fancy, but it really just makes the chocolate flavor pop.
- Bake – Place the baking sheet in the preheated oven and bake for 10 to 12 minutes. At 10 minutes, the cookies will look slightly underdone in the center — that is exactly what you want. They will continue to set as they cool. For crispier cookies, bake for 12 minutes.
- Cool and enjoy – Let the cookies cool on the baking sheet for 5 minutes before transferring them to a cooling rack. This resting time is crucial — the cookies are fragile right out of the oven, and moving them too soon will break them. After 5 minutes, they will be sturdy enough to move.
Your kitchen is going to smell like a bakery at this point. Honestly, the hardest part is waiting those 5 minutes before you can dig in.
Cooking Tips & Techniques
I have made this recipe dozens of times, and I have learned a few things along the way. Here are the tips that make the biggest difference.
Use melted butter, not softened. This is the number one tip I give everyone. Melted butter creates cookies that are chewy and dense rather than cakey. The first time I made these with softened butter, they puffed up too much and lost that signature crinkly top. Melted butter gives you that bakery-style texture every time.
Do not skip the egg yolk. I know it feels wasteful to use only the yolk, but trust me on this. The yolk adds richness and tenderness without adding too much liquid. If you use the whole egg, the dough will be too wet, and the cookies will spread into flat, greasy discs. I learned this the hard way when I was in a hurry and just cracked the whole egg in. The cookies were not pretty.
Let the dough rest if you have time. If you can let the shaped dough balls sit in the fridge for 15 to 20 minutes before baking, the cookies will be even better. The chill time allows the butter to firm up slightly, which means less spread and a thicker, more satisfying cookie. I do not always have the patience for this step, but when I do, it is worth it.
Watch the oven like a hawk. Every oven runs a little differently. My oven runs hot, so I start checking at 9 minutes. If the edges are golden brown and the centers still look soft and slightly puffy, they are done. Pull them out even if they look underdone — carryover cooking will finish the job.
Use a cookie scoop for even portions. A small cookie scoop (about 1.5 tablespoons) makes perfectly uniform dough balls. If you do not have one, just eyeball it — the cookies do not have to be identical. Imperfect cookies taste just as good.
Variations & Adaptations
One of the best things about this recipe is how easy it is to change up. Here are some of my favorite variations.
Double Chocolate Chip Cookies: Replace 1 tablespoon of the all-purpose flour with 1 tablespoon of unsweetened cocoa powder. Use white chocolate chips instead of semi-sweet for a cookies-and-cream vibe. The cocoa powder adds a deep chocolate flavor that pairs beautifully with the buttery dough.
Peanut Butter Swirl Cookies: After you scoop the dough onto the baking sheet, drop a small teaspoon of peanut butter on top of each dough ball and swirl it in gently with a toothpick. Bake as directed. The peanut butter gets all warm and melty, and it is absolutely divine.
Vegan Version: Use vegan butter sticks (not margarine) and replace the egg yolk with 1 tablespoon of aquafaba (the liquid from a can of chickpeas) mixed with 1/2 tablespoon of cornstarch. The cookies will be slightly less tender but still delicious. I tested this for a friend who is vegan, and she said they were the best vegan cookies she had ever had.
Add Mix-Ins: Swap out the chocolate chips for chopped nuts, dried cranberries, or even crushed pretzels for a sweet-and-salty twist. My personal favorite is adding 2 tablespoons of toasted pecans and 2 tablespoons of butterscotch chips. It feels fancy but takes zero extra effort.
Gluten-Free Adaptation: Use a 1-to-1 gluten-free baking flour blend. I have tested this with Bob’s Red Mill and King Arthur, and both worked well. The cookies might spread a tiny bit more, so let them cool completely before moving them.
Serving & Storage Suggestions
These cookies are best served warm, about 5 to 10 minutes after they come out of the oven. The chocolate is still melty, the edges are crisp, and the centers are soft. Pair them with a cold glass of milk, a scoop of vanilla ice cream, or just eat them straight off the baking sheet — no judgment here.
If you have leftovers (unlikely, but possible), store them in an airtight container at room temperature for up to 3 days. To bring back that fresh-from-the-oven texture, pop a cookie in the microwave for 10 seconds. It will soften the chocolate and make the center gooey again.
You can also freeze the unbaked dough balls. Place them on a small baking sheet and freeze until solid, then transfer them to a freezer-safe bag. When you want cookies, bake them straight from frozen — just add 2 to 3 minutes to the baking time. This is my favorite trick for those nights when I want a single cookie but do not want to make a whole batch.
The flavors actually develop over time. Day-old cookies are slightly chewier and the chocolate flavor is more pronounced. I have been known to hide a cookie in the back of the pantry just so I can enjoy it the next day with my morning coffee.
Nutritional Information & Benefits
Per serving (2 cookies): Approximately 380 calories, 20g fat, 48g carbohydrates, 5g protein, 28g sugar, 2g fiber. Please note these are estimates and will vary based on the specific ingredients you use.
While these cookies are definitely a treat, they do offer some surprising benefits. The dark chocolate chips contain antioxidants and can help satisfy a sweet craving with less sugar than many store-bought desserts. Making cookies from scratch also means you control exactly what goes into them — no preservatives, no artificial flavors, just real ingredients you can pronounce.
If you are watching your sugar intake, you can reduce the granulated sugar to 2 tablespoons without significantly affecting the texture. The cookies will be slightly less sweet but still satisfying. For a lower-carb option, use a sugar substitute like monk fruit sweetener, though the texture will be slightly more delicate.
Frequently Asked Questions
Can I double this recipe?
Absolutely! Simply double all the ingredients. The baking time and temperature remain the same. This is perfect if you want a full dozen cookies or if you are baking for a small gathering.
Why did my cookies turn out flat?
Flat cookies usually mean the butter was too warm or the dough was overmixed. Make sure your melted butter has cooled for a couple minutes before adding the egg yolk, and stop mixing as soon as the flour disappears. Chilling the dough for 15 minutes before baking also helps prevent spreading.
Can I use margarine instead of butter?
I do not recommend it. Margarine has a higher water content than butter, which will make the cookies spread too much and turn out greasy. Stick with unsalted butter for the best texture and flavor.
How do I make these cookies softer?
For softer cookies, reduce the baking time by 1 to 2 minutes and pull them out when the centers still look slightly underdone. You can also replace 1 tablespoon of the granulated sugar with an extra tablespoon of brown sugar — the extra molasses keeps the cookies tender.
What if I do not have parchment paper?
You can grease the baking sheet lightly with butter or non-stick spray. Just keep an eye on the cookies as they bake — they might spread a little more on a greased surface. A silicone baking mat works perfectly too.
Conclusion
This easy small-batch chocolate chip cookies for two recipe is the kind of thing you will make again and again. It is quick, it is reliable, and it delivers exactly what you want — warm, gooey, perfectly textured cookies without the commitment of a full batch. Whether you are baking for a date night, a quiet evening alone, or just because you deserve a little something sweet, this recipe has your back.
I love this recipe because it reminds me that you do not need a fancy kitchen or a complicated technique to make something truly special. You just need good ingredients, a little patience, and the willingness to eat a warm cookie straight off the baking sheet. Go ahead and make these tonight. You will not regret it.
If you try this recipe, I would love to hear how it turned out. Leave a comment below and let me know if you added any fun mix-ins or if you ate all four cookies in one sitting — I will not tell anyone. Happy baking!
Pin This Recipe!
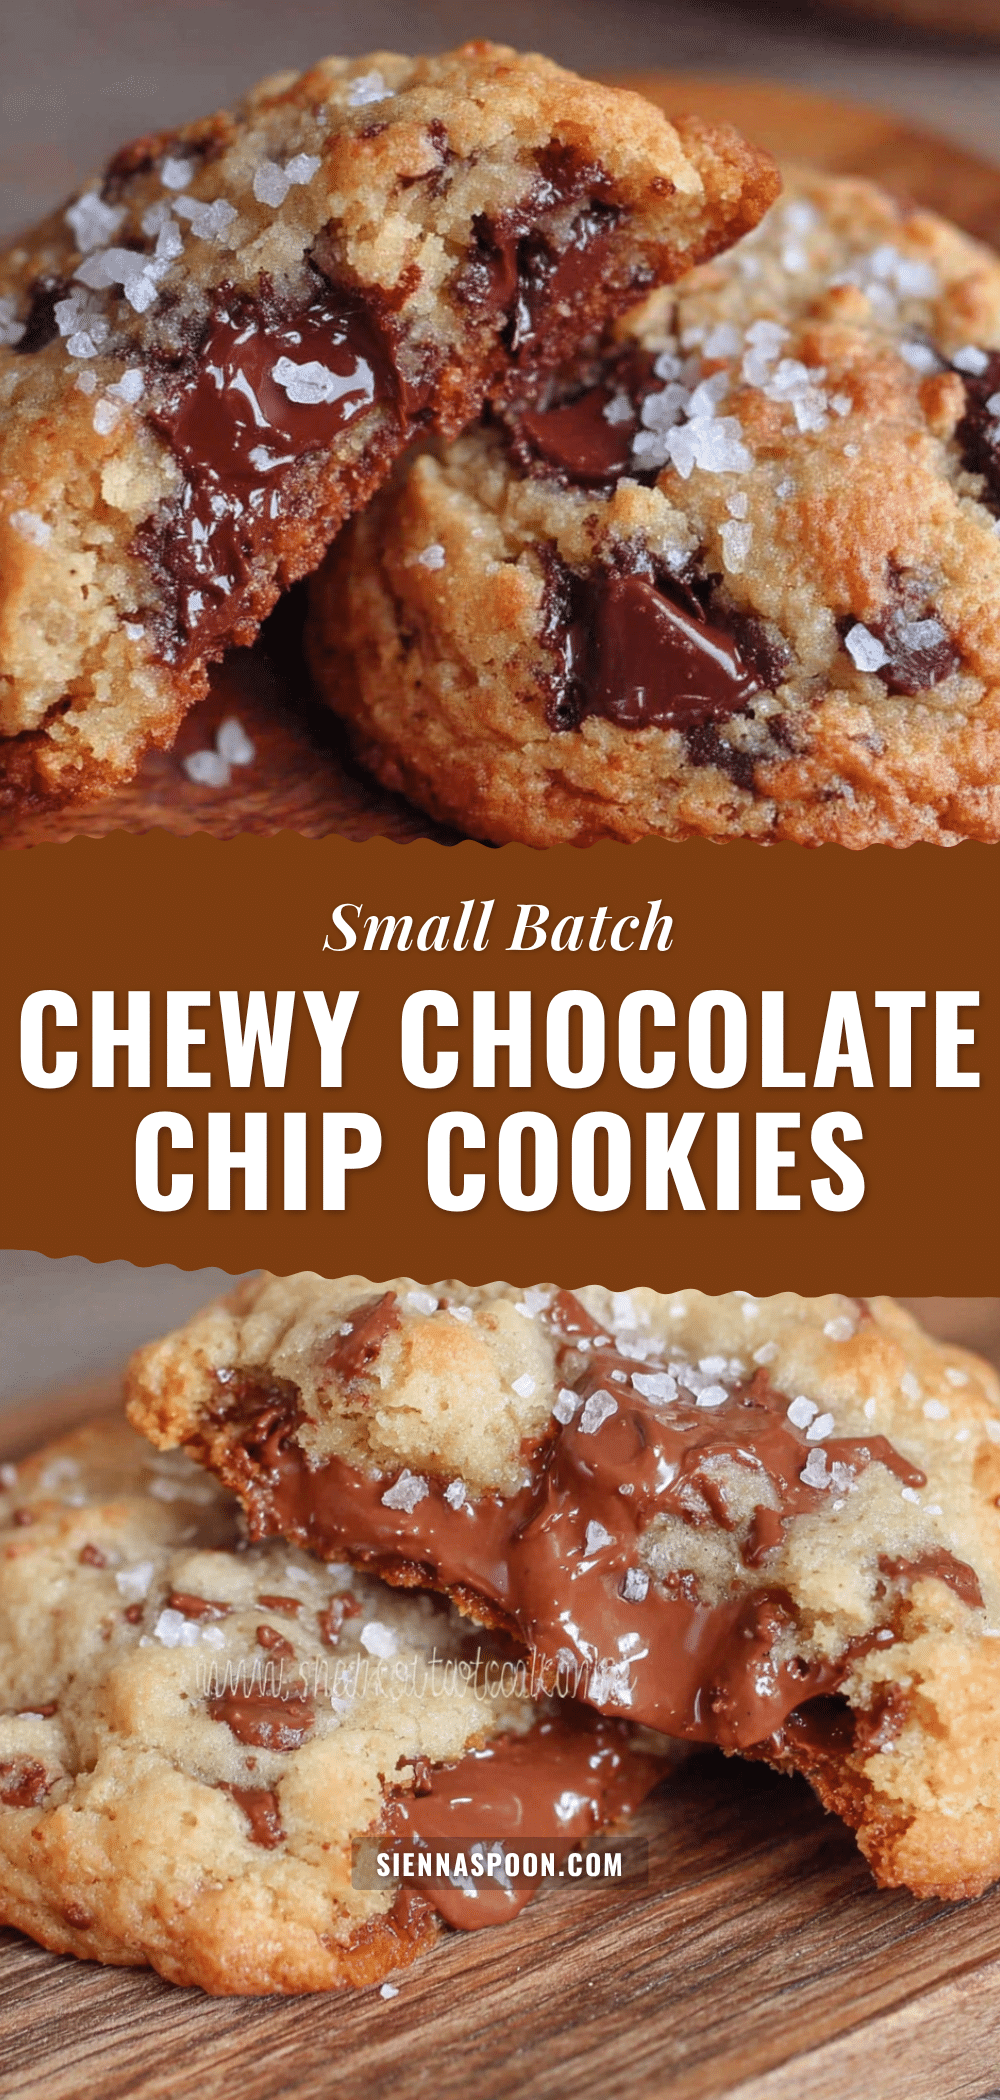
Easy Small-Batch Chocolate Chip Cookies for Two
This easy small-batch chocolate chip cookies for two recipe is that exact bakery experience, scaled down for those evenings when you want something warm and nostalgic without committing to three dozen cookies. The edges are crisp, the centers are soft, and the chocolate is melty in that dangerous way.
- Prep Time: 10 minutes
- Cook Time: 10 to 12 minutes
- Total Time: 20 to 22 minutes
- Yield: 4 cookies (2 servings) 1x
- Category: Dessert
- Cuisine: American
Ingredients
- 4 tablespoons unsalted butter, melted and slightly cooled
- 3 tablespoons granulated sugar
- 2 tablespoons light brown sugar, packed
- 1/2 teaspoon vanilla extract
- 1 large egg yolk
- 1/2 cup all-purpose flour, spooned and leveled
- 1/4 teaspoon baking soda
- 1/4 teaspoon salt
- 1/3 cup semi-sweet chocolate chips
- Flaky sea salt for sprinkling (optional)
Instructions
- Preheat your oven to 350°F (175°C) and line a small baking sheet with parchment paper.
- Melt 4 tablespoons of unsalted butter in a microwave-safe bowl in 20-second intervals until fully melted. Let it cool for about 2 minutes.
- Add 3 tablespoons of granulated sugar and 2 tablespoons of packed light brown sugar to the melted butter. Whisk vigorously for about 30 seconds until smooth and slightly thickened.
- Whisk in 1/2 teaspoon of vanilla extract and one large egg yolk until fully combined and glossy.
- In a small bowl, whisk together 1/2 cup of all-purpose flour, 1/4 teaspoon of baking soda, and 1/4 teaspoon of salt.
- Pour the dry ingredients into the wet mixture. Use a spatula to fold together gently until no streaks of flour remain. Do not overmix.
- Fold in 1/3 cup of semi-sweet chocolate chips until evenly distributed.
- Divide the dough into 4 equal portions. Roll each into a ball and place on the prepared baking sheet, spacing about 2 inches apart. Do not flatten.
- Sprinkle a tiny pinch of flaky sea salt on top of each dough ball (optional).
- Bake for 10 to 12 minutes. At 10 minutes, the cookies will look slightly underdone in the center — that is perfect. For crispier cookies, bake for 12 minutes.
- Let the cookies cool on the baking sheet for 5 minutes before transferring to a cooling rack.
Notes
Use melted butter for chewy texture. Only use egg yolk, not whole egg. For thicker cookies, chill dough balls for 15-20 minutes before baking. Watch the oven closely as baking times vary. Cookies continue to set as they cool.
Nutrition
- Serving Size: 2 cookies
- Calories: 380
- Sugar: 28
- Sodium: 200
- Fat: 20
- Saturated Fat: 12
- Carbohydrates: 48
- Fiber: 2
- Protein: 5
Keywords: small-batch cookies, chocolate chip cookies, cookies for two, easy cookie recipe, quick cookies, no chill cookies


