Love this? Save it for later!
Share the inspiration with your friends
It was 6:47 PM on a rainy Tuesday, and I had just realized I forgot to thaw the ground beef for the tacos I had planned. You know that feeling when your dinner plan collapses and you’re staring into the fridge like it owes you money? That was me. I had a pack of bone-in chicken thighs sitting in the fridge, some butter, and a head of garlic that was starting to sprout. Honestly, I almost ordered pizza. But something—maybe stubbornness, maybe hunger—made me grab that cast iron skillet instead. I threw the chicken in, added way more butter than I probably should have, and let the garlic sizzle until the whole kitchen smelled like a restaurant. Twenty minutes later, I was eating the best accidental dinner of my life. The chicken was crispy on the outside, juicy on the inside, and that garlic butter sauce? Let me tell you, I was licking the spoon. This recipe became my go-to for those nights when you need something fast but refuse to eat sad cereal for dinner. Maybe you’ve been there too.
Why You’ll Love This Recipe
I have made this recipe at least thirty times since that rainy Tuesday, and it has never let me down. Here is why this one-pan wonder deserves a permanent spot in your dinner rotation:
- Quick & Easy: From fridge to table in under 15 minutes. No marinating, no complicated techniques, no stress. Perfect for those evenings when you walk through the door at 6 PM and need to eat by 6:20.
- Simple Ingredients: You probably have everything in your kitchen right now. Chicken thighs, butter, garlic, salt, pepper, and maybe some fresh herbs if you are feeling fancy. No special grocery trips required.
- Perfect for Busy Weeknights: This is the dinner you make when you have zero energy but still want something that tastes like you actually tried. It works for a quick family dinner, a last-minute date night, or meal prep for the week.
- Crowd-Pleaser: I have served this to picky eaters, foodie friends, and my grandmother who thinks she has tried every chicken recipe on earth. Everyone asks for seconds. The crispy skin and buttery sauce are irresistible.
- Unbelievably Delicious: There is something magical about the way garlic butter transforms simple chicken thighs into restaurant-quality food. The skin gets golden and crackly, the meat stays tender, and the sauce is so good you will want to pour it over everything on your plate.
What makes this recipe different from all the other garlic chicken recipes out there? It is the technique. Most recipes tell you to sear the chicken and then add the garlic later to avoid burning it. But I found that adding the garlic at just the right moment—after the chicken has a golden crust but before it is fully cooked—creates this incredible infusion of flavor. The garlic gets soft and sweet, the butter turns nutty and brown, and the whole thing comes together in a way that feels like alchemy. This is not just another chicken recipe. It is the one you will keep coming back to.
What Ingredients You Will Need
This recipe uses simple, everyday ingredients that work together to create something truly special. The beauty of this dish is that you do not need anything exotic—just good quality basics and a little bit of love.
- Chicken Thighs (4-6 pieces, bone-in and skin-on): Bone-in thighs stay juicier during cooking, and the skin gets beautifully crispy. I prefer pasture-raised chicken when I can find it, but any good quality chicken works. If you only have boneless thighs, reduce cooking time by about 3-4 minutes.
- Unsalted Butter (4 tablespoons, divided): Butter is the star here. I use unsalted so I can control the salt level. Kerrygold is my go-to for its rich, creamy flavor, but any good butter works. Do not substitute margarine—it will not give you that same rich sauce.
- Garlic (6-8 cloves, thinly sliced): Fresh garlic is non-negotiable here. The pre-minced stuff in jars will burn and turn bitter. Slice the cloves thinly so they soften and caramelize in the butter without burning. If you love garlic (like me), feel free to add an extra clove or two.
- Salt (1 teaspoon, plus more for seasoning): I use kosher salt for its clean flavor and easy pinch-ability. Diamond Crystal is my preferred brand because it is less salty by volume, giving me more control.
- Black Pepper (½ teaspoon, freshly ground): Freshly ground pepper makes a noticeable difference here. The pre-ground stuff is fine in a pinch, but fresh adds a subtle heat that complements the garlic beautifully.
- Paprika (1 teaspoon): This is optional but highly recommended. It adds a lovely color and a subtle smoky sweetness that pairs perfectly with the garlic butter. Smoked paprika is my favorite, but sweet paprika works too.
- Dried Thyme (½ teaspoon): Thyme and chicken are best friends. If you have fresh thyme, use 1 teaspoon of leaves. Rosemary also works if that is what you have on hand.
- Chicken Broth (¼ cup): This deglazes the pan and helps create that luscious sauce. Use low-sodium broth so you can control the salt. In a pinch, water works, but broth adds so much more flavor.
- Fresh Parsley (2 tablespoons, chopped, for garnish): This is purely for looks and a fresh pop of flavor. Totally optional, but it makes the dish look like you tried really hard.
Equipment Needed
One of the best things about this recipe is how little equipment it requires. You probably already own everything you need.
- Large Skillet (12-inch, preferably cast iron or stainless steel): Cast iron gives you that perfect golden crust and retains heat beautifully. I use my trusty Lodge skillet that I have had for years. If you do not have cast iron, a heavy-bottomed stainless steel pan works great. Avoid nonstick if possible—you will not get the same browning.
- Tongs: Essential for flipping the chicken without piercing the skin and losing those precious juices. I prefer silicone-tipped tongs to avoid scratching my pans.
- Sharp Knife: For slicing the garlic thinly. A dull knife will crush the garlic and release too much moisture, making it burn faster.
- Cutting Board: Any cutting board works. I use a wooden one for garlic because it is gentler on my knife.
- Measuring Spoons: For accurate seasoning. Eyeballing works if you are experienced, but measuring ensures consistency every time.
- Paper Towels: For patting the chicken dry. This step is crucial for crispy skin, so do not skip it.
If you do not have a cast iron skillet, do not worry. I made this recipe for years in a stainless steel pan before I got my cast iron. The key is making sure the pan is hot enough before you add the chicken. And if you are in the market for a new skillet, check out thrift stores—I found my Lodge for eight dollars and it is still going strong.
Preparation Method
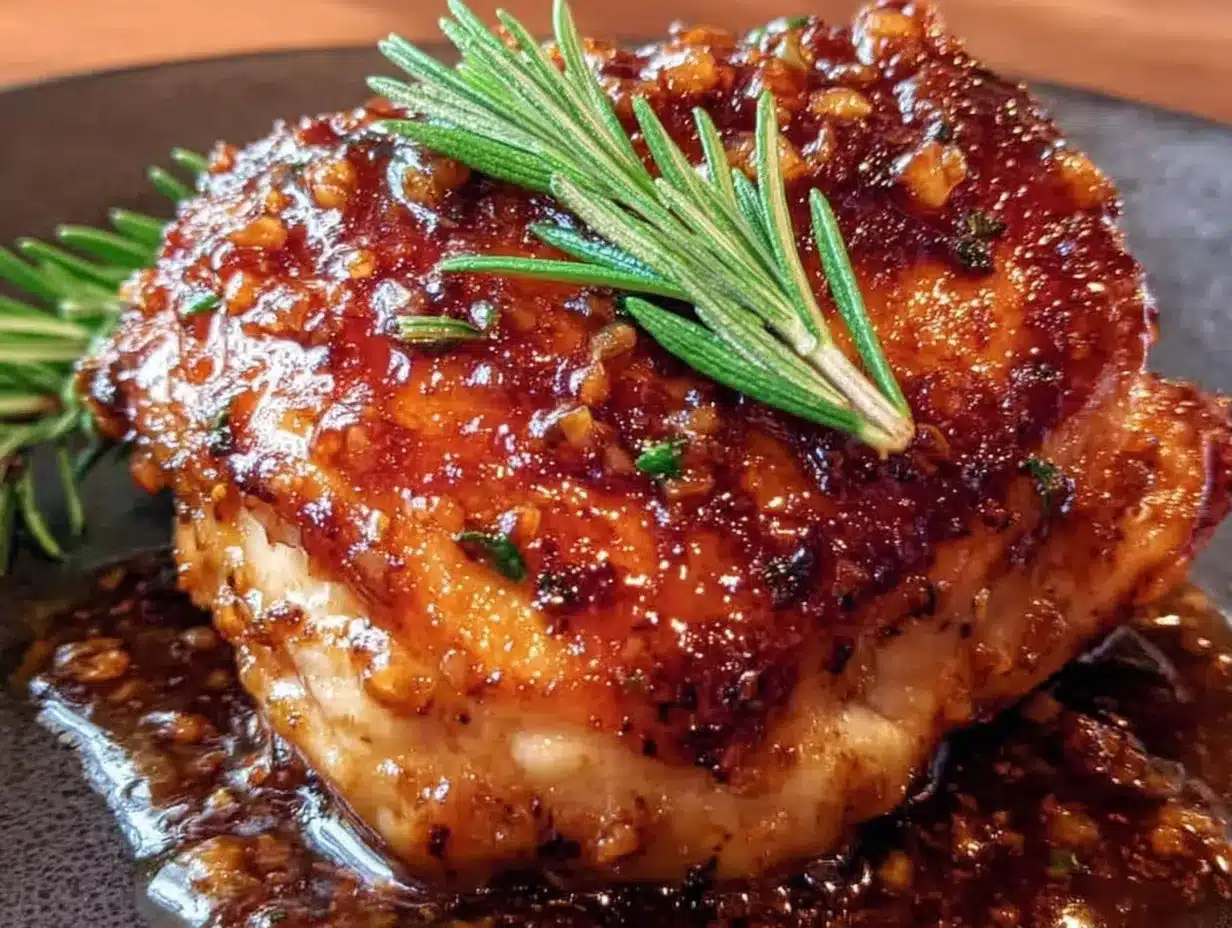
Follow these steps carefully, and you will have a restaurant-quality dinner on the table in under 20 minutes. I have tested this method dozens of times to make sure it works every single time.
- Pat the chicken thighs dry with paper towels. This is the most important step for crispy skin. Do not skip it. Season both sides generously with salt, pepper, paprika, and dried thyme. Let them sit at room temperature for 5 minutes while you prep the garlic.
- Slice the garlic cloves thinly. Aim for slices about 1/8 inch thick. Too thick and they will not soften enough; too thin and they will burn. Set them aside near the stove so you can add them quickly when the time comes.
- Heat your skillet over medium-high heat for 2 minutes. Add 2 tablespoons of butter and swirl until it melts and starts to foam. The butter should sizzle when it hits the pan but not smoke. If it smokes, your heat is too high.
- Place the chicken thighs skin-side down in the hot skillet. You should hear a satisfying sizzle. Do not move them! Let them cook undisturbed for 5-6 minutes. The skin will turn deep golden brown and crispy. If you try to flip too early, the skin will stick and tear.
- Flip the chicken thighs using your tongs. The skin side should be beautifully browned. Cook for another 4-5 minutes on the second side. The chicken should feel firm to the touch but still have a little give when pressed. An instant-read thermometer should read 165°F when inserted into the thickest part.
- Remove the chicken from the skillet and set it on a plate. Do not cover it—you want the skin to stay crispy. Leave the rendered fat and browned bits in the pan.
- Reduce the heat to medium-low and add the remaining 2 tablespoons of butter. Once it melts, add the sliced garlic. Stir constantly for 30-45 seconds until the garlic is fragrant and just starting to turn golden. Watch it carefully—garlic goes from perfect to burnt in seconds.
- Pour in the chicken broth and scrape up all those delicious browned bits from the bottom of the pan. This is called deglazing, and it is where all the flavor lives. Let the sauce simmer for 1-2 minutes until it thickens slightly.
- Return the chicken to the skillet, skin-side up. Spoon the garlic butter sauce over the top of each piece. Let everything warm through together for 1 minute.
- Sprinkle with fresh parsley and serve immediately. The chicken should be glistening with that gorgeous garlic butter sauce, and the skin should still be crispy.
One thing I learned the hard way: do not crowd the pan. If your skillet is too small, cook the chicken in two batches. Overcrowding traps steam and prevents that beautiful golden crust from forming. Trust me, I learned this after making soggy-skinned chicken three times in a row before I figured it out.
Cooking Tips & Techniques
After making this recipe more times than I can count, I have picked up a few tricks that make a real difference. Here is what I wish someone had told me from the start.
Patience is everything. The biggest mistake people make with pan-seared chicken is moving it too soon. When you first put the chicken in the hot pan, it will stick. That is normal. Let it cook until it releases naturally—usually around 5 minutes. If you try to flip it and it resists, give it another 30 seconds. The chicken will tell you when it is ready.
Watch your heat. Medium-high is perfect for the initial sear, but you need to lower it when you add the garlic. I once left the heat too high and burned the garlic in about 15 seconds. The whole kitchen smelled like regret. Now I always reduce the heat before adding the garlic, and it comes out perfectly every time.
Room temperature chicken cooks more evenly. If you have time, let the seasoned chicken sit out for 15-20 minutes before cooking. Cold chicken straight from the fridge will lower the pan temperature too much and lead to uneven browning. I know sometimes you do not have that luxury, but when you do, it makes a difference.
Do not skip the deglazing step. Those browned bits stuck to the bottom of the pan are pure flavor gold. When you add the broth and scrape them up, you are essentially creating an instant sauce base. I have made this recipe without deglazing, and the sauce was noticeably thinner and less flavorful.
Use a thermometer if you have one. Chicken thighs are forgiving, but they are best at 165°F. Overcooked chicken thighs get dry and tough, even though they have more fat than breasts. I use my Thermapen and it takes the guesswork out completely.
Variations & Adaptations
This recipe is incredibly versatile, and I have tried several variations over the years. Here are some of my favorites:
Lemon Garlic Butter Chicken: Add the zest of one lemon and 2 tablespoons of lemon juice along with the chicken broth. The acidity cuts through the richness of the butter and adds a bright, fresh flavor. I make this version when I want something a little lighter, and it pairs beautifully with a simple green salad.
Spicy Garlic Butter Chicken: Add ½ teaspoon of red pepper flakes along with the garlic, or stir in a teaspoon of sriracha with the broth. The heat balances the buttery richness perfectly. My husband loves this version, and I have to admit, I sneak a few extra pepper flakes in when he is not looking.
Herb Butter Chicken: Stir in 1 tablespoon of fresh chopped rosemary and 1 tablespoon of fresh thyme leaves after you add the garlic. The herbs infuse the butter and create an aromatic, almost Thanksgiving-like flavor. This is my go-to for Sunday dinners when I want something that feels special.
Creamy Garlic Butter Chicken: After deglazing with broth, stir in ¼ cup of heavy cream and let it simmer for 2 minutes until thickened. The cream transforms the sauce into something decadent and luxurious. I save this version for date nights or when I need a serious comfort food fix.
Air Fryer Adaptation: Season the chicken as directed, then cook at 375°F for 12-14 minutes, flipping halfway through. While the chicken cooks, make the garlic butter sauce on the stovetop. Pour the sauce over the finished chicken. The air fryer gives you incredibly crispy skin with even less hands-on time.
Serving & Storage Suggestions
This chicken is best served hot, straight from the skillet, with that garlic butter sauce spooned over the top. The crispy skin is at its peak right after cooking, so do not let it sit around.
What to serve with it: I love this chicken with mashed potatoes to soak up all that garlic butter sauce. Rice is another great option—jasmine or basmati work beautifully. For vegetables, roasted asparagus or a simple green salad with lemon vinaigrette balance the richness. Crusty bread is essential for sopping up every last drop of sauce. Honestly, I have been known to eat the sauce with a spoon after the chicken is gone.
Storage: Leftover chicken keeps in an airtight container in the refrigerator for up to 3 days. The skin will lose its crispiness, but the flavor will still be amazing. I actually love the leftovers cold, straight from the fridge, sliced over a salad.
Reheating: The best way to reheat this chicken is in a skillet over medium heat with a splash of chicken broth or water. Cover the pan and let it steam for 3-4 minutes until heated through. The microwave works in a pinch, but it will make the skin soggy. If you have an air fryer, reheat at 350°F for 3-4 minutes—the skin gets almost as crispy as fresh.
Freezing: You can freeze the cooked chicken (without the sauce) for up to 2 months. Wrap each piece individually in plastic wrap, then place in a freezer bag. Thaw overnight in the refrigerator and reheat as directed. The sauce is best made fresh, but you can freeze it separately in a small container.
One thing I have noticed: the flavors actually deepen overnight. The garlic mellows and the herbs infuse more fully. So if you have leftovers, consider yourself lucky—they might be even better the next day.
Nutritional Information & Benefits
Chicken thighs are often overlooked in favor of chicken breasts, but they have plenty to offer nutritionally. Here is a rough breakdown per serving (based on one thigh with sauce):
| Nutrient | Amount per Serving |
|---|---|
| Calories | 380-420 |
| Protein | 28-32g |
| Fat | 28-32g |
| Saturated Fat | 12-14g |
| Carbohydrates | 2-3g |
| Fiber | 0g |
| Sugar | 0g |
| Sodium | 500-600mg |
Chicken thighs are rich in B vitamins, particularly B6 and B12, which support energy metabolism and brain function. They also provide selenium, an important antioxidant that supports thyroid health. Garlic is known for its immune-boosting properties and anti-inflammatory benefits. Butter contains fat-soluble vitamins A, D, E, and K, though it should be enjoyed in moderation.
This recipe is naturally low-carb and keto-friendly, with only 2-3 grams of carbohydrates per serving. It is also gluten-free as written. If you are watching your sodium, use unsalted butter and low-sodium broth, and go easy on the added salt.
I personally love that this recipe feels indulgent but is actually quite balanced. You get a good amount of protein, healthy fats, and minimal carbs. It is the kind of meal that keeps you full and satisfied without that heavy, weighed-down feeling.
Frequently Asked Questions
Can I use boneless skinless chicken thighs?
Yes, but the cooking time will be shorter—about 4 minutes per side. You will also miss out on the crispy skin, so consider adding an extra tablespoon of butter to compensate for the lost flavor. The sauce will still be delicious.
How do I know when the chicken is fully cooked?
The safest way is to use an instant-read thermometer. Insert it into the thickest part of the thigh without touching the bone. It should read 165°F. If you do not have a thermometer, cut into the thickest part—the juices should run clear and the meat should no longer be pink.
Can I make this recipe dairy-free?
Absolutely. Substitute the butter with a good quality dairy-free butter or ghee (which is lactose-free). I have used Miyoko’s cultured vegan butter with great results. The flavor will be slightly different, but still delicious.
Why is my chicken skin not getting crispy?
There are three common culprits: the chicken was not patted dry enough, the pan was not hot enough, or you moved the chicken too soon. Make sure you blot the chicken thoroughly with paper towels, let the pan heat for a full 2 minutes, and resist the urge to flip until the skin releases naturally.
Can I double this recipe?
Yes, but cook the chicken in batches to avoid overcrowding the pan. If you try to cook too many pieces at once, they will steam instead of sear, and you will end up with pale, soggy skin. Cook half the chicken, keep it warm on a plate, then cook the second batch. Make the sauce after all the chicken is cooked.
Conclusion
This quick garlic butter chicken thighs recipe has become a staple in my kitchen for a reason. It is fast, it is forgiving, and it delivers flavor that tastes like you spent way more time than you actually did. Whether you are a seasoned cook or someone who is just starting to find their way around the kitchen, this recipe will make you feel like a pro.
I love that I can come home after a long day, tired and hungry, and have a hot, satisfying dinner on the table in the time it takes to watch one episode of a show. The crispy skin, the tender meat, that glorious garlic butter sauce—it is comfort food that does not require a lot of effort. And honestly, is that not what we all need sometimes?
I would love to hear how this recipe turns out for you. Did you try one of the variations? Did you come up with your own twist? Drop a comment below and let me know. And if you loved it, share it with a friend who needs a quick dinner win. Happy cooking, friends!
Pin This Recipe!

Quick Garlic Butter Chicken Thighs: Best One Pan 15-Minute Dinner
This quick garlic butter chicken thighs recipe is a one-pan wonder that delivers crispy skin, tender meat, and a luscious garlic butter sauce in under 20 minutes. Perfect for busy weeknights when you need a fast, delicious dinner without the fuss.
- Prep Time: 5 minutes
- Cook Time: 15 minutes
- Total Time: 20 minutes
- Yield: 4 servings 1x
- Category: Main Course
- Cuisine: American
Ingredients
- 4–6 bone-in, skin-on chicken thighs
- 4 tablespoons unsalted butter, divided
- 6–8 cloves garlic, thinly sliced
- 1 teaspoon kosher salt, plus more for seasoning
- ½ teaspoon freshly ground black pepper
- 1 teaspoon paprika (optional, smoked or sweet)
- ½ teaspoon dried thyme
- ¼ cup low-sodium chicken broth
- 2 tablespoons fresh parsley, chopped (for garnish)
Instructions
- Pat the chicken thighs dry with paper towels. Season both sides generously with salt, pepper, paprika, and dried thyme. Let them sit at room temperature for 5 minutes while you prep the garlic.
- Slice the garlic cloves thinly (about 1/8 inch thick). Set aside near the stove.
- Heat a large skillet (12-inch, preferably cast iron or stainless steel) over medium-high heat for 2 minutes. Add 2 tablespoons of butter and swirl until melted and foaming.
- Place the chicken thighs skin-side down in the hot skillet. Cook undisturbed for 5-6 minutes until the skin is deep golden brown and crispy.
- Flip the chicken thighs using tongs. Cook for another 4-5 minutes on the second side until the chicken feels firm to the touch and an instant-read thermometer reads 165°F when inserted into the thickest part.
- Remove the chicken from the skillet and set on a plate. Do not cover.
- Reduce the heat to medium-low and add the remaining 2 tablespoons of butter. Once melted, add the sliced garlic. Stir constantly for 30-45 seconds until fragrant and just starting to turn golden.
- Pour in the chicken broth and scrape up the browned bits from the bottom of the pan. Let the sauce simmer for 1-2 minutes until slightly thickened.
- Return the chicken to the skillet, skin-side up. Spoon the garlic butter sauce over the top. Let warm through for 1 minute.
- Sprinkle with fresh parsley and serve immediately.
Notes
Pat the chicken dry thoroughly for crispy skin. Do not crowd the pan; cook in batches if needed. Watch the garlic carefully as it burns quickly. For best results, let the chicken come to room temperature before cooking. The flavors deepen overnight, making leftovers even better.
Nutrition
- Serving Size: 1 chicken thigh with
- Calories: 400
- Sodium: 550
- Fat: 30
- Saturated Fat: 13
- Carbohydrates: 2.5
- Protein: 30
Keywords: garlic butter chicken, one pan chicken, quick chicken dinner, weeknight dinner, crispy chicken thighs, 15 minute dinner


