Love this? Save it for later!
Share the inspiration with your friends
My neighbor, Carl, had a rule. For fifteen years, he swore he hated enchiladas. “Too soggy,” he’d say, shaking his head at my foil-covered dishes. “All that sauce turns everything to mush.” I’d nod and keep walking, because honestly, you can’t argue with a man who’s made up his mind about something. But last September, when Hatch chile season rolled around and the smell of roasting peppers filled our whole block, something shifted.
I was testing this one-pan version on a Tuesday night, just for myself. The kitchen was a mess—I’d spilled cumin on the counter and used the wrong measuring spoon for the chili powder. You know those nights where everything goes slightly wrong but you’re too hungry to care? That was this night. I layered the tortillas, poured the sauce, and slid the pan into the oven, already planning to order takeout as backup.
The smell that came out of that oven, though. It was different. The green chiles had softened into something almost sweet, and the chicken was shredding apart like it had been slow-cooking all day instead of just twenty minutes. I was standing there, fork in hand, about to take my first bite, when I heard a knock. It was Carl. He was holding his mail, but his eyes were fixed on the pan behind me. “What is that?” he asked, and I swear I saw him swallow.
I cut him a piece, still not believing this was happening. He took one bite, then another, and then he just stood there in my doorway, eating enchiladas in silence. “Okay,” he finally said, licking his fork clean. “I was wrong.” And that’s the thing about this recipe—it has a way of proving people wrong, including myself. It’s not mushy. It’s not complicated. It’s just really, really good. Maybe you’ve had your own enchilada disaster stories? This one might just change your mind too.
Why You’ll Love This Recipe
Let me tell you why this recipe has become my most-requested dish for potlucks, weeknight dinners, and even those “I need comfort food right now” kind of days. I’ve tested this version at least a dozen times, tweaking the sauce-to-tortilla ratio and the roasting time until everything clicked perfectly.
- One-Pan Wonder: Everything comes together in a single skillet or baking dish. Less cleanup means more time actually enjoying your meal. I mean, who wants to wash a mountain of dishes after cooking?
- Quick & Easy: From start to table in under 45 minutes. The active prep time is about 15 minutes, and the oven does the rest. Perfect for those busy weeknights when you’re tempted to just order pizza.
- Simple Ingredients: No fancy grocery trips required. You likely have most of these pantry staples already—tortillas, cheese, spices. The star ingredient, Hatch green chiles, is available canned or jarred year-round now.
- Crowd-Pleaser: I’ve served these at family gatherings, game day parties, and casual dinners. Kids love the cheesy top, adults love the smoky heat, and everyone goes back for seconds.
- Unbelievably Delicious: The combination of tender chicken, melty cheese, and those roasted green chiles creates something truly special. The texture is perfect—not too wet, not too dry, with just the right amount of sauce.
What makes this recipe different from every other enchilada recipe out there? It’s the technique. Instead of rolling each tortilla individually (which takes forever and always ends up messy), we’re layering them like a lasagna. This means every bite has the perfect ratio of tortilla to filling to sauce. Plus, the one-pan method keeps the tortillas from getting soggy—a problem I struggled with for years until I figured out this approach.
This is the kind of recipe that makes you close your eyes after the first bite. It’s comfort food reimagined—faster, easier, but with the same soul-soothing satisfaction. Perfect for impressing guests without stress, or turning a simple Tuesday into something memorable.
What Ingredients You Will Need
This recipe uses simple, wholesome ingredients to deliver bold flavor and satisfying texture without the fuss. Most of these are pantry staples or easily found at any grocery store, especially during Hatch chile season.
For the Chicken Filling
- 1 ½ pounds boneless, skinless chicken breasts (about 2-3 medium breasts) – You can also use chicken thighs for extra moisture and flavor
- 1 tablespoon olive oil – For searing the chicken and sautéing the aromatics
- 1 medium yellow onion, diced – Adds sweetness and depth
- 3 cloves garlic, minced – Fresh garlic makes a big difference here
- 1 teaspoon ground cumin – The backbone of so many Mexican dishes
- 1 teaspoon chili powder – I prefer a mild chili powder for balanced heat
- ½ teaspoon smoked paprika – Adds that subtle smoky flavor (optional but recommended)
- Salt and black pepper, to taste
For the Green Chile Sauce
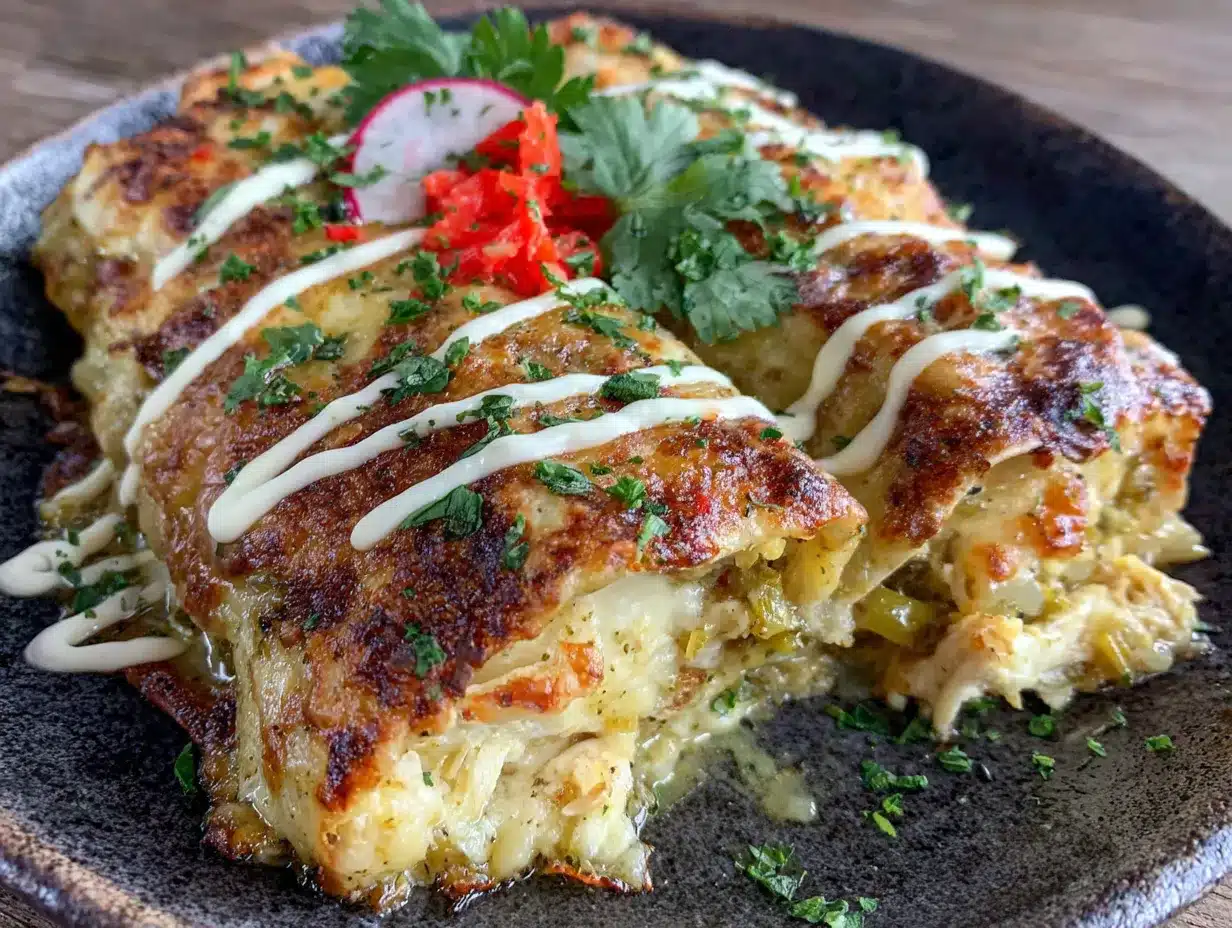
- 1 can (15 ounces) Hatch green chiles, diced – Look for the “fire-roasted” variety for best flavor. If you can’t find Hatch, any mild green chiles will work
- 1 cup chicken broth – Low-sodium is best so you can control the salt level
- 2 tablespoons all-purpose flour – Helps thicken the sauce. For gluten-free, use cornstarch mixed with cold water
- ½ cup sour cream – Adds creaminess and balances the heat. Greek yogurt works great too
- ½ cup heavy cream – For richness. Half-and-half or whole milk can substitute in a pinch
For the Enchilada Layers
- 8-10 corn tortillas – Yellow or white corn tortillas work best. Flour tortillas can be used but will be softer
- 2 cups shredded Mexican blend cheese – A mix of Monterey Jack, cheddar, and queso quesadilla is my go-to. Pre-shredded works fine, but freshly shredded melts better
- ¼ cup chopped fresh cilantro – For garnish
- 1 lime, cut into wedges – For serving
Ingredient Tips from My Kitchen: I’ve found that the quality of the green chiles really matters here. My personal favorite brand is Hatch by Melissa’s for canned, but during peak season (August-September), fresh roasted Hatch chiles from the farmer’s market are absolutely worth the effort. Just roast them yourself, peel off the charred skin, and chop them up. The flavor is incomparable.
For the chicken, I recommend using organic or free-range chicken if your budget allows. The meat is more flavorful and stays tender during cooking. And please, don’t skip the smoked paprika—it’s not a traditional enchilada ingredient, but that subtle smokiness plays beautifully with the green chiles.
Equipment Needed
The beauty of this recipe is that it doesn’t require any fancy equipment. Here’s what you’ll need:
- Large oven-safe skillet or baking dish (10-12 inches) – A cast-iron skillet works perfectly here. If you don’t have one, any oven-safe pan or a 9×13 baking dish will do
- Cutting board and sharp knife – For dicing the onion and mincing the garlic
- Wooden spoon or spatula – For stirring the sauce and filling
- Measuring cups and spoons – For accuracy, especially with the spices
- Small bowl – For mixing the flour into the sauce (prevents lumps)
- Cheese grater – If you’re shredding your own cheese (highly recommended for better melting)
Budget-Friendly Alternatives: If you don’t own an oven-safe skillet, you can cook the filling on the stovetop in a regular pan, then transfer everything to a baking dish for the oven. I’ve done this many times when my cast-iron was already in use. Also, a pizza cutter works surprisingly well for cutting tortillas into strips if you want to try a different layering approach.
Personal Note: I’ve made this recipe in a cheap non-stick skillet, an expensive stainless steel pan, and my trusty old cast-iron. The cast-iron gives the best results—it holds heat evenly and creates a nice crust on the bottom layer of tortillas. But honestly? It works great in any oven-safe pan. Don’t let equipment hold you back.
Preparation Method
Let’s walk through this step by step. I’ve included all the little details I wish someone had told me the first time I made this.
- Preheat your oven to 375°F (190°C). While it’s heating, start prepping your ingredients. Dice the onion, mince the garlic, and shred the cheese if you’re doing it yourself. Having everything ready makes the process so much smoother.
- Season and sear the chicken. Pat the chicken breasts dry with paper towels (this helps them brown better). Season both sides generously with salt, pepper, and a pinch of cumin. Heat the olive oil in your oven-safe skillet over medium-high heat. Add the chicken and cook for 4-5 minutes per side, until golden brown. Don’t crowd the pan—if your chicken pieces are large, work in batches. The chicken won’t be cooked through yet, and that’s totally fine. Transfer the chicken to a plate and set aside.
- Sauté the aromatics. In the same skillet (don’t wipe it out—those browned bits are flavor gold), add the diced onion. Cook over medium heat for 3-4 minutes, stirring occasionally, until the onion is translucent and starting to brown. Add the minced garlic, cumin, chili powder, and smoked paprika. Cook for another 30 seconds until fragrant. Your kitchen should smell amazing at this point.
- Make the green chile sauce. Sprinkle the flour over the onion mixture and stir constantly for 1 minute. This cooks out the raw flour taste. Gradually pour in the chicken broth, whisking continuously to prevent lumps. Add the diced Hatch green chiles (with their liquid). Bring the mixture to a simmer, then reduce heat to low. Let it cook for 2-3 minutes until it thickens slightly. Remove from heat and stir in the sour cream and heavy cream. Taste and adjust salt and pepper—remember, the cheese will add saltiness too.
- Shred the chicken. While the sauce is simmering, shred the seared chicken using two forks. It should still be slightly pink in the center, which is fine because it will finish cooking in the oven. If it’s fully cooked, that’s okay too—just shred it and move on.
- Assemble the layers. Now for the fun part. Spread about ½ cup of the green chile sauce on the bottom of the skillet. This prevents the tortillas from sticking. Layer half of the tortillas over the sauce, overlapping them slightly. Top with half of the shredded chicken, half of the remaining sauce, and half of the shredded cheese. Repeat the layers: tortillas, chicken, sauce, cheese. Make sure the top layer is nicely covered with sauce and cheese—this creates that beautiful golden crust.
- Bake to perfection. Place the skillet in the preheated oven and bake for 20-25 minutes, until the cheese is melted and bubbly and the edges are slightly browned. If you want a more golden top, switch to broil for the last 2-3 minutes—but watch it carefully so it doesn’t burn.
- Rest and serve. Let the enchiladas rest for 5-10 minutes before serving. This is crucial—it allows the layers to set so you get clean slices instead of a messy pile. Sprinkle with fresh cilantro and serve with lime wedges on the side.
Sensory Cues: When the sauce is ready, it should coat the back of a spoon. The tortillas should be slightly softened but not falling apart. When it comes out of the oven, the cheese should be golden in spots and the sauce should be bubbling around the edges. You’ll know it’s done when the whole kitchen smells like roasted chiles and melted cheese.
Cooking Tips & Techniques
After making this recipe more times than I can count, I’ve learned a few things the hard way. Here are my best tips to ensure success every time.
Don’t Overcook the Chicken: This was my biggest mistake early on. I’d cook the chicken all the way through before shredding, which meant it dried out during baking. Now I sear it just until golden, then let the oven finish the job. The result is tender, juicy chicken that practically melts in your mouth.
The Tortilla Trick: Corn tortillas can be tricky—they tend to crack or become soggy. Here’s what works for me: warm them briefly in the microwave (about 30 seconds wrapped in a damp paper towel) before layering. This makes them pliable and helps them absorb the sauce evenly. Also, don’t be shy with the sauce—each layer needs enough moisture to keep everything tender.
Layer Like a Pro: I used to roll each tortilla individually, and honestly, it was a mess. The layering method is not only faster but also gives you better texture. Each bite has the perfect ratio of tortilla to filling. Just make sure your layers are even—use a spatula to spread the chicken and sauce all the way to the edges.
Timing is Everything: This recipe comes together in about 45 minutes total. Here’s my strategy: start the oven preheating first, then prep your ingredients while it heats. By the time the oven is ready, you’ll have everything assembled and ready to bake. Multitasking like this makes the whole process feel effortless.
One Mistake I’ll Never Make Again: I once used low-fat sour cream and skim milk instead of the full-fat versions, thinking I’d make it healthier. The sauce broke in the oven—separated into watery liquid and greasy solids. Trust me, use the full-fat dairy for this recipe. The richness is what makes it so satisfying, and a little goes a long way.
Variations & Adaptations
One of the best things about this recipe is how adaptable it is. Here are some variations I’ve tried and loved.
Vegetarian Version: Swap the chicken for two cans of black beans (drained and rinsed) or 2 cups of roasted vegetables like zucchini, bell peppers, and corn. The green chile sauce is so flavorful that you won’t miss the meat at all. I’ve made this for vegetarian friends and they always ask for the recipe.
Spicy Upgrade: If you like more heat, use hot Hatch chiles instead of mild, or add a diced jalapeño to the onion mixture. You can also sprinkle some red pepper flakes on top before baking. My husband loves this version—he says it wakes up his taste buds.
Cheese Options: Feel free to experiment with different cheeses. Pepper Jack adds a nice kick, while queso fresco crumbled on top after baking gives a authentic touch. I’ve also used a mix of mozzarella and cheddar when that’s all I had, and it turned out great.
Gluten-Free Adaptation: Use corn tortillas (they’re naturally gluten-free) and substitute the all-purpose flour with a gluten-free flour blend or cornstarch. Mix 2 tablespoons of cornstarch with ¼ cup of cold water to make a slurry, then stir it into the sauce instead of the flour.
Make It Ahead: You can assemble the entire dish up to 24 hours in advance. Just cover and refrigerate, then add about 10 minutes to the baking time. This is perfect for busy weeknights or when you’re hosting a party and want to minimize last-minute stress.
My Favorite Personal Variation: Sometimes I add a layer of sautéed spinach between the tortillas and chicken. It adds color, nutrients, and a subtle earthy flavor that pairs beautifully with the green chiles. Plus, it’s a great way to sneak in some greens without anyone complaining.
Serving & Storage Suggestions
This dish is best served warm, right out of the oven. Here’s how to make the most of it.
Serving Temperature: Let the enchiladas rest for 5-10 minutes after baking. This allows the layers to set, making it easier to cut and serve. I like to serve it directly from the skillet—it looks rustic and impressive. Garnish with fresh cilantro, a squeeze of lime juice, and maybe a dollop of sour cream on the side.
What to Serve With It: These enchiladas are hearty enough to be a meal on their own, but they pair beautifully with a simple side salad dressed with lime vinaigrette. For a more complete spread, try serving with Mexican rice, refried beans, or a side of grilled corn with cotija cheese. A cold beer or a tangy margarita is the perfect drink pairing.
Storage Instructions: Leftovers keep well in the refrigerator for up to 4 days. Store in an airtight container. The flavors actually meld together overnight, so leftovers might taste even better the next day. I’ve been known to eat them cold straight from the fridge—don’t judge me.
Reheating Tips: The best way to reheat is in the oven at 350°F (175°C) for about 10-15 minutes, covered with foil to prevent drying out. You can also microwave individual portions for 1-2 minutes, though the tortillas will be softer. For a crispy top, reheat in a skillet over medium heat with a lid on.
Freezer-Friendly: These enchiladas freeze beautifully. Assemble the dish completely but don’t bake it. Wrap tightly with plastic wrap and then foil, and freeze for up to 3 months. To bake from frozen, add about 20 minutes to the baking time and cover with foil for the first half of baking. This is my go-to for busy weeks when I need a homemade meal without the effort.
Nutritional Information & Benefits
Here’s a rough estimate of the nutritional content per serving (based on 6 servings):
- Calories: Approximately 450-500
- Protein: 35-40g
- Carbohydrates: 30-35g
- Fat: 20-25g
- Fiber: 4-6g
- Sugar: 5-7g
Health Benefits: This recipe packs a surprising nutritional punch. Chicken provides lean protein for muscle health and satiety. Hatch green chiles are rich in vitamin C and capsaicin, which may boost metabolism and reduce inflammation. The onions and garlic offer prebiotic fiber for gut health. And the calcium from the cheese supports bone health.
Dietary Considerations: This recipe is naturally gluten-free if you use corn tortillas and a cornstarch thickener. It’s also high in protein and relatively low in sugar. For a lower-fat version, use reduced-fat cheese and Greek yogurt instead of sour cream. As always, check your ingredient labels if you have specific allergies—some pre-shredded cheeses contain anti-caking agents that may include gluten.
My Personal Take: I love that this recipe feels indulgent but is actually quite balanced. It’s the kind of meal that leaves you satisfied without feeling weighed down. Plus, the green chiles add a boost of flavor without a ton of sodium or processed ingredients.
Conclusion
This Easy One-Pan Hatch Green Chili Chicken Enchiladas recipe has become a staple in my kitchen for good reason. It’s the perfect combination of convenience and flavor—something that tastes like you spent hours on it but actually comes together in under an hour. The one-pan method means less cleanup, the layering technique ensures perfect texture, and those Hatch green chiles bring a warmth that’s hard to beat.
I love that this recipe is forgiving enough for beginners but impressive enough for seasoned cooks. You can customize it with your favorite proteins, cheeses, or add-ins, and it always turns out delicious. Whether you’re making it for a busy weeknight dinner, a potluck with friends, or just because you’re craving something comforting, this recipe delivers.
I’d love to hear how it goes for you! Did you try any variations? Did your family love it as much as mine does? Drop a comment below and share your experience. And if you’re feeling generous, share this recipe with someone who could use a little comfort food in their life. Happy cooking, friend—you’ve got this.
Frequently Asked Questions
Can I use flour tortillas instead of corn?
Yes, you can! Flour tortillas will be softer and slightly less sturdy than corn, but they work well in this recipe. Just be aware that they absorb more sauce, so you might want to reduce the sauce slightly to prevent sogginess.
Can I make this recipe dairy-free?
Absolutely. Use a dairy-free sour cream alternative (like cashew-based or coconut-based), skip the heavy cream or use full-fat coconut milk, and use a dairy-free shredded cheese. The sauce will be slightly thinner but still delicious.
How do I store leftovers and how long do they last?
Store leftovers in an airtight container in the refrigerator for up to 4 days. For longer storage, freeze the unbaked assembled dish for up to 3 months. Reheat in the oven or microwave as needed.
What if I can’t find Hatch green chiles?
No problem! Any canned or jarred mild green chiles will work. Look for fire-roasted varieties for the best flavor. You can also use fresh poblano peppers—roast them under the broiler, peel off the skin, and dice them.
Can I add more vegetables to this recipe?
Definitely! Sautéed spinach, zucchini, bell peppers, or corn all work beautifully. Just add them to the onion mixture in step 3 and cook until softened. You can also layer fresh tomatoes or avocado on top after baking for a fresh finish.
Pin This Recipe!
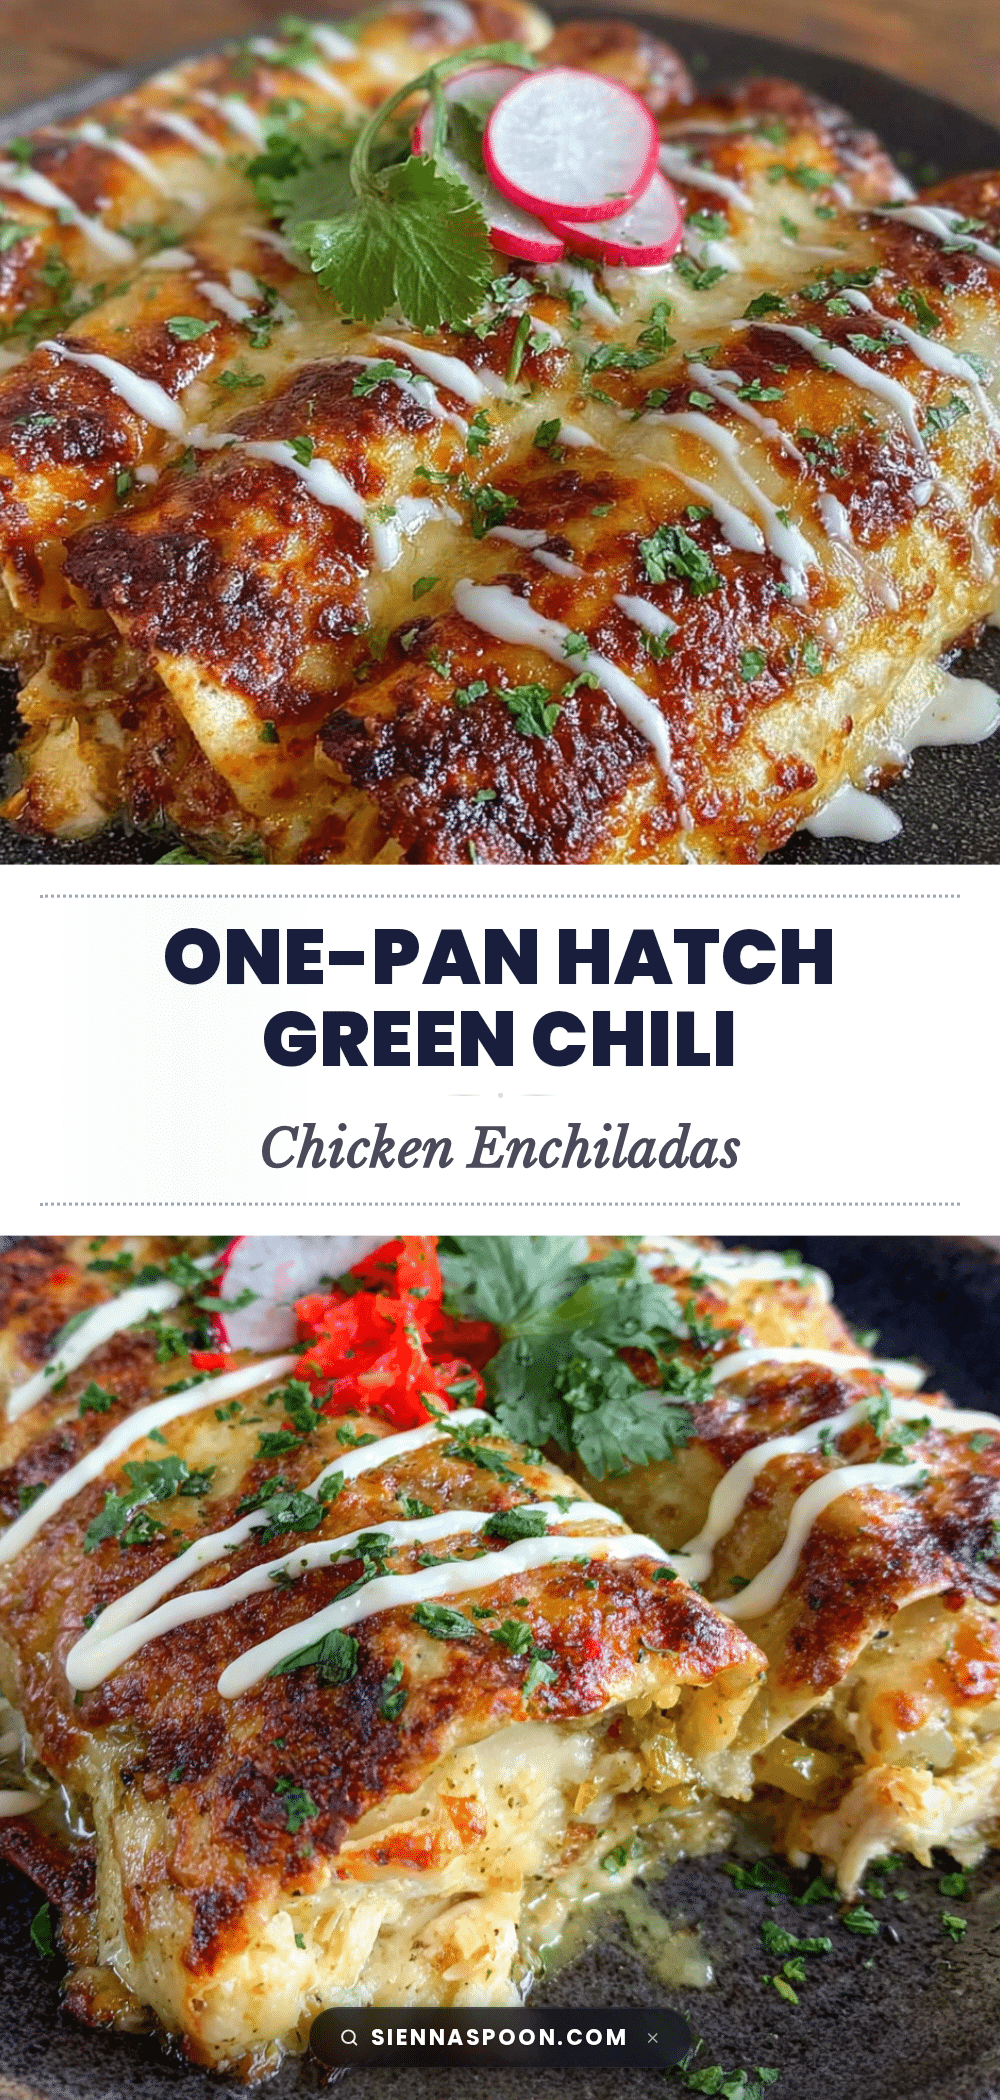
Easy One-Pan Hatch Green Chili Chicken Enchiladas Recipe

A quick and easy one-pan enchilada recipe with tender chicken, melty cheese, and roasted Hatch green chiles, layered like a lasagna for perfect texture and flavor. Ready in under 45 minutes with minimal cleanup.
- Prep Time: 15 minutes
- Cook Time: 30 minutes
- Total Time: 45 minutes
- Yield: 6 servings 1x
- Category: Main Course
- Cuisine: Mexican
Ingredients
- 1 ½ pounds boneless, skinless chicken breasts (about 2–3 medium breasts)
- 1 tablespoon olive oil
- 1 medium yellow onion, diced
- 3 cloves garlic, minced
- 1 teaspoon ground cumin
- 1 teaspoon chili powder
- ½ teaspoon smoked paprika (optional but recommended)
- Salt and black pepper, to taste
- 1 can (15 ounces) Hatch green chiles, diced (fire-roasted preferred)
- 1 cup chicken broth (low-sodium)
- 2 tablespoons all-purpose flour
- ½ cup sour cream
- ½ cup heavy cream
- 8–10 corn tortillas (yellow or white)
- 2 cups shredded Mexican blend cheese (Monterey Jack, cheddar, queso quesadilla)
- ¼ cup chopped fresh cilantro (for garnish)
- 1 lime, cut into wedges (for serving)
Instructions
- Preheat your oven to 375°F (190°C). Dice the onion, mince the garlic, and shred the cheese if needed.
- Pat the chicken breasts dry with paper towels. Season both sides generously with salt, pepper, and a pinch of cumin. Heat olive oil in an oven-safe skillet over medium-high heat. Sear the chicken for 4-5 minutes per side until golden brown. Transfer to a plate (chicken will not be fully cooked).
- In the same skillet, add the diced onion and cook over medium heat for 3-4 minutes until translucent. Add minced garlic, cumin, chili powder, and smoked paprika. Cook for 30 seconds until fragrant.
- Sprinkle flour over the onion mixture and stir constantly for 1 minute. Gradually pour in chicken broth, whisking to prevent lumps. Add the diced Hatch green chiles (with liquid). Bring to a simmer, then reduce heat to low and cook for 2-3 minutes until slightly thickened. Remove from heat and stir in sour cream and heavy cream. Season with salt and pepper to taste.
- While the sauce simmers, shred the seared chicken using two forks.
- Spread about ½ cup of the green chile sauce on the bottom of the skillet. Layer half of the tortillas over the sauce, overlapping slightly. Top with half of the shredded chicken, half of the remaining sauce, and half of the shredded cheese. Repeat layers: tortillas, chicken, sauce, cheese.
- Bake in the preheated oven for 20-25 minutes until cheese is melted and bubbly and edges are slightly browned. For a more golden top, broil for the last 2-3 minutes, watching carefully.
- Let the enchiladas rest for 5-10 minutes before serving. Sprinkle with fresh cilantro and serve with lime wedges.
Notes
For best results, use full-fat dairy to prevent the sauce from breaking. Warm tortillas in the microwave for 30 seconds wrapped in a damp paper towel to make them pliable. Let the dish rest after baking for clean slices. Leftovers keep in the refrigerator for up to 4 days or freeze unbaked for up to 3 months.
Nutrition
- Serving Size: 1 serving (about 1/6
- Calories: 475
- Sugar: 6
- Sodium: 680
- Fat: 22
- Saturated Fat: 10
- Carbohydrates: 32
- Fiber: 5
- Protein: 37
Keywords: enchiladas, Hatch green chile, chicken enchiladas, one-pan, easy dinner, Mexican recipe, comfort food


