Love this? Save it for later!
Share the inspiration with your friends
I was standing in the baking aisle at Target last October, staring at a bag of candy eyeballs, when this weird little memory surfaced. It wasn’t a grand holiday tradition or anything like that. It was just me, maybe eight years old, sitting on my neighbor Mrs. Kowalski’s linoleum kitchen floor. She was rolling cake crumbs and frosting into perfect little balls between her palms, and I was supposed to be helping, but I was mostly just eating the sprinkles out of the container. She had this quiet way of working, never rushing, and she’d let me lick the beaters clean even though my mom always said no. I hadn’t thought about her in years. But there I was, holding those plastic eyeballs, and I could suddenly feel the sticky-sweet smell of her kitchen and the way she’d wink at me when I made a mess. I grabbed the bag, a box of cake mix, and a tub of white frosting, and I decided right then that I was going to figure out how to make those creepy little things myself. Honestly, it took me three tries to get them right. The first batch looked less like monster eyeballs and more like sad, lumpy snowmen. But by the end of the night, I had a tray full of these ridiculous, hilarious, perfect little monsters staring back at me. And I just knew I had to share this Easy Halloween Monster Eyeball Cake Pops recipe with you. Maybe you’ve been there too, chasing a taste or a feeling from somewhere in your past. This is mine — and it’s so much fun to make.
Why You’ll Love This Recipe
Let me tell you, these cake pops are a total game-changer for Halloween. I’ve made them for three years running now, and they never fail to get the biggest reaction. People literally gasp when they see them on the dessert table. And the best part? They’re way easier than they look.
- Surprisingly Simple: You don’t need to be a pastry chef to pull these off. If you can crumble a cake and dip a lollipop stick, you’ve got this. I promise.
- No Fancy Ingredients: Everything comes from the regular grocery store. Cake mix, canned frosting, candy melts, and those little candy eyeballs. That’s it.
- Perfect for Halloween Parties: These little guys steal the show every single time. Kids go crazy for them, and adults can’t resist snapping a picture before taking a bite.
- Make-Ahead Friendly: You can prep them days in advance. I usually make mine on a Saturday and they’re still perfect for the party on Friday.
- Completely Customizable: Want them extra creepy? Add some red gel coloring for bloodshot veins. Want them cute? Use bigger eyeballs and pink cheeks. You’re in control here.
What makes this recipe different from all the other cake pop tutorials out there is that I’ve tested every single step. I’ve had them fall apart, I’ve had the coating crack, and I’ve figured out exactly how to avoid all that frustration. This isn’t just another version — it’s my best version, tested and tweaked until it’s practically foolproof. And honestly, there’s something so satisfying about biting into one of these and getting that perfect cake pop texture — soft, moist, and just sweet enough. It’s the kind of treat that makes you close your eyes after the first bite, even if it looks a little ridiculous.
What Ingredients You Will Need
This recipe uses simple, straightforward ingredients that you can find at any grocery store. The magic is in how they come together, not in fancy specialty items. Here’s what you’ll need to gather before you start.
For the Cake Pops
- 1 box (15.25 oz) chocolate or vanilla cake mix (I prefer Duncan Hines for moisture, but any brand works)
- Ingredients listed on the cake mix box (usually eggs, oil, and water)
- 1/2 cup (120g) cream cheese frosting (store-bought is fine, but I love using Pillsbury)
For the Coating and Decorating
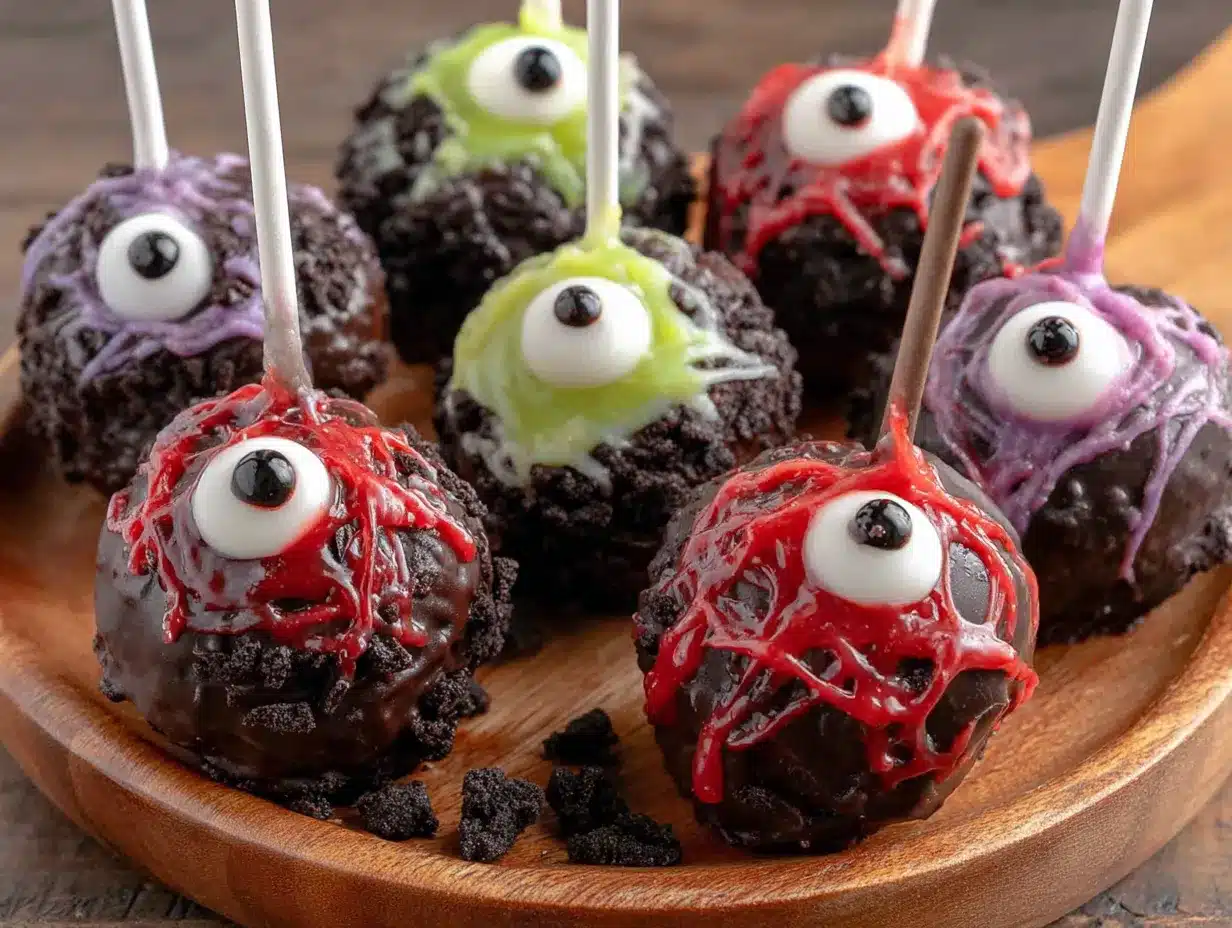
- 2 bags (12 oz each) white candy melts (Wilton brand is my go-to for smooth melting)
- 1 tablespoon coconut oil or shortening (this helps thin the coating for dipping)
- 1 bag (about 50 pieces) candy eyeballs (you can find these in the baking aisle or online)
- Black gel food coloring (for drawing pupils and veins)
- Red gel food coloring (optional, for bloodshot effects)
- Lollipop sticks (at least 20 sticks)
A quick note on the candy melts — don’t skip the coconut oil. I learned this the hard way when my first batch of coating was so thick it pulled the cake pop right off the stick. The oil makes it thin enough to dip smoothly without any drama. And for the cake mix, I’ve tried both chocolate and vanilla, and honestly, chocolate gives it that rich, fudgy interior that contrasts perfectly with the sweet white coating. But if you’re feeding picky kids, vanilla is a safe bet too.
For the frosting, cream cheese is non-negotiable in my book. It adds a slight tang that balances the sweetness of the candy coating. Regular buttercream works in a pinch, but it makes the pops sweeter and a bit greasier. Trust me on this one — cream cheese is the way to go.
Equipment Needed
You don’t need a ton of fancy equipment for this recipe, which is part of what makes it so approachable. Here’s what you’ll need to have on hand.
- Large mixing bowls (at least two — one for the cake crumbs, one for the melted coating)
- 9×13 inch baking pan (or two 8-inch round pans)
- Hand mixer or stand mixer (for crumbling the cake — your hands work too, but a mixer saves time)
- Cookie scoop or tablespoon measure (for uniform cake balls)
- Baking sheet lined with parchment paper (for setting the pops)
- Styrofoam block or cardboard box (to hold the cake pops upright while they dry)
- Small microwave-safe bowls (for melting the candy coating)
- Toothpicks (for detail work with the gel coloring)
If you don’t have a Styrofoam block, don’t stress. I’ve used a shoebox with holes poked in it before, and it worked just fine. You can even stand them in a tall drinking glass if you’re careful. The key is just having something to hold them upright while the coating sets.
Preparation Method
Okay, let’s get into the nitty-gritty. I’m going to walk you through every single step, including the little tricks I’ve picked up along the way. Take your time with this — rushing is the number one reason cake pops fail.
- Bake the cake. Preheat your oven to 350°F (175°C). Prepare the cake mix according to the package directions and bake it in a 9×13 inch pan. Let it cool completely. I mean completely — if it’s even slightly warm, the frosting will melt and you’ll end up with a greasy mess. I usually bake mine the day before and let it cool overnight.
- Crumble the cake. Once the cake is completely cool, break it into large chunks and put them in a large mixing bowl. Using your hands or a hand mixer on low speed, crumble the cake until it looks like fine sand. There should be no large pieces left. This takes about 2-3 minutes with a mixer.
- Add the frosting. Add the cream cheese frosting to the crumbled cake. Start with 1/2 cup and mix it in with your hands (yes, get in there — it’s the best way). The mixture should hold together when you squeeze it, like damp sand. If it’s too dry, add a tablespoon more frosting. If it’s too wet, add a bit more cake crumbs.
- Roll the balls. Scoop out tablespoon-sized portions of the mixture and roll them into smooth balls between your palms. Place them on the parchment-lined baking sheet. You should get about 20-24 balls. Pop them in the freezer for 15 minutes — this is crucial for keeping them on the sticks later.
- Melt the candy coating. Put the white candy melts and coconut oil in a microwave-safe bowl. Microwave in 30-second intervals, stirring between each, until completely smooth. Don’t overheat it or the coating will seize up. If it’s too thick, add a tiny bit more coconut oil.
- Dip the sticks. Take the cake balls out of the freezer. Dip the tip of a lollipop stick into the melted coating, then insert it about halfway into a cake ball. This acts like glue and keeps the pop from sliding off. Repeat with all the balls, then freeze them again for 10 minutes.
- Dip the pops. Hold a cake pop by the stick and dip it completely into the melted coating. Gently tap the stick on the edge of the bowl to let the excess drip off. Don’t swirl it around — that can cause the cake ball to fall off. Lift it out and let the excess drip for a few seconds.
- Add the eyeballs. While the coating is still wet, press two candy eyeballs onto the front of each pop. Work quickly before the coating sets. If it starts to harden, just dip the pop again briefly.
- Let them set. Stick the pops into your Styrofoam block or makeshift stand. Let them dry completely at room temperature for about 30 minutes. Don’t put them in the fridge — condensation will make the coating sticky.
- Add the details. Once the coating is set, use a toothpick dipped in black gel food coloring to draw pupils on the candy eyeballs (they usually come with blank white eyes). You can also add red veins or little monster mouths. Get creative here!
A few sensory cues to watch for: when you’re crumbling the cake, it should feel light and airy, almost like sand. When you add the frosting, the mixture should smell sweet and slightly tangy. And when you dip the pops, the coating should flow like thick honey — not too runny, not too thick. If it’s too thick, it will pull the cake ball off the stick. If it’s too thin, it won’t cover properly.
Cooking Tips & Techniques
I’ve made more cake pops than I care to count, and I’ve messed up plenty of them along the way. Here’s everything I wish someone had told me before I started.
The biggest mistake people make is using warm cake. I cannot stress this enough. If your cake is even slightly warm, the frosting will melt into it and you’ll end up with a greasy, sticky mess that won’t hold its shape. Let it cool completely — overnight is best. I once tried to rush this step and ended up with cake balls that looked like they were sweating. Not cute.
Freezing is your best friend. Those 15-minute freezer breaks aren’t optional. They firm up the cake balls so they stay on the sticks during dipping. I’ve had pops fall off mid-dip more times than I want to admit, and it’s almost always because I skipped the freezer step. Don’t be like me. Freeze them.
Tap, don’t swirl. When you’re dipping, gently tap the stick against the bowl to remove excess coating. If you swirl the pop around, the centrifugal force can loosen the cake ball from the stick. I learned this one the hard way when I lost three pops in one bowl of coating.
Work in small batches. Only take a few cake balls out of the freezer at a time. If they sit out too long, they’ll soften and start to crumble. I usually work with 4-5 pops at a time, keeping the rest in the freezer until I’m ready for them.
Thin your coating properly. If your candy melts are too thick, add a teaspoon of coconut oil at a time until it reaches the right consistency. Don’t add water — it will seize the chocolate instantly. And don’t microwave it for too long at once. Thirty seconds, stir, repeat. Patience pays off here.
Variations & Adaptations
One of the best things about this recipe is how easy it is to change up. Here are some of my favorite variations that I’ve tested over the years.
Bloodshot Eyeballs: After the white coating sets, use a toothpick dipped in red gel food coloring to draw thin squiggly lines radiating from the candy eyeballs. It gives them a seriously creepy, zombie-like look that’s perfect for Halloween parties.
Gluten-Free Version: Use a gluten-free cake mix (Betty Crocker makes a good one) and make sure your candy melts are certified gluten-free. The process is exactly the same, and honestly, nobody can tell the difference. I made these for a friend with celiac and she ate four of them before I could blink.
Chocolate Coating: Swap the white candy melts for dark or milk chocolate. The dark chocolate version looks especially sinister, like monster eyeballs dipped in shadow. Just be careful — dark chocolate coating is a bit thinner and can be trickier to work with.
Monster Mouth Pops: Instead of just eyeballs, add a little red frosting smile below the eyes using a piping bag. You can even add white candy melt teeth for a full monster face. My nephew requested these last year and they were a huge hit.
Vegan Adaptation: Use a vegan cake mix, vegan cream cheese frosting, and dairy-free candy melts. Coconut oil works great for thinning the coating. I’ve made these for a vegan Halloween party and they turned out just as good as the original.
My personal favorite variation is the bloodshot version. There’s something so satisfying about seeing people’s faces when they notice the creepy red veins. It’s a small detail that makes a big impact, and it only takes an extra minute per pop.
Serving & Storage Suggestions
These cake pops are best served at room temperature. The coating stays nice and crisp, and the inside stays soft and fudgy. If you serve them straight from the fridge, the coating can get a bit hard and the texture won’t be as pleasant.
For presentation, I love arranging them on a large platter with some fake spiderwebs and plastic spiders scattered around. It makes for an amazing Halloween centerpiece. You can also stand them in a decorated Styrofoam block or arrange them in a tall glass jar for a more casual look.
These pair beautifully with a glass of cold milk, a hot cup of coffee, or even a pumpkin spice latte. For a Halloween party spread, serve them alongside some creepy Halloween punch or spider web cupcakes for a full spooky dessert table.
Storage: Store the cake pops in an airtight container at room temperature for up to 3 days. If you need to keep them longer, you can refrigerate them for up to a week, but let them come to room temperature before serving. For freezing, wrap them individually in plastic wrap and store in a freezer bag for up to 3 months. Thaw them in the refrigerator overnight, then let them sit at room temperature for 30 minutes before serving.
A word of warning: don’t stack them directly on top of each other in the container. The eyeballs can get squished or fall off. I like to use a single layer with parchment paper between layers if I need to stack them.
The flavors actually develop a bit over time. The cake gets even more moist after a day or two, and the coating sets up perfectly. I actually prefer them on day two — they seem to taste even better.
Nutritional Information & Benefits
Let’s be real — these are a treat, not a health food. But here’s the estimated nutritional breakdown for one cake pop (based on 20 pops per batch).
| Nutrient | Amount Per Pop |
|---|---|
| Calories | 185 |
| Total Fat | 9g |
| Saturated Fat | 5g |
| Carbohydrates | 25g |
| Sugar | 18g |
| Protein | 2g |
On the bright side, these are portion-controlled treats — one pop is usually enough to satisfy a sweet tooth without going overboard. And if you use a dark chocolate coating, you’ll get a small dose of antioxidants from the cocoa. The cream cheese frosting adds a bit of calcium and protein, but honestly, we’re here for the fun, not the nutrition facts.
If you’re watching your sugar intake, you can use a sugar-free cake mix and sugar-free frosting. The candy melts don’t come in a sugar-free version, but you can use a smaller amount of coating by doing a quick dip instead of a full coating. It changes the look a bit, but it still tastes great.
These are not suitable for anyone with nut allergies unless you specifically use nut-free ingredients. Always check labels on candy melts and cake mixes to be safe.
Conclusion
Look, I know making cake pops can feel intimidating. I’ve been there — staring at a bowl of melted coating and a tray of cake balls, wondering if I should just give up and buy something from the bakery. But I promise you, once you make these Easy Halloween Monster Eyeball Cake Pops, you’ll wonder why you ever hesitated. They’re fun, they’re silly, and they taste absolutely amazing. Plus, there’s something so satisfying about watching people’s faces light up when they see them. It’s pure Halloween magic.
Don’t be afraid to make these your own. Add more eyeballs, make them extra creepy, or go for a cute and colorful look instead. That’s the beauty of this recipe — it’s a blank canvas for your imagination. I’d love to see what you come up with! Drop a comment below and tell me how yours turned out, or share a photo on social media and tag me. And if you try a variation I haven’t thought of, please share it — I’m always looking for new ideas.
Happy Halloween, and happy baking! You’ve got this.
Frequently Asked Questions
Can I use homemade cake instead of box mix?
Absolutely! Just make sure your homemade cake is completely cool before crumbling. Any cake recipe works — just bake it, cool it, and proceed with the same steps. I’ve used a homemade vanilla cake before and it turned out beautifully.
Why did my cake pops fall off the sticks?
This usually happens for one of three reasons: the cake balls weren’t cold enough, you didn’t dip the stick in coating before inserting it, or the coating was too thick. Make sure to freeze the balls for at least 15 minutes, dip the stick tip in coating first, and thin your coating with coconut oil if needed.
Can I make these ahead of time?
Yes! You can make them up to 3 days in advance and store them at room temperature in an airtight container. You can also freeze them for up to 3 months. Just wrap each pop individually in plastic wrap before freezing.
How do I get the coating perfectly smooth?
The key is thinning the candy melts with coconut oil. Start with 1 tablespoon per bag of melts and add more if needed. Also, tap the stick gently on the bowl after dipping to remove excess. Don’t swirl — just tap and let it drip.
Can I use chocolate instead of white candy melts?
Definitely! Dark or milk chocolate works great. Just be aware that chocolate is a bit thinner than candy melts, so you might need to work a little faster. And if you’re using chocolate, skip the food coloring — it won’t show up on brown chocolate anyway.
Pin This Recipe!
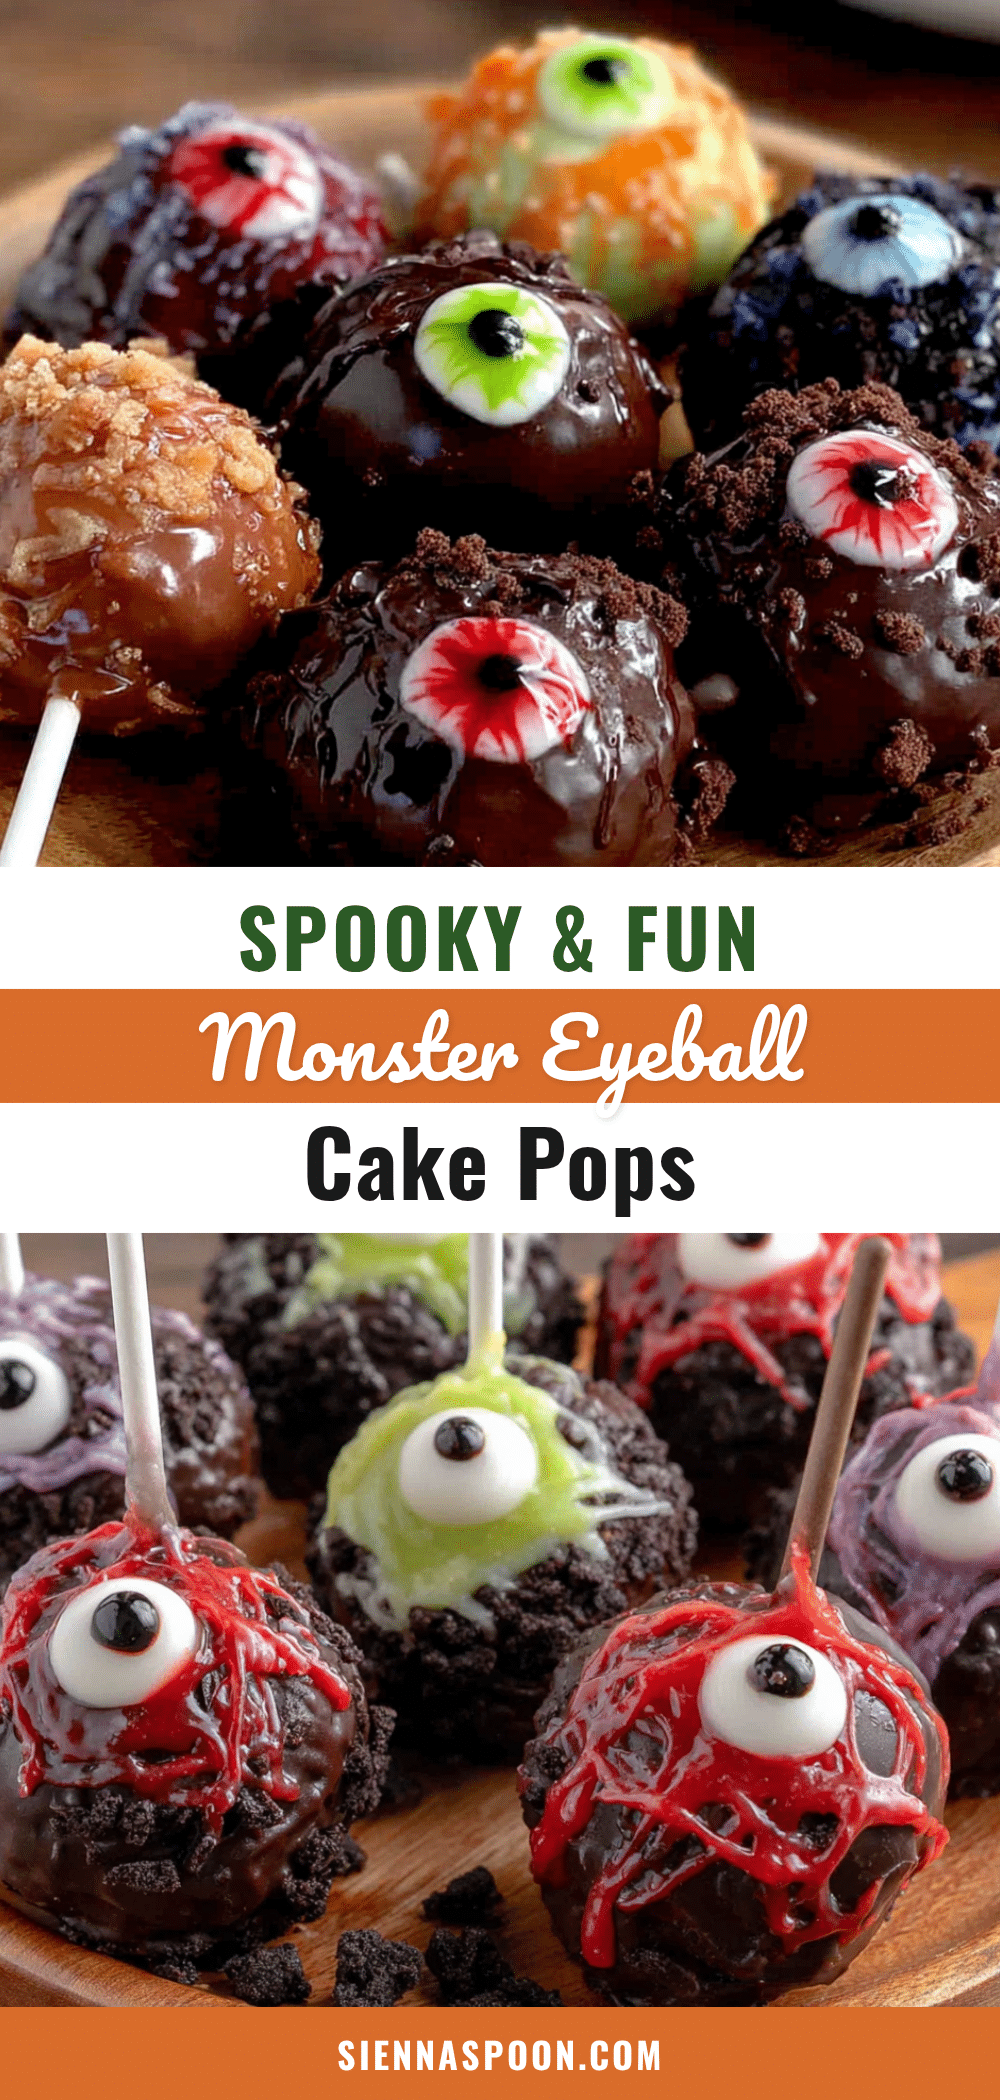
Easy Halloween Monster Eyeball Cake Pops Recipe

These fun and spooky cake pops are perfect for Halloween parties. Made with simple ingredients like cake mix, cream cheese frosting, and candy eyeballs, they are surprisingly easy to make and always a hit.
- Prep Time: 30 minutes
- Cook Time: 30 minutes
- Total Time: 1 hour 30 minutes
- Yield: 20-24 cake pops 1x
- Category: Dessert
- Cuisine: American
Ingredients
- 1 box (15.25 oz) chocolate or vanilla cake mix
- Ingredients listed on the cake mix box (usually eggs, oil, and water)
- 1/2 cup (120g) cream cheese frosting
- 2 bags (12 oz each) white candy melts
- 1 tablespoon coconut oil or shortening
- 1 bag (about 50 pieces) candy eyeballs
- Black gel food coloring
- Red gel food coloring (optional)
- Lollipop sticks (at least 20)
Instructions
- Preheat oven to 350°F (175°C). Prepare cake mix according to package directions and bake in a 9×13 inch pan. Let cool completely.
- Crumble the cooled cake into fine crumbs using your hands or a hand mixer.
- Add cream cheese frosting and mix with your hands until the mixture holds together like damp sand.
- Roll tablespoon-sized portions into smooth balls and place on a parchment-lined baking sheet. Freeze for 15 minutes.
- Melt white candy melts and coconut oil in a microwave-safe bowl in 30-second intervals, stirring until smooth.
- Dip the tip of a lollipop stick into the melted coating, then insert it halfway into a cake ball. Repeat with all balls, then freeze for 10 minutes.
- Dip each cake pop into the melted coating, gently tapping the stick to remove excess. Do not swirl.
- While coating is still wet, press two candy eyeballs onto each pop.
- Place pops in a Styrofoam block or stand to dry completely at room temperature for about 30 minutes.
- Once set, use a toothpick dipped in black gel food coloring to draw pupils on the eyeballs. Add red veins or other details if desired.
Notes
Freeze the cake balls before dipping to prevent them from falling off the sticks. Thin the candy melts with coconut oil for a smooth coating. Work in small batches to keep the cake balls cold.
Nutrition
- Serving Size: 1 cake pop
- Calories: 185
- Sugar: 18
- Fat: 9
- Saturated Fat: 5
- Carbohydrates: 25
- Protein: 2
Keywords: Halloween, cake pops, monster eyeballs, easy, spooky, party treat


