Love this? Save it for later!
Share the inspiration with your friends
My father-in-law had sworn off canned fruit for the better part of two decades. The man claimed it all tasted like tin and sadness, and honestly, I couldn’t blame him. Store-bought pears in syrup have that weird, slick texture and a sweetness that tastes more like a science experiment than actual fruit. Then last September, I found myself with a bushel of Barlett pears that were ripening faster than I could eat them. I decided to try my hand at canning them in a vanilla syrup, mostly just to save the fruit from the compost bin. I’ll never forget walking into the kitchen the next morning and catching him at the counter, spoon in one hand, jar in the other, looking like a kid who got caught sneaking cookies before dinner. “These are different,” he mumbled, not quite making eye contact. “These actually taste like pears.”
That moment stuck with me, you know? It wasn’t about proving him wrong—it was about rediscovering what real canned fruit could be. I mean, I’d spent years assuming canning was this complicated, intimidating process reserved for grandmothers with dedicated pantries. Let me tell you, it’s not. The first time I made these Homemade Canned Pear Halves in Vanilla Syrup, I used a pot that was barely big enough, forgot to sterilize the lids properly (rookie move), and still ended up with the most beautiful jars I’d ever seen. The vanilla bean flecks floating in that golden syrup, the way the pears held their shape but softened just enough—it felt like I’d unlocked some secret kitchen magic.
Maybe you’ve been there, staring at a pile of pears at the farmers market, thinking you should do something with them but not knowing where to start. Or maybe you just want that feeling of opening a jar in January and tasting summer. Either way, this recipe is the one that changed my mind about canning forever. It’s why I keep making it every single year now, even when the pears aren’t threatening to go bad. Some recipes just earn their spot in your rotation.
Why You’ll Love This Recipe
Look, I’ve tested a lot of canning recipes over the years, and most of them fall into two camps: overly complicated or disappointingly bland. This one hits the sweet spot perfectly. Here’s why this version of Homemade Canned Pear Halves in Vanilla Syrup is different from everything else out there.
- Incredibly Simple Process : Once you get the hang of the water bath method, the whole thing comes together in about an hour. No fancy pressure canners needed—just a big pot and some patience.
- Minimal Ingredients : You need pears, sugar, water, vanilla beans, and lemon juice. That’s it. No weird preservatives or mysterious additives.
- Year-Round Summer Flavor : Opening a jar of these in the middle of February feels like a small miracle. The vanilla really brings out the pear’s natural sweetness in a way that store-bought stuff just can’t match.
- Incredibly Versatile : Use them for desserts, breakfast toppings, cheese boards, or just eat them straight from the jar. I’ve done all of the above, and I regret nothing.
- Perfect for Gifting : A jar of these with a ribbon tied around it makes people think you spent way more effort than you actually did. I’m not saying that’s the only reason I make them, but it’s definitely a bonus.
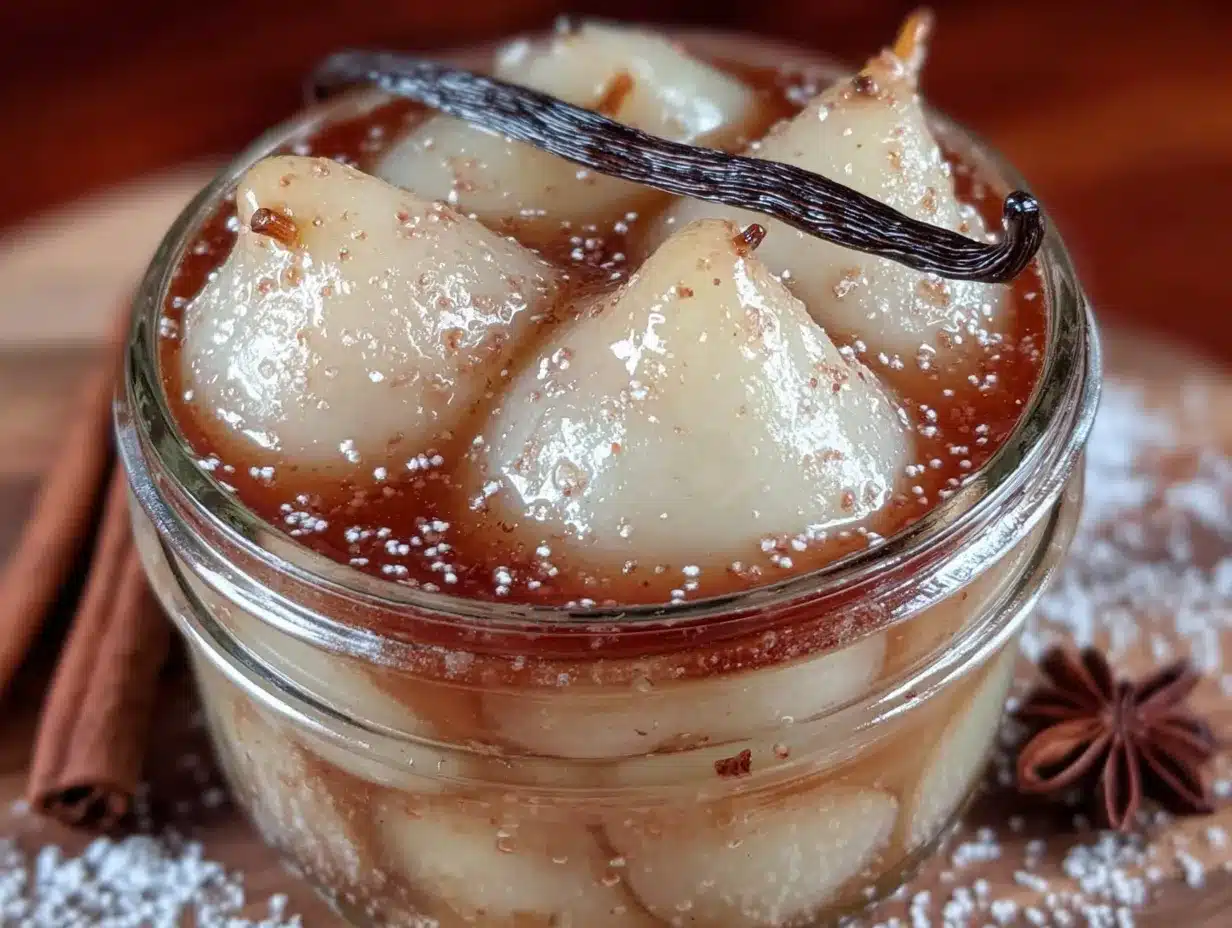
The real magic here is the vanilla. It doesn’t overpower the pear—it just makes the pear taste more like itself, if that makes sense. I’ve tried this recipe with vanilla extract instead of whole beans, and honestly, it’s just not the same. The tiny specks of vanilla seed suspended in the syrup, the way the flavor develops over a few weeks in the jar—that’s what makes these homemade canned pears taste like something you’d pay top dollar for at a fancy food shop.
This is the kind of recipe that makes you feel accomplished without feeling stressed. It’s comfort in a jar, ready whenever you need it.
What Ingredients You Will Need
This recipe relies on simple, high-quality ingredients to create something truly special. The pear halves do the heavy lifting, and the vanilla syrup just helps them shine. Here’s everything you’ll need.
For the Pears
- 6 pounds firm, ripe pears (Barlett or Bosc work best—they hold their shape well during processing)
- 1/4 cup fresh lemon juice (this prevents browning and adds a subtle brightness; bottled works in a pinch but fresh is noticeably better)
- Cold water (for the acidulated water bath that keeps your pears from turning brown while you work)
For the Vanilla Syrup
- 4 cups granulated sugar (regular white sugar gives the cleanest flavor; I’ve tried honey and it changes the texture too much)
- 6 cups water (filtered or tap—just avoid distilled water, which can taste flat)
- 2 whole vanilla beans (split lengthwise; I prefer Madagascar vanilla for its rich, creamy flavor profile)
- 2 tablespoons fresh lemon juice (helps maintain the syrup’s clarity and balances the sweetness)
A quick note on pears: you want them ripe but still firm. If they’re too soft, they’ll turn into mush during processing. If they’re too hard, they won’t have much flavor. The sweet spot is when the neck of the pear gives slightly when you press it—kind of like testing an avocado, but gentler. I learned this the hard way after canning an entire batch of rock-hard pears that tasted like crunchy water.
For the vanilla beans, I know they’re pricier than extract, but trust me on this one. A single vanilla bean costs a few dollars and flavors an entire batch of syrup. You can reuse the spent pods by rinsing them and burying them in a jar of sugar to make vanilla sugar later. Nothing goes to waste around here.
If you’re in a pinch and absolutely cannot find whole vanilla beans, use 2 tablespoons of pure vanilla extract added to the syrup after it comes off the heat. It won’t have those beautiful specks, but it’ll still taste lovely.
Equipment Needed
You don’t need a dedicated canning setup to make this work, but having the right tools makes everything smoother. Here’s what I use.
- Water bath canner or large stockpot : Needs to be deep enough to cover your jars with at least 1 inch of water. A regular stockpot works fine if it’s tall enough.
- Canning rack : Keeps jars off the bottom of the pot so they don’t crack from direct heat. If you don’t have one, fold a kitchen towel and place it in the bottom of the pot.
- 6 pint-sized canning jars with lids and bands : Wide-mouth jars are easier to fill with pear halves. Check for chips or cracks before using.
- Jar lifter : Absolutely non-negotiable. Trust me, trying to fish hot jars out of boiling water with tongs is a disaster waiting to happen.
- Wide-mouth funnel : Makes filling jars without spilling syrup everywhere actually possible.
- Wooden skewer or bubble remover tool : For releasing air bubbles trapped between the pear halves.
- Clean kitchen towels : For wiping jar rims and setting hot jars on.
- Small saucepan : For heating lids and keeping them soft for sealing.
- Sharp paring knife and vegetable peeler : A good peeler makes quick work of those pear skins.
I started with a hand-me-down stockpot and a pair of tongs that were definitely not designed for canning. It worked, barely. If you’re just testing the waters, borrow a friend’s equipment before investing. But honestly, a proper jar lifter is worth every penny—it’s the difference between a relaxing afternoon and a burned hand.
Preparation Method
Alright, let’s get into the actual process. Take your time with this—rushing leads to mistakes, and mistakes lead to jars that don’t seal properly. I’ve made plenty of both, so learn from my experience.
Step 1: Prepare Your Workstation
Wash all your jars, lids, and bands in hot, soapy water. Rinse thoroughly. Place the jars in your canning pot, cover them with water, and bring to a simmer. Keep them hot until you’re ready to fill them. Place the lids and bands in a small saucepan of hot water (not boiling—just hot). This softens the sealing compound and helps create a proper vacuum seal later.
Step 2: Make the Acidulated Water
Fill a large bowl with 4 cups of cold water and add the 1/4 cup of fresh lemon juice. This is your pear bath. Every time you peel and cut a pear, drop the halves in here immediately. Pears oxidize fast, and nobody wants brown canned pears. I learned this the morning after my first attempt when I opened the jars to find everything looking sad and discolored.
Step 3: Prepare the Pears
Peel each pear using a vegetable peeler. Cut the pear in half lengthwise. Use a melon baller or small spoon to scoop out the core and seeds. Remove the stem. Drop each half into the acidulated water as you go. Work quickly but carefully—those peels can be slippery when the pears are ripe.
Step 4: Make the Vanilla Syrup
In a large saucepan, combine the 4 cups of sugar, 6 cups of water, and the split vanilla beans. Scrape the seeds from the vanilla pods into the water (don’t throw the pods away—drop them in too). Bring to a boil over medium-high heat, stirring occasionally until the sugar dissolves completely. Reduce the heat and let it simmer for 5 minutes. Add the 2 tablespoons of lemon juice and stir. The syrup should be clear and fragrant, with those beautiful black vanilla specks floating throughout.
Step 5: Pack the Jars
Remove a hot jar from the canner using your jar lifter. Place it on a towel. Using the wide-mouth funnel, arrange the pear halves in the jar with the cut sides facing down. Pack them snugly but don’t force them—you want about 1/2 inch of headspace at the top. Ladle the hot vanilla syrup over the pears, leaving that 1/2 inch of space. Use your wooden skewer to gently run around the inside of the jar to release any trapped air bubbles. Add more syrup if needed to maintain the headspace.
Step 6: Wipe and Seal
Wipe the rim of each jar with a clean, damp towel. Any syrup residue here will prevent a proper seal. Center a lid on the jar and screw on the band until it’s fingertip-tight—not too tight, just snug enough to hold the lid in place. I overtightened my first batch and ended up with bent lids that wouldn’t seal. Live and learn.
Step 7: Process the Jars
Place the filled jars back into the canning pot using your jar lifter. Make sure they’re covered by at least 1 inch of water. Bring to a full rolling boil, then start your timer. Process pint jars for 20 minutes (adjust for altitude if you’re above 1,000 feet). When the timer goes off, turn off the heat and let the jars sit in the water for 5 minutes before removing them.
Step 8: Cool and Check Seals
Carefully lift the jars out and place them on a towel-lined counter. Leave them undisturbed for 12 to 24 hours. You’ll hear the satisfying “ping” sound as the lids seal. After they’ve cooled, press the center of each lid—if it doesn’t pop up and down, it’s sealed. Refrigerate any unsealed jars and use them within a few weeks.
Cooking Tips & Techniques
After several seasons of canning these pears, I’ve collected a few tricks that make the process smoother and the results more consistent. Here’s what I wish someone had told me before my first attempt.
Don’t skip the lemon juice bath. I know it seems like an extra step, but pears brown faster than almost any other fruit. I once got distracted by a phone call and left a bowl of peeled pears sitting out for twenty minutes. They looked like they’d been through a war. The acidulated water buys you time and keeps everything looking pristine.
Use a melon baller for coring. A knife works, but a melon baller scoops out the core in one clean motion without wasting too much fruit. It also creates a neat little cavity that looks nice in the jar. I found mine at a thrift store for a dollar, and it’s become my favorite canning tool.
Keep your syrup hot. Cold syrup can cause thermal shock and crack your hot jars. Keep the syrup at a simmer while you’re filling jars. If it starts to thicken or reduce too much, add a splash of boiling water to thin it back out.
Watch your headspace. Too little headspace and the syrup will bubble out during processing, making a mess and potentially preventing a seal. Too much headspace and the pears at the top might discolor. I aim for exactly 1/2 inch and use a ruler if I’m feeling particular.
Label your jars. I know it sounds obvious, but I have a drawer full of mystery jars from two years ago that I’m afraid to open. Write the date and contents on the lid with a permanent marker. Your future self will thank you.
Variations & Adaptations
One of the best things about this recipe is how easily it adapts to different tastes and dietary needs. Here are some variations I’ve tried and loved.
Spiced Vanilla Pears
Add one cinnamon stick, three whole cloves, and a strip of orange zest to the syrup while it simmers. Remove the spices before ladling the syrup into jars. The warm spice notes pair beautifully with the vanilla and make these pears perfect for holiday cheese boards.
Honey-Sweetened Version
Replace the granulated sugar with 2 cups of mild honey (clover or orange blossom work well). Reduce the water to 5 cups since honey adds liquid. The flavor is more complex and floral, though the syrup will be slightly darker. I’ve made this version for friends who avoid refined sugar, and it’s always a hit.
Low-Sugar Option
Use 2 cups of sugar instead of 4, and add 1 teaspoon of liquid stevia to boost sweetness without adding more sugar. The pears will be softer since sugar helps maintain texture, so use the firmest pears you can find. This version works well for people watching their sugar intake.
Vanilla Bourbon Pears
Add 1/4 cup of good bourbon to the syrup after it comes off the heat. The alcohol cooks off during processing, but the warm, oaky flavor remains. These are incredible spooned over vanilla ice cream or served alongside a slice of pound cake.
I’ve also tried using different pear varieties. Bosc pears hold their shape the best, while Barlett pears have the most intense flavor. Anjou pears are somewhere in between. If you can find Seckel pears (those tiny ones), they look adorable canned whole with a stem sticking out of each jar.
Serving & Storage Suggestions
These Homemade Canned Pear Halves in Vanilla Syrup are incredibly versatile, and I’ve found myself reaching for them in situations I never expected. Here’s how I serve and store mine.
Serving Temperature: I prefer them chilled straight from the fridge, especially in summer. The cold syrup and tender pear are incredibly refreshing. In winter, I sometimes warm them gently in the syrup with a pinch of cinnamon for a cozy dessert.
Presentation Ideas: Fan the pear halves out on a plate and drizzle with a little syrup. Top with a dollop of mascarpone or whipped cream and a sprinkle of chopped pistachios for an elegant dessert that takes five minutes to assemble. I’ve also served them alongside a sharp cheddar or blue cheese on a cheese board—the sweet vanilla pears balance the salty, funky cheese beautifully.
Complementary Dishes: These pears pair well with pound cake, angel food cake, or simple butter cookies. Spoon them over oatmeal or yogurt for a fancy breakfast. Dice them up and fold them into muffin batter for a seasonal twist. I once used them as a topping for a Dutch baby pancake, and it was honestly one of the best brunches I’ve ever made.
Storage Instructions: Properly sealed jars will keep in a cool, dark pantry for up to 12 months. Once opened, refrigerate and use within 2 to 3 weeks. The syrup tends to thicken slightly over time, which is normal. If you notice any mold, off smells, or hissing sounds when opening a jar, discard the contents immediately—that’s a sign of spoilage.
Flavor Development: The pears actually taste better after sitting for a few weeks. The vanilla flavor deepens and the syrup absorbs more of the pear essence. I always try to stash a few jars away for at least a month before opening them. The patience is worth it.
Nutritional Information & Benefits
Pears are a surprisingly nutritious fruit, and canning them in a light syrup preserves most of their benefits. Here’s what you’re getting in a half-cup serving of these pears with syrup (approximately one pear half).
- Calories: 120-140 (varies based on syrup absorption)
- Carbohydrates: 32g
- Sugar: 28g (some natural, some added)
- Fiber: 3g
- Vitamin C: 4% Daily Value
- Potassium: 116mg
Pears are an excellent source of dietary fiber, particularly pectin, which supports digestive health and helps maintain steady blood sugar levels. They also contain antioxidants like flavonoids and vitamin C, which support immune function. The vanilla adds a small amount of vanillin, which has been studied for its potential anti-inflammatory properties.
For those watching their sugar intake, the low-sugar variation mentioned earlier reduces the added sugar by about half. This recipe is naturally gluten-free, dairy-free, and vegan, making it accessible for most dietary preferences. If you’re following a low-FODMAP diet, stick to one pear half per serving, as pears contain sorbitol in larger amounts.
I personally love that this recipe lets me enjoy summer fruit year-round without relying on store-bought canned goods that often contain high fructose corn syrup and artificial flavors. It’s a small act of kitchen independence that makes me feel good about what I’m eating.
Conclusion
These Homemade Canned Pear Halves in Vanilla Syrup have become a yearly tradition in my kitchen, and I honestly can’t imagine going back to store-bought versions. There’s something deeply satisfying about opening a jar in the dead of winter and tasting the sweetness of September—those vanilla specks floating in golden syrup, the tender pear that tastes like sunshine and patience.
If you’ve never tried canning before, let this recipe be your starting point. It’s forgiving, the ingredients are simple, and the payoff is enormous. You can customize the sweetness, play with spices, or keep it classic. The pears will wait for you in their jars, getting better with time, ready to be pulled out for a quick dessert, a thoughtful gift, or a moment of quiet indulgence.
I’d love to hear how your batch turns out. Did you try a variation? Serve them with something unexpected? Leave a comment below and share your experience—your tweaks might inspire someone else’s kitchen adventure. And if you found this helpful, please share it with a friend who’s been thinking about trying canning. Happy preserving, friends. Your pantry is about to get a whole lot more interesting.
Frequently Asked Questions
Can I use vanilla extract instead of vanilla beans?
Yes, you can substitute 2 tablespoons of pure vanilla extract for the vanilla beans. Add it to the syrup after it comes off the heat to preserve the flavor. Just know you won’t get those beautiful vanilla specks in the syrup.
How long do these canned pears last?
Properly sealed jars stored in a cool, dark pantry will last up to 12 months. After opening, refrigerate and use within 2 to 3 weeks. Always check for signs of spoilage before eating.
Do I need a pressure canner for this recipe?
No, pears are a high-acid fruit, so a water bath canner is perfectly safe. The lemon juice in the syrup helps maintain the proper acidity level. Just follow the processing times carefully.
Can I use this syrup recipe for other fruits?
Absolutely. This vanilla syrup works beautifully with peaches, nectarines, plums, and even apples. Adjust the processing time based on the fruit you’re using—check your local extension office for safe times.
Why did my pears float to the top of the jar?
This is completely normal and doesn’t affect safety or quality. Floating happens when the syrup is denser than the fruit, or when air gets trapped in the pear’s pores. Over time, most pears will absorb some syrup and settle back down.
Pin This Recipe!
Homemade Canned Pear Halves in Vanilla Syrup
Tender pear halves preserved in a golden vanilla syrup, capturing the taste of summer in a jar. This simple water bath canning recipe yields beautifully flavored pears perfect for desserts, breakfasts, cheese boards, or gifting.
- Prep Time: 30 minutes
- Cook Time: 20 minutes
- Total Time: 1 hour (plus 12-24 hours cooling)
- Yield: 6 pint jars 1x
- Category: Preserves
- Cuisine: American
Ingredients
- 6 pounds firm, ripe pears (Bartlett or Bosc work best)
- 1/4 cup fresh lemon juice
- Cold water (for acidulated water bath)
- 4 cups granulated sugar
- 6 cups water (filtered or tap)
- 2 whole vanilla beans (split lengthwise)
- 2 tablespoons fresh lemon juice
Instructions
- Prepare your workstation: Wash jars, lids, and bands in hot, soapy water. Place jars in canning pot, cover with water, and bring to a simmer. Keep hot until filling. Place lids and bands in a small saucepan of hot water.
- Make acidulated water: Fill a large bowl with 4 cups cold water and 1/4 cup fresh lemon juice. This prevents pears from browning.
- Prepare the pears: Peel each pear, cut in half lengthwise, and core using a melon baller or small spoon. Remove stem. Drop each half into the acidulated water immediately.
- Make the vanilla syrup: In a large saucepan, combine 4 cups sugar, 6 cups water, and split vanilla beans (scrape seeds into water, add pods). Bring to a boil, stirring until sugar dissolves. Reduce heat and simmer 5 minutes. Stir in 2 tablespoons lemon juice.
- Pack the jars: Remove a hot jar from canner using jar lifter. Arrange pear halves cut-side down in jar using a wide-mouth funnel. Pack snugly, leaving 1/2 inch headspace. Ladle hot syrup over pears, maintaining 1/2 inch headspace. Use a wooden skewer to release air bubbles.
- Wipe and seal: Wipe jar rims with a clean, damp towel. Center lid on jar and screw on band until fingertip-tight.
- Process the jars: Place filled jars back in canning pot, ensuring they’re covered by at least 1 inch of water. Bring to a full rolling boil. Process pint jars for 20 minutes (adjust for altitude above 1,000 feet). Turn off heat and let jars sit in water for 5 minutes.
- Cool and check seals: Remove jars and place on a towel-lined counter. Leave undisturbed for 12-24 hours. Press center of each lid—if it doesn’t pop, it’s sealed. Refrigerate any unsealed jars and use within a few weeks.
Notes
Use firm but ripe pears—too soft and they’ll turn to mush, too hard and they’ll lack flavor. The vanilla beans can be reused to make vanilla sugar. For altitude adjustments, add processing time as needed. The pears taste better after sitting for a few weeks as flavors develop.
Nutrition
- Serving Size: 1 pear half with syr
- Calories: 130
- Sugar: 28
- Carbohydrates: 32
- Fiber: 3
Keywords: canned pears, vanilla syrup, homemade canned fruit, water bath canning, pear preserves, vanilla pears, canning recipe, homemade preserves


