Love this? Save it for later!
Share the inspiration with your friends
It was one of those nights—11:30 PM, the house quiet except for the hum of the fridge. I was craving something sweet but honestly, I didn’t have half the ingredients for a proper dessert. Just a few bananas, a pack of Nilla wafers, and some cream cheese leftover from lunch prep. Normally, I’d just call it a night, but something about that late-night quiet had me experimenting. So, I mashed those bananas, crushed the wafers, and whipped up a quick batter, thinking, “Well, this might be a total flop.”
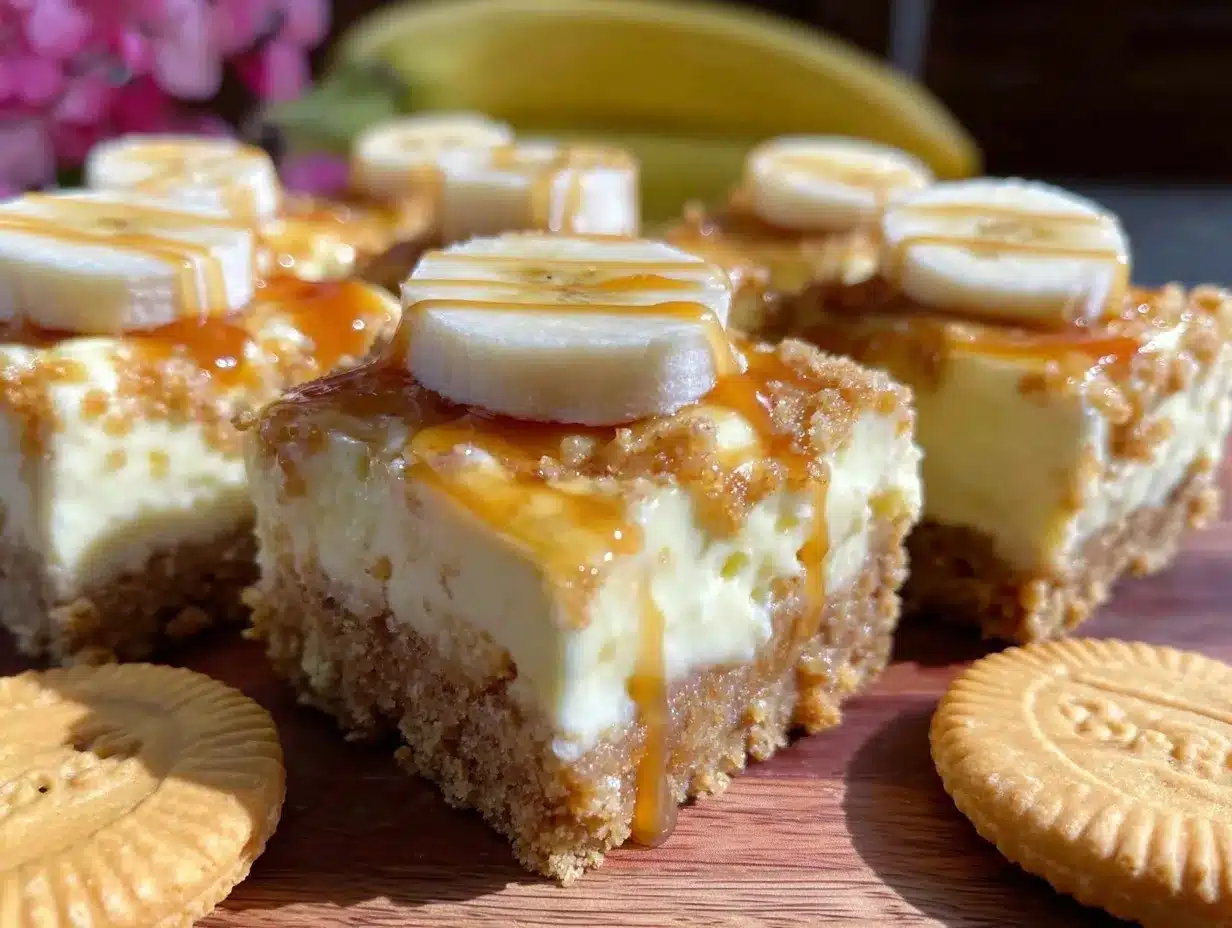
Instead, what came out of the oven was this dreamy, creamy banana pudding cheesecake bars with a buttery Nilla wafer crust that honestly felt like a hug on a plate. The texture was silky, the flavor balanced with just the right amount of sweetness and a nostalgic vibe that reminded me of summer potlucks and family picnics, even though I whipped it up solo in my tiny kitchen. Maybe you’ve been there—caught between sleepy and hungry, and suddenly you stumble upon a new favorite. This recipe stuck with me because it’s simple, quick, and yet so indulgently satisfying that it’s become my go-to when I need that cozy but impressive dessert.
Let me tell you, the cracked bowl of mashed bananas on the counter and the half-spilled sugar weren’t signs of a mess but of a happy accident. That’s why I keep making these bars, especially since they manage to bring together childhood comfort and grown-up cheesecake sophistication in one easy slice.
Why You’ll Love This Creamy Banana Pudding Cheesecake Bars Recipe
After countless trials tweaking this recipe in my kitchen, I can say this version of creamy banana pudding cheesecake bars with Nilla wafer crust is something special. It’s not just another banana dessert—here’s why it stands out:
- Quick & Easy: Ready in under an hour, including baking and cooling time. Perfect for those spontaneous dessert cravings or last-minute guests.
- Simple Ingredients: Uses pantry staples and everyday items you probably have on hand—no obscure ingredients or special trips needed.
- Perfect for Gatherings: Whether it’s a summer BBQ, a potluck, or a cozy Sunday dinner, these bars impress without stress.
- Crowd-Pleaser: The creamy texture balanced with the crunch of the Nilla wafer crust wins over both kids and adults every single time.
- Unbelievably Delicious: The blend of velvety cream cheese, ripe bananas, and that buttery, crumbly crust hits all the right comfort-food notes.
This isn’t just your typical banana pudding or cheesecake—it’s a hybrid that captures the best of both worlds. The secret is in the crust: crushed Nilla wafers mixed with butter create a perfect base that’s crunchy yet tender, which keeps the creamy filling delightfully supported. I’ve also found that folding a bit of whipped cream into the cheesecake layer adds a cloud-like texture that makes every bite feel special.
Honestly, this recipe makes you close your eyes the moment the flavors hit. It’s that kind of dessert that turns a simple banana into something memorable. If you’ve ever loved the classic banana pudding but wished it was a bit more elegant or easier to serve, these cheesecake bars are exactly what you need.
What Ingredients You Will Need
This recipe uses simple, wholesome ingredients to deliver bold flavor and satisfying texture without the fuss. Most components are pantry staples or easy-to-find grocery store items, making it super accessible. Here’s what you’ll want to gather:
- For the Nilla Wafer Crust:
- 1 ½ cups crushed Nilla wafers (about 45-50 wafers)—I like to crush them in a sealable bag with a rolling pin for the best texture
- 5 tablespoons unsalted butter, melted (adds richness and binds the crust)
- 2 tablespoons granulated sugar (balances the buttery flavor)
- For the Creamy Banana Pudding Cheesecake Filling:
- 16 oz (450 g) cream cheese, softened (use a full-fat brand like Philadelphia for the creamiest result)
- ¾ cup granulated sugar
- 2 large eggs, room temperature
- 1 teaspoon pure vanilla extract
- 1 cup ripe bananas, mashed (about 2 medium bananas; ripe means lots of brown spots for sweetness)
- ½ cup sour cream (adds tang and moisture)
- ¼ cup heavy cream (for extra creaminess, but you can swap for whole milk if needed)
- Optional: 1 tablespoon cornstarch (helps with setting, especially if bananas are very ripe)
- For the Topping:
- ½ cup whipped cream or whipped topping (adds lightness on top; you can use dairy-free if preferred)
- Extra crushed Nilla wafers for garnish (optional)
If you want to make this gluten-free, you can find gluten-free Nilla wafer alternatives or substitute with crushed gluten-free cookies. For a dairy-free version, swap the cream cheese and sour cream with plant-based alternatives—just make sure they’re thick enough to hold the texture.
Equipment Needed
- 9×9-inch (23×23 cm) baking pan – I recommend a metal pan for even baking, but glass works fine too.
- Mixing bowls – at least two: one for crust ingredients and one for cheesecake filling.
- Electric mixer or stand mixer – for creaming the cream cheese smoothly without lumps.
- Spatula – a silicone one works best for scraping down the sides.
- Measuring cups and spoons – for accuracy, especially with baking ingredients.
- Food processor or rolling pin with a sealable plastic bag – for crushing the Nilla wafers.
If you don’t have an electric mixer, a sturdy whisk and some elbow grease will do in a pinch, but the texture might take a bit longer to become smooth. When I first started making this, I didn’t own a food processor, so crushing wafers with a rolling pin on the kitchen counter was my go-to method. It works like a charm, just be careful not to make a mess!
Preparation Method
- Preheat your oven to 325°F (163°C). Grease your 9×9-inch pan with butter or line it with parchment paper for easy removal. This step takes about 10 minutes including prep.
- Prepare the crust: Crush the Nilla wafers until fine but with some small chunks remaining for texture. In a bowl, combine crushed wafers, melted butter, and sugar. Mix until crumbs are evenly coated and hold together when pressed.
- Press the crust mixture firmly into the bottom of the prepared pan. Use the bottom of a glass or your fingers to compact it evenly. Bake the crust for 10 minutes, then remove and let cool slightly. This helps it set and crisp up.
- Make the cheesecake filling: In a large mixing bowl, beat the softened cream cheese and sugar until smooth and creamy. This should take around 3-4 minutes with an electric mixer on medium speed.
- Add eggs one at a time, mixing well after each addition. Scrape down the sides to ensure everything is combined.
- Mix in vanilla extract, mashed bananas, sour cream, and heavy cream. Beat until the filling is smooth and well combined. If using cornstarch, sift it in now and mix gently. The batter will be thick but creamy.
- Pour the filling over the pre-baked crust and spread evenly with a spatula. Tap the pan lightly on the counter to release any air bubbles.
- Bake for 40-45 minutes, or until the edges are set but the center still has a slight jiggle when you gently shake the pan. This ensures a creamy texture once cooled.
- Cool the bars at room temperature for 30 minutes, then refrigerate for at least 3 hours or overnight for best results. I usually cover the pan loosely with foil to avoid drying out the top.
- Before serving, spread whipped cream on top and sprinkle extra crushed Nilla wafers if desired. Cut into squares and enjoy!
Pro tip: If your bananas are super ripe and watery, the cornstarch helps the filling hold together without becoming runny. Also, don’t overbake—if the center cracks or is too firm, it loses that luscious creamy feel.
Cooking Tips & Techniques
One of the keys to making creamy banana pudding cheesecake bars work every time is balancing moisture and structure. Here are some tips I’ve picked up:
- Softened cream cheese is a must. Cold cream cheese lumps can ruin the texture. Take it out of the fridge 1 hour before or soften in the microwave for 15 seconds if in a hurry.
- Don’t overmix once eggs are added. Too much air incorporated can cause cracking or a dry texture.
- Press the crust firmly. I learned the hard way that a loose crust means it falls apart when cutting. Use the bottom of a glass to really compact it.
- Use ripe bananas but not overly mushy. If they’re too ripe, the filling can become too wet. That’s when cornstarch helps.
- Cooling is crucial. Let the bars chill thoroughly before slicing to get clean edges and the right firmness.
- Multitasking tip: While the crust bakes, prep the filling to save time. It helps keep your kitchen workflow smooth.
Honestly, the first few times I made this recipe I forgot to soften the cream cheese and ended up with a lumpy nightmare. Don’t be like me! Also, when I tried using regular cookies instead of Nilla wafers, the flavor just wasn’t the same—the wafer crust has that perfect vanilla hint that pairs perfectly with banana.
Variations & Adaptations
This creamy banana pudding cheesecake bars recipe is super flexible, so here are some ways to change it up:
- Chocolate Banana Bars: Add ½ cup mini chocolate chips to the filling or drizzle melted chocolate on top for a rich twist.
- Gluten-Free Crust: Use gluten-free vanilla cookies or crushed gluten-free graham crackers instead of Nilla wafers.
- Dairy-Free Version: Substitute dairy cream cheese with a plant-based cream cheese and use coconut cream instead of heavy cream.
- Peanut Butter Swirl: Drop small spoonfuls of peanut butter on top of the filling before baking and swirl with a knife for a nutty surprise.
- Seasonal Fruit Swap: Try swapping mashed bananas with fresh pureed mango or cooked peaches for a summer vibe.
One personal favorite variation I tried was adding a sprinkle of toasted coconut flakes on top with the whipped cream—adds a lovely texture and tropical note that pairs beautifully with the banana.
Serving & Storage Suggestions
These bars are best served chilled or at room temperature. I like to slice them into small squares for a perfect finger-food size at parties. A dollop of whipped cream or a light dusting of cinnamon on top brings out the cozy flavors beautifully.
They pair wonderfully with a cup of strong coffee or a glass of cold milk—honestly, that combo never fails. For a grown-up touch, a drizzle of caramel sauce on top is a total game-changer.
Store leftovers covered in the refrigerator for up to 4 days. If you want to keep them longer, they freeze well for up to 2 months—just thaw overnight in the fridge before serving. When reheating, warm slightly in the microwave for 10-15 seconds to bring back that creamy softness without melting the crust.
Flavors actually deepen after a day in the fridge, so sometimes I make the bars a day ahead to let everything meld together perfectly.
Nutritional Information & Benefits
Per serving (based on 12 bars): approximately 280 calories, 18g fat, 25g carbohydrates, 3g fiber, and 4g protein. Not too shabby for a dessert that feels indulgent!
The bananas provide potassium and vitamins B6 and C, while the cream cheese adds calcium and protein. Using ripe bananas naturally sweetens the bars, reducing the need for extra sugar. For those watching carbs, swapping sugar with a natural sweetener like erythritol could be an option.
Keep in mind this recipe contains dairy, eggs, and gluten (from Nilla wafers), so it’s not suitable for those with allergies to these ingredients.
From my experience, this dessert feels like a balanced treat—satisfying sweet cravings without going overboard, which is great when you want to enjoy dessert but stay mindful.
Conclusion
So, why should you give these creamy banana pudding cheesecake bars with Nilla wafer crust a try? Because they perfectly blend comfort and sophistication in a way that’s simple, quick, and downright addictive. Whether you’re feeding a crowd or indulging yourself after a long day, this recipe adapts to your needs and tastes.
I love making these bars because they remind me that great things sometimes come from the most unexpected kitchen moments. Plus, they’re easy enough to whip up on a whim but fancy enough to impress.
Try customizing them with your favorite add-ins or toppings and let me know how yours turn out! I’d love to hear your twists or any fun stories about how this recipe fit into your life—drop a comment or share your photos to keep the dessert love going.
Happy baking, and enjoy that creamy, dreamy bite!
Frequently Asked Questions about Creamy Banana Pudding Cheesecake Bars
Can I use frozen bananas for this recipe?
Yes, but thaw and drain them well before mashing to avoid excess moisture that can affect the filling’s texture.
Do I need to prebake the Nilla wafer crust?
Prebaking helps the crust set and prevents sogginess, so I recommend it for the best texture.
How do I store leftover bars?
Store covered in the refrigerator for up to 4 days or freeze for up to 2 months. Thaw in the fridge before serving.
Can I make this recipe vegan?
You can try swapping dairy and eggs with plant-based alternatives, but texture and flavor might change. Experiment with vegan cream cheese and egg replacers.
What if my cheesecake bars crack on top?
Cracking usually means overbaking or too much air whipped into the batter. Avoid overmixing eggs and bake until the center still jiggles slightly to prevent cracks.
Pin This Recipe!

Creamy Banana Pudding Cheesecake Bars Easy Recipe with Nilla Wafer Crust
A quick and easy dessert combining creamy banana pudding and cheesecake with a buttery Nilla wafer crust, perfect for gatherings or a cozy treat.
- Prep Time: 15 minutes
- Cook Time: 55 minutes
- Total Time: 1 hour 10 minutes
- Yield: 12 servings 1x
- Category: Dessert
- Cuisine: American
Ingredients
- 1 ½ cups crushed Nilla wafers (about 45–50 wafers)
- 5 tablespoons unsalted butter, melted
- 2 tablespoons granulated sugar
- 16 oz (450 g) cream cheese, softened
- ¾ cup granulated sugar
- 2 large eggs, room temperature
- 1 teaspoon pure vanilla extract
- 1 cup ripe bananas, mashed (about 2 medium bananas)
- ½ cup sour cream
- ¼ cup heavy cream
- Optional: 1 tablespoon cornstarch
- ½ cup whipped cream or whipped topping
- Extra crushed Nilla wafers for garnish (optional)
Instructions
- Preheat your oven to 325°F (163°C). Grease a 9×9-inch pan with butter or line it with parchment paper.
- Crush the Nilla wafers until fine with some small chunks remaining. In a bowl, combine crushed wafers, melted butter, and sugar. Mix until crumbs are evenly coated and hold together when pressed.
- Press the crust mixture firmly into the bottom of the prepared pan. Bake the crust for 10 minutes, then remove and let cool slightly.
- In a large mixing bowl, beat the softened cream cheese and sugar until smooth and creamy (3-4 minutes).
- Add eggs one at a time, mixing well after each addition. Scrape down the sides to combine.
- Mix in vanilla extract, mashed bananas, sour cream, and heavy cream. If using cornstarch, sift it in now and mix gently until smooth.
- Pour the filling over the pre-baked crust and spread evenly. Tap the pan lightly to release air bubbles.
- Bake for 40-45 minutes, until edges are set but center still has a slight jiggle.
- Cool the bars at room temperature for 30 minutes, then refrigerate for at least 3 hours or overnight.
- Before serving, spread whipped cream on top and sprinkle extra crushed Nilla wafers if desired. Cut into squares and enjoy.
Notes
Use softened cream cheese for smooth texture. Do not overmix after adding eggs to avoid cracking. Press crust firmly to prevent crumbling. Use ripe but not overly mushy bananas; add cornstarch if bananas are very ripe to help set filling. Cool bars thoroughly before slicing for clean edges. Prebake crust to prevent sogginess.
Nutrition
- Serving Size: 1 bar (1/12th of rec
- Calories: 280
- Fat: 18
- Carbohydrates: 25
- Fiber: 3
- Protein: 4
Keywords: banana pudding, cheesecake bars, Nilla wafer crust, creamy dessert, easy dessert, banana dessert, quick dessert, crowd-pleaser