Love this? Save it for later!
Share the inspiration with your friends
My nephew Leo asked why I couldn’t just stir the M&Ms into the melted marshmallow instead of pressing them on top. I started to explain why that wouldn’t work — something about the candy shells melting and the colors bleeding into a sad, grey mess. Then I stopped. Honestly, I had never actually tried it. I had just assumed, like so many things in cooking, that the way I’d always done it was the only way. So I handed him the bag of red and green M&Ms and said, “Go for it, buddy.”
The kitchen was already a disaster zone — powdered sugar on the counter, a sticky spatula abandoned in the sink, and Leo’s little fingerprints on every surface. It was a Tuesday afternoon in early December, and we were supposed to be making a simple batch of Christmas Rice Krispie Treats for his class party. I had the butter melting in a big pot, the marshmallows waiting in a bowl, and a plan that I was sure would work. But Leo, all of seven years old, had a different plan. He wanted to dump the entire bag of M&Ms right into the hot, gooey marshmallow mixture. I almost stopped him. I mean, every food blogger instinct in my body screamed “No! The colors will run!” But I bit my tongue. Let me tell you, watching that kid confidently pour those candies into the pot was a moment of pure, unscripted kitchen magic.
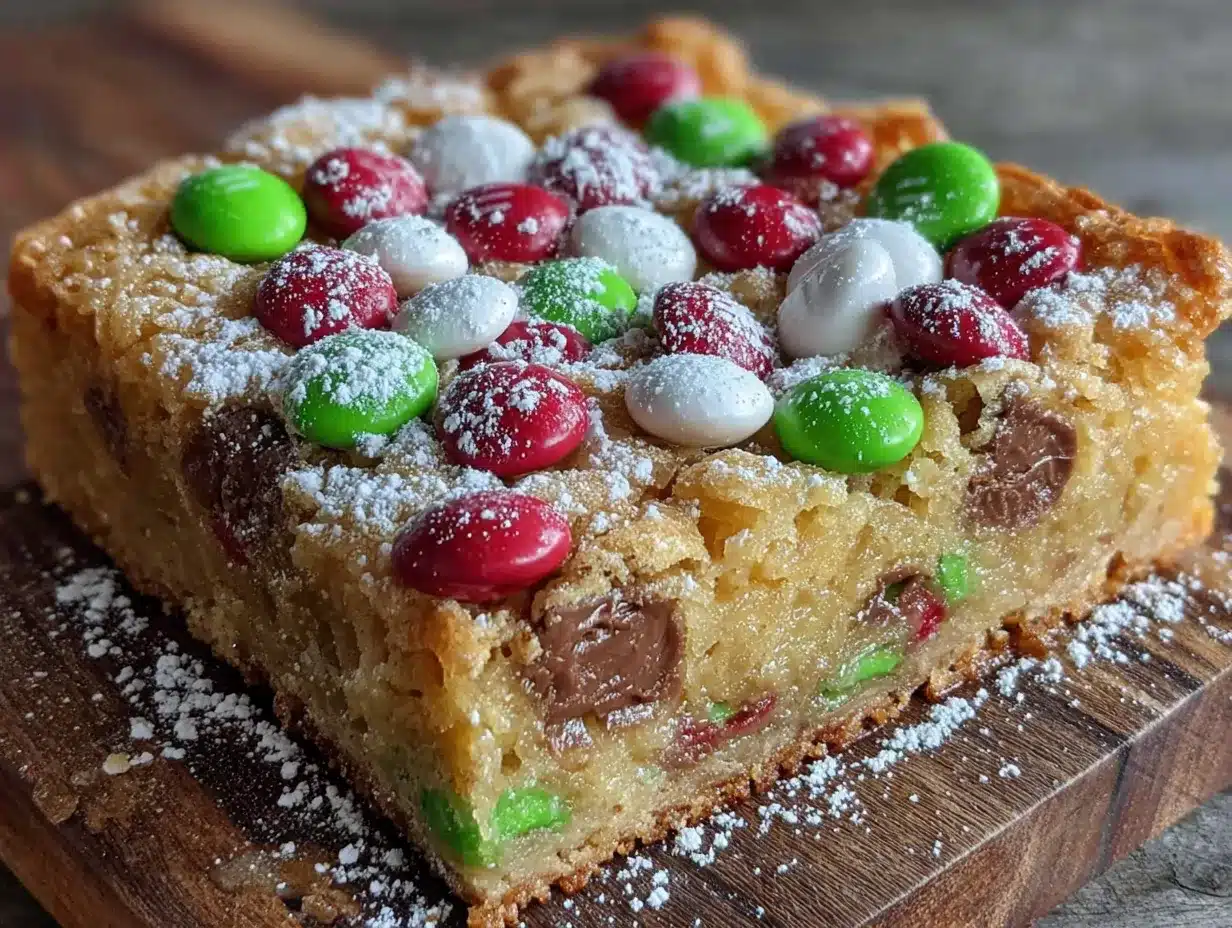
The colors didn’t bleed. The shells stayed intact. And what came out of that pot was the most festive, speckled, ridiculously cheerful batch of treats I had ever made. The M&Ms softened just slightly from the heat, creating little pockets of chocolate in every single bite. I learned something that day — sometimes the best recipes come from letting the beginner take the lead. This is that recipe. These Easy Christmas Rice Krispie Treats with M&Ms are a little bit messy, a whole lot of fun, and absolutely perfect for the holiday season. If you’ve ever had a kid try to “help” in the kitchen and worried it would ruin everything, you know that feeling when it turns out better than you planned. That’s this recipe.
Why You’ll Love This Recipe
These aren’t your average Rice Krispie Treats. They are a holiday showstopper that comes together in about 15 minutes with just a handful of ingredients. I’ve tested this method at least a dozen times now — both with my own kids and for holiday bake sales — and it works every single time. The trick of stirring the M&Ms directly into the warm marshmallow mixture is the game-changer. It distributes the chocolate and candy shells evenly throughout the treat, so every bite has that perfect crunch and pop of festive color.
- Quick & Easy: From start to finish, you are looking at about 15 minutes of hands-on time. Perfect for those December evenings when you need a classroom treat or a last-minute dessert for a holiday gathering.
- Simple Ingredients: You need butter, marshmallows, Rice Krispies cereal, and a bag of Christmas M&Ms. That’s it. No fancy extracts, no special equipment, no trips to a specialty baking store.
- Perfect for Christmas: These treats are custom-made for holiday parties, cookie exchanges, school celebrations, or just a cozy afternoon at home with the kids. The red and green M&Ms make them instantly festive.
- Crowd-Pleaser: I have yet to meet a kid — or an adult, honestly — who can resist these. They are sweet, crunchy, chewy, and just the right amount of chocolatey.
- Unbelievably Delicious: The texture is next-level. The M&Ms soften slightly from the warm marshmallow, creating little melty chocolate pockets, while the candy shells add a satisfying crunch. It’s comfort food at its most joyful.
What makes this recipe different from every other Rice Krispie Treat recipe out there is the method. Most recipes tell you to press the candies on top after the mixture is in the pan. That works, but the M&Ms tend to fall off when you cut the bars. By stirring them in, every single piece is locked into the treat. It’s a small change that makes a huge difference. Plus, it is way more fun to let the kids dump the whole bag in and stir. This isn’t just good — it’s the kind of treat that makes you close your eyes after the first bite and remember being a kid on Christmas morning.
What Ingredients You Will Need
This recipe relies on a short list of pantry staples that you probably already have on hand. The key is using good-quality ingredients because there are so few of them. Every component plays a role in the final texture and flavor.
- Unsalted butter (6 tablespoons / 85 grams): I always use unsalted butter so I can control the salt level. If you only have salted butter on hand, reduce the added salt in the recipe. The butter adds richness and helps the marshmallows melt smoothly.
- Mini marshmallows (10 ounces / 283 grams): Mini marshmallows melt faster and more evenly than the large ones. I recommend using a fresh bag — stale marshmallows can make the treats turn out hard and dry. Jet-Puffed is my go-to brand for consistent results.
- Rice Krispies cereal (6 cups / 180 grams): The original Rice Krispies cereal gives the best texture. Generic brands can work, but they tend to get soggy faster. For the classic snap, crackle, and pop, stick with the name brand.
- Christmas M&Ms (1 cup / 200 grams): Look for the red and green variety specifically sold for the holiday season. You can also use the white chocolate or peanut butter M&Ms for a different twist. The regular milk chocolate ones are my favorite for the classic flavor.
- Vanilla extract (1 teaspoon): A good-quality vanilla extract adds depth to the sweetness. It is a small addition, but it rounds out the flavor beautifully. I use Nielsen-Massey, but any pure vanilla extract will work.
- Salt (¼ teaspoon): A pinch of salt balances the sweetness and enhances the buttery flavor. Don’t skip it — it makes a difference.
For the best results, have all your ingredients measured and ready before you start. The process moves quickly once the butter melts, and you don’t want to be scrambling to open a bag of marshmallows while the mixture is cooling. If you are making these with kids, let them do the measuring and dumping — it keeps them engaged and helps them feel like they are part of the process.
Equipment Needed
You don’t need any fancy kitchen gadgets for this recipe. A few basic tools are all it takes to make a perfect batch of Christmas Rice Krispie Treats.
- Large pot (5 to 6 quarts): You need a pot big enough to hold all the cereal and marshmallows with room to stir. A heavy-bottomed pot works best to prevent the mixture from burning. I use my trusty enameled cast iron Dutch oven, but any large stockpot will do.
- Silicone spatula: A heat-resistant silicone spatula is essential for stirring. It won’t scratch your pot, and it makes scraping every last bit of marshmallow mixture into the pan much easier. A wooden spoon works in a pinch, but the spatula is better for folding.
- 9×13-inch baking pan: This size gives you thick, satisfying bars. If you want thinner treats, you can use a larger sheet pan, but adjust the baking time accordingly. I recommend a metal pan over glass for more even cooling.
- Parchment paper: Lining the pan with parchment paper makes lifting the treats out and cutting them a breeze. Leave an overhang on two sides to create “handles.”
- Butter or cooking spray: Grease the spatula and your hands to prevent sticking when pressing the mixture into the pan. This is a non-negotiable step — trust me, I learned the hard way.
Preparation Method
Follow these steps carefully, and you will have a perfect batch of festive treats every single time. The key is working quickly once the marshmallows are melted.
- Prepare the pan: Line a 9×13-inch baking pan with parchment paper, leaving an overhang on the long sides. Lightly grease the parchment with butter or cooking spray. Set the pan aside.
- Melt the butter: Place the large pot over medium-low heat and add the 6 tablespoons of unsalted butter. Stir occasionally until the butter is completely melted. Do not let it brown — you want a gentle melt, not a sizzle.
- Add the marshmallows: Pour the 10 ounces of mini marshmallows into the melted butter. Stir constantly with your silicone spatula until the marshmallows are about 75% melted. The mixture will look glossy and smooth. This takes about 3 to 4 minutes.
- Remove from heat: Take the pot off the burner immediately. You don’t want to overcook the marshmallows or they will turn hard and brittle. Stir in the ¼ teaspoon of salt and 1 teaspoon of vanilla extract until combined.
- Add the M&Ms: Here is the magic moment. Pour the entire cup of Christmas M&Ms into the warm marshmallow mixture. Stir gently but quickly until the M&Ms are evenly distributed. The heat will soften the chocolate slightly, but the shells should stay intact. Work fast — the mixture will start to set.
- Fold in the cereal: Add the 6 cups of Rice Krispies cereal all at once. Fold the cereal into the marshmallow mixture using a gentle, sweeping motion. Be careful not to crush the cereal. You want the mixture to be evenly coated without breaking the pieces. This should take about 30 seconds.
- Transfer to the pan: Scrape the mixture into the prepared pan. Use your greased spatula or buttered hands to gently press the mixture into an even layer. Do not press too hard — you want the treats to be tender, not compacted. Aim for an even thickness across the pan.
- Cool completely: Let the treats cool at room temperature for at least 30 minutes. Do not put them in the refrigerator — that can make them hard. Once they are fully set, use the parchment paper handles to lift the entire block out of the pan.
- Cut into bars: Use a sharp knife to cut the treats into squares. I usually cut 12 large bars or 24 smaller ones. Wipe the knife clean between cuts for neat edges. The M&Ms will be visible in every single piece.
A quick note: the mixture will be very sticky. Don’t panic. That is normal. A light coating of butter on your hands or spatula will make pressing it into the pan much easier. If you find the mixture is getting too stiff to work with, you can microwave the pot for 5 to 10 seconds to soften it slightly.
Cooking Tips & Techniques
Over the years, I have made more batches of Rice Krispie Treats than I can count, and I have made every mistake in the book. Here is what I’ve learned so you don’t have to repeat my failures.
Low and slow is the rule. The biggest mistake people make is using high heat to melt the marshmallows. It seems faster, but it almost always leads to scorched marshmallows and a grainy texture. Keep the heat on medium-low and be patient. Your treats will thank you.
Don’t over-stir the cereal. I know it is tempting to keep mixing until everything looks perfect, but over-stirring crushes the cereal and turns the treats into dense, tough bars. Fold gently until the cereal is just coated. A few dry spots are okay — they will disappear as you press the mixture into the pan.
The M&Ms need to go in before the cereal. This is the non-negotiable trick that makes this recipe work. If you add the M&Ms after the cereal, they won’t distribute evenly. Stirring them into the warm marshmallow first ensures every bite has a pop of color and chocolate. I learned this the hard way after making a batch where all the M&Ms sank to the bottom.
Press gently, not firmly. When you transfer the mixture to the pan, use a light hand. Firm pressing creates dense, hard treats that are difficult to bite into. You want them to be light and tender. Think of it as coaxing the mixture into place rather than forcing it.
Timing is everything. Have all your ingredients measured and ready before you start. Once the butter hits the pot, you have about 10 minutes before the mixture starts to set. If you are making these with kids, do the measuring ahead of time and let them handle the dumping and stirring.
Variations & Adaptations
One of the best things about this recipe is how easily it adapts to different tastes and dietary needs. Here are a few variations I have tried and loved.
Peppermint Crunch: Swap half of the M&Ms for crushed candy canes or peppermint bark. The minty flavor pairs beautifully with the chocolate and adds an extra festive crunch. Just be sure to crush the candy canes into small pieces so they distribute evenly.
White Chocolate Dream: Use white chocolate M&Ms instead of the milk chocolate ones. The contrast of the white chocolate against the red and green candy shells is stunning, and the flavor is sweeter and creamier. My niece prefers this version, and honestly, I can’t blame her.
Gluten-Free Option: Rice Krispies are naturally gluten-free, but check the label to make sure your brand is certified gluten-free if you have a sensitivity. The rest of the ingredients are naturally gluten-free, so this variation is simple.
Extra Chocolatey: Stir in ½ cup of mini chocolate chips along with the M&Ms. The chocolate chips will melt slightly from the heat, creating even more gooey pockets of chocolate. Use milk chocolate, semi-sweet, or dark chocolate depending on your preference.
Nutty Holiday: Add ½ cup of chopped pecans or walnuts along with the cereal. The nuts add a lovely crunch and a savory note that balances the sweetness. This is a great option if you are making treats for an adult gathering.
For a completely different take, try using Fruity Pebbles cereal instead of Rice Krispies. The colorful cereal combined with the M&Ms creates a treat that looks like a Christmas confetti explosion. It is a bit sweeter, but the kids absolutely love it.
Serving & Storage Suggestions
These treats are best served at room temperature. The texture is perfectly chewy with just the right amount of crunch. If you are serving them at a party, arrange them on a festive platter or a cake stand. They look beautiful piled high with a few extra M&Ms scattered around for decoration.
For a fun presentation, cut the treats into smaller bite-sized squares and place them in a holiday-themed cupcake liner. This makes them easy to grab and eat, especially at a buffet-style gathering. You can also thread them onto skewers for a fun twist on a dessert kabob.
Storage: Store the treats in an airtight container at room temperature for up to 3 days. I like to layer them between sheets of parchment paper to prevent sticking. Do not refrigerate them — the cold temperature will make them hard and stale.
Freezing: These treats freeze beautifully. Wrap each bar individually in plastic wrap, then place them in a freezer-safe bag or container. They will keep for up to 2 months. To thaw, let them sit at room temperature for about 15 minutes. The texture will be just as good as fresh.
One thing I love about this recipe is that the flavors actually improve after a day. The M&Ms have time to soften slightly, and the marshmallow and cereal meld together into a perfectly cohesive bar. So don’t hesitate to make them a day ahead of your event.
Nutritional Information & Benefits
Let’s be honest — these are a treat, not a health food. But that doesn’t mean they can’t be part of a balanced holiday celebration. Here is the approximate nutritional breakdown for one large bar (based on 12 servings):
- Calories: 280
- Total Fat: 10g
- Saturated Fat: 6g
- Cholesterol: 15mg
- Sodium: 180mg
- Total Carbohydrates: 46g
- Dietary Fiber: 1g
- Sugars: 30g
- Protein: 2g
While these treats are high in sugar, they do offer a small amount of iron from the fortified cereal and a bit of calcium from the butter and chocolate. The M&Ms add a touch of antioxidants from the cocoa, but let’s not kid ourselves — this is a dessert meant for enjoyment, not nutrition.
If you are looking to lighten them up, you can reduce the butter to 4 tablespoons and use a sugar-free marshmallow. The texture will be slightly different, but the treats will still be delicious. For a dairy-free version, use vegan butter and dairy-free chocolate candies.
Conclusion
These Easy Christmas Rice Krispie Treats with M&Ms are more than just a dessert — they are a memory in the making. They are the treat you make when the kids are bouncing off the walls with holiday excitement and you need something simple to channel all that energy. They are the recipe you pull out when you need a last-minute contribution to the office party or the school bake sale. And they are the snack that somehow tastes even better when you eat it standing over the kitchen counter, sneaking bites before anyone else sees.
I love this recipe because it reminds me that cooking doesn’t have to be complicated to be special. Sometimes the best dishes come from a seven-year-old’s suggestion and a willingness to be wrong. So go ahead — let the kids dump the M&Ms in. Let them stir. Let them press the mixture into the pan with their buttered little hands. The mess is worth it. The joy is worth it. And the treats? They are absolutely worth it.
I would love to hear how your batch turns out. Did you try a variation? Did your kids have any brilliant suggestions? Drop a comment below and share your experience. And if you loved this recipe, save it to your Christmas baking board on Pinterest so you can find it again next year. Happy holidays, and happy cooking!
Frequently Asked Questions
Can I use large marshmallows instead of mini marshmallows?
Yes, you can. Use about 40 large marshmallows (which is roughly 10 ounces). Just keep in mind that large marshmallows take a little longer to melt. Stir them constantly over low heat to prevent burning. The texture will be the same, but the melting process is slightly slower.
Why did my Rice Krispie Treats turn out hard?
Hard treats are usually the result of overcooking the marshmallows or pressing the mixture too firmly into the pan. Keep the heat on medium-low and remove the pot from the burner as soon as the marshmallows are mostly melted. When pressing the mixture into the pan, use a gentle touch. You want the treats to be light and tender, not compacted.
Can I make these treats ahead of time?
Absolutely. These treats actually taste better the next day. Store them in an airtight container at room temperature for up to 3 days. If you need to make them further in advance, you can freeze them for up to 2 months. Just wrap each bar individually in plastic wrap and place them in a freezer bag.
Do I have to use Christmas M&Ms?
Not at all. You can use any color of M&Ms you like. For Valentine’s Day, use pink and red. For Easter, use pastel colors. For a birthday party, use the standard rainbow mix. The recipe works the same way regardless of the color. You can even use mini M&Ms for a more even distribution.
Can I add other mix-ins besides M&Ms?
Yes, this recipe is very flexible. You can stir in mini chocolate chips, crushed candy canes, chopped nuts, or even white chocolate chips. Just keep the total amount of mix-ins to about 1 cup so the treats hold together properly. If you add too many extras, the cereal-to-marshmallow ratio will be off, and the treats may crumble.
Pin This Recipe!
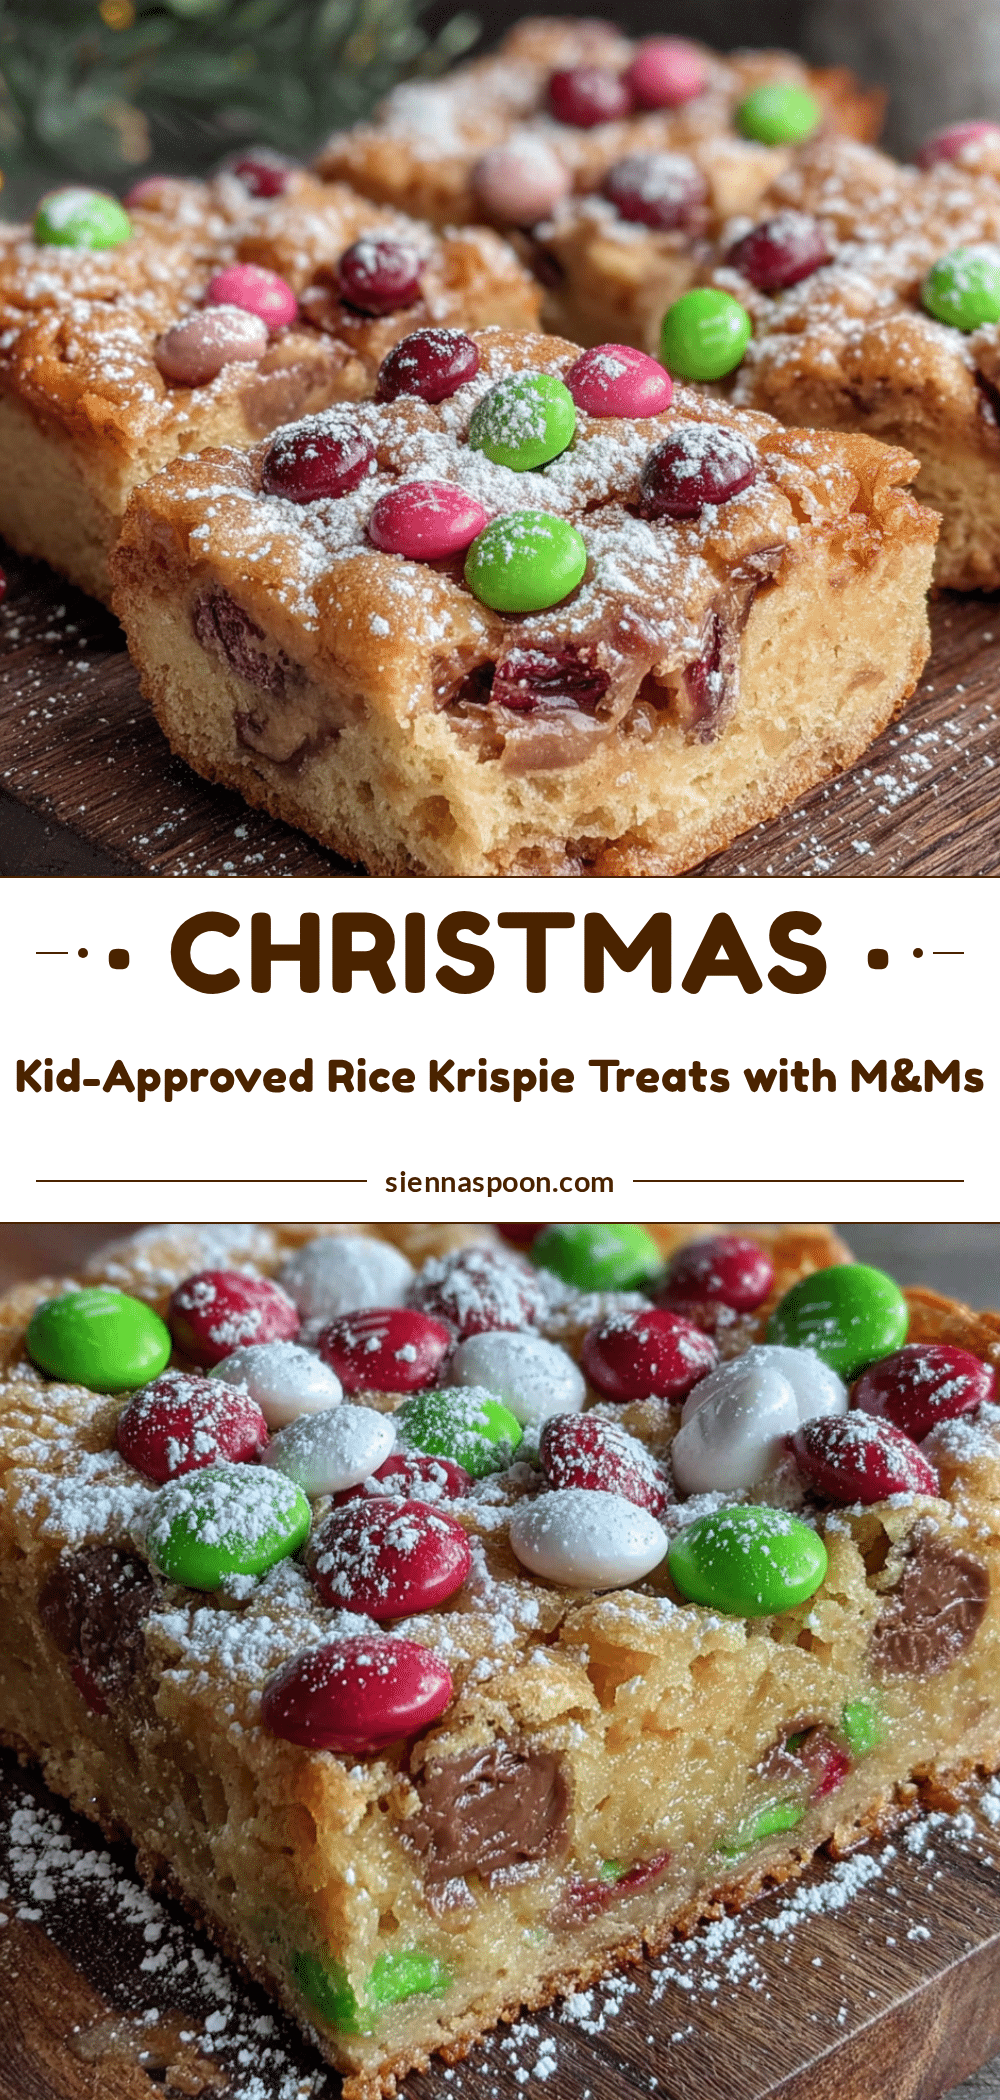
Easy Christmas Rice Krispie Treats with M&Ms

These festive Rice Krispie Treats are made by stirring M&Ms directly into the warm marshmallow mixture, creating perfectly speckled bars with pockets of chocolate in every bite. Quick, easy, and kid-friendly, they are the ultimate holiday treat.
- Prep Time: 10 minutes
- Cook Time: 5 minutes
- Total Time: 45 minutes
- Yield: 12 servings 1x
- Category: Dessert
- Cuisine: American
Ingredients
- 6 tablespoons (85 g) unsalted butter
- 10 ounces (283 g) mini marshmallows
- 6 cups (180 g) Rice Krispies cereal
- 1 cup (200 g) Christmas M&Ms
- 1 teaspoon vanilla extract
- ¼ teaspoon salt
Instructions
- Line a 9×13-inch baking pan with parchment paper, leaving an overhang on the long sides. Lightly grease the parchment with butter or cooking spray. Set aside.
- Place a large pot over medium-low heat and add the butter. Stir occasionally until completely melted. Do not let it brown.
- Add the mini marshmallows to the melted butter. Stir constantly until the marshmallows are about 75% melted (about 3-4 minutes).
- Remove the pot from heat. Stir in the salt and vanilla extract until combined.
- Pour the M&Ms into the warm marshmallow mixture. Stir gently but quickly until evenly distributed.
- Add the Rice Krispies cereal all at once. Fold gently with a silicone spatula until the cereal is just coated (about 30 seconds). Do not over-stir.
- Scrape the mixture into the prepared pan. Use a greased spatula or buttered hands to gently press into an even layer. Do not press too hard.
- Let the treats cool at room temperature for at least 30 minutes. Do not refrigerate.
- Use the parchment paper handles to lift the block out of the pan. Cut into 12 large bars or 24 smaller squares with a sharp knife, wiping the blade clean between cuts.
Notes
For best results, use fresh mini marshmallows and work quickly once the marshmallows are melted. Do not refrigerate the treats as they will become hard. The M&Ms should be stirred into the marshmallow mixture before adding the cereal to ensure even distribution. If the mixture becomes too stiff, microwave the pot for 5-10 seconds to soften.
Nutrition
- Serving Size: 1 large bar
- Calories: 280
- Sugar: 30
- Sodium: 180
- Fat: 10
- Saturated Fat: 6
- Carbohydrates: 46
- Fiber: 1
- Protein: 2
Keywords: Christmas Rice Krispie Treats, M&Ms, holiday treats, easy dessert, no-bake, kid-friendly, Christmas baking