Love this? Save it for later!
Share the inspiration with your friends
My youngest swore she hated sugar cookies for three solid years. Three years. Every birthday party, every bake sale, every holiday gathering—she’d politely pass on the frosted cookies and reach for the brownies instead. I figured it was just a phase, but she was stubborn about it. Then last November, I made a small batch of these turkey cookies “just for the blog photos” while she was at school. I left them cooling on the counter, royal icing drying to a perfect matte finish, and went to pick up her brother from practice. I came home to find her at the kitchen table, a half-eaten turkey leg in one hand and icing smeared across her cheek. She looked up at me with this guilty little grin and said, “Okay, these are actually good.” That was the moment I knew we had something special here.
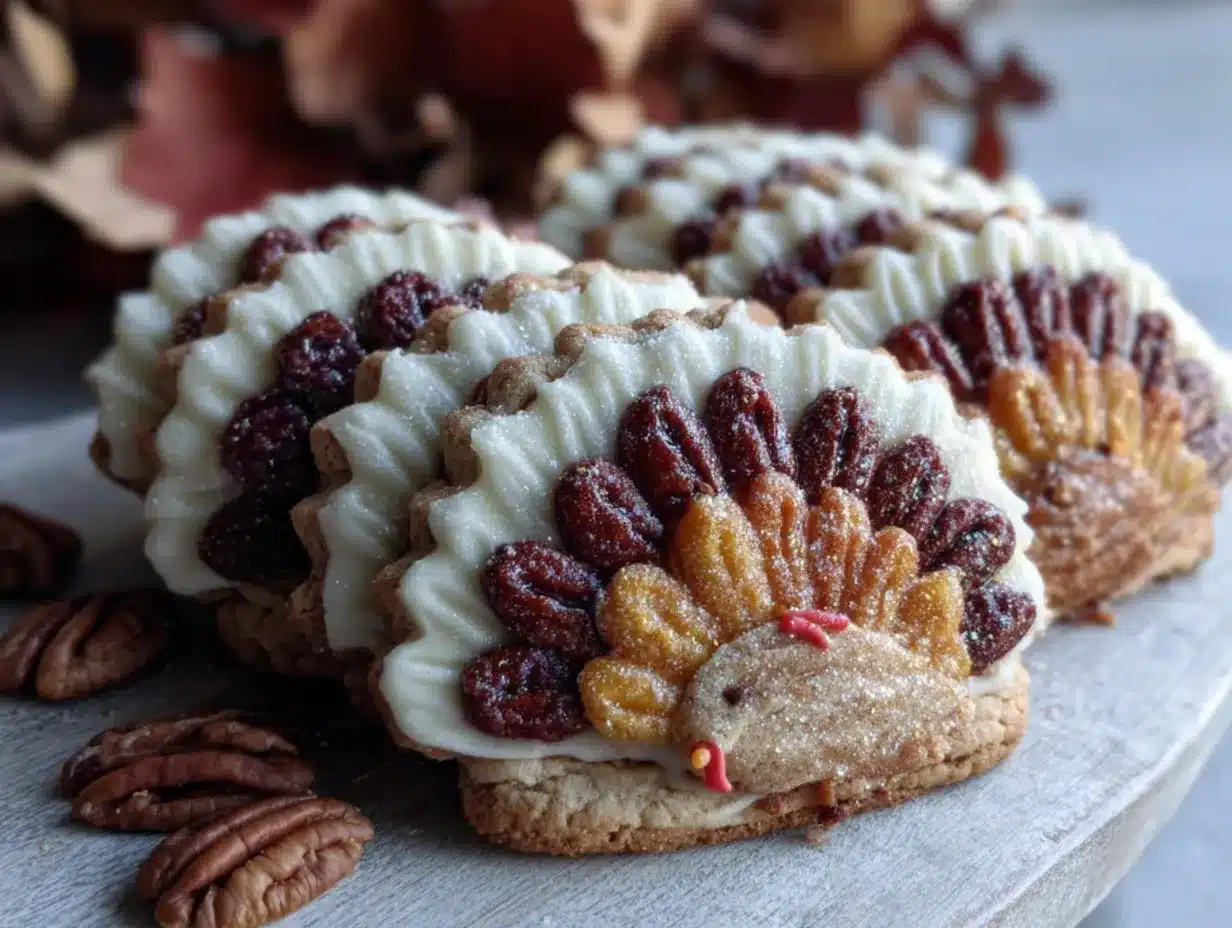
These kid-friendly royal icing turkey sugar cookies have become our Thanksgiving tradition ever since. They’re not just cute—they’re genuinely delicious, with a soft, buttery cookie base that holds up perfectly to decorating. And honestly, the royal icing sets firm enough that little fingers don’t make a mess, which is a game-changer when you’re baking with kids. Maybe you’ve been there, wrestling with sticky frosting that never quite dries, ending up with more on the table than on the cookies. That’s exactly why I kept tweaking this recipe until it worked for real life, not just for pretty pictures. Let me tell you, watching my sugar-cookie-skeptic daughter teach her friends how to pipe turkey feathers last Thanksgiving made all those kitchen disasters totally worth it.
Why You’ll Love This Recipe
I’ve tested this recipe more times than I care to count, and here’s what makes it stand out from every other sugar cookie you’ve tried. First off, the cookie dough itself is practically foolproof—no chilling required, which means you can go from mixing to baking in under fifteen minutes. That’s huge when you’re managing a kitchen full of excited kids on Thanksgiving morning.
- Quick & Easy: From start to finish, these come together in about 45 minutes, including decorating time. Perfect for those “I need a fun activity NOW” moments during holiday break.
- Simple Ingredients: Butter, sugar, flour, eggs—all pantry staples you probably already have. No hunting down specialty baking supplies at the last minute.
- Perfect for Thanksgiving: Whether you’re making them for a classroom party, a family gathering, or just a rainy afternoon activity, these turkeys fit right in.
- Crowd-Pleaser: Even my sugar-cookie-hating daughter loves these. The texture is soft but sturdy, and the royal icing adds just the right amount of sweetness without being overwhelming.
- Unbelievably Delicious: The secret is a touch of almond extract in the dough—it gives these cookies a flavor that’s somehow both familiar and special. You’ll get compliments every single time.
What makes these different from other decorated sugar cookies is the royal icing recipe itself. I spent months perfecting the consistency—it needs to be thin enough to pipe smoothly but thick enough to hold its shape on the cookie. Plus, it dries completely hard, which means you can stack these cookies for storage without smudging. No more ruined designs from wrapping them in plastic wrap. This isn’t just another turkey cookie recipe—it’s the one that actually works for busy families who want beautiful results without the stress.
What Ingredients You Will Need
This recipe uses simple, wholesome ingredients that come together to create cookies that are both beautiful and delicious. Most of these are probably already in your pantry, which makes this a great last-minute baking project.
For the Sugar Cookies
- 1 cup (226g) unsalted butter, softened to room temperature (I prefer using European-style butter like Kerrygold for richer flavor, but any unsalted butter works fine)
- 1 cup (200g) granulated sugar
- 1 large egg, room temperature
- 1 teaspoon vanilla extract (use pure vanilla if you have it—the flavor difference is noticeable)
- ½ teaspoon almond extract (this is my secret ingredient—don’t skip it!)
- 2 ½ cups (312g) all-purpose flour (spoon and level for accuracy)
- ½ teaspoon baking powder
- ¼ teaspoon salt
For the Royal Icing
- 3 cups (360g) powdered sugar, sifted (trust me on this—sifting prevents lumps)
- 2 tablespoons (30ml) meringue powder (I recommend Wilton brand for consistent results)
- 4-5 tablespoons (60-75ml) water, room temperature
- ½ teaspoon vanilla extract (optional, but adds nice flavor)
- Gel food coloring: brown, orange, red, yellow, and green (Americolor or Wilton gels work best—liquid food coloring will thin the icing too much)
For Decorating
- Piping bags (disposable or reusable—both work fine)
- Small round piping tips (sizes #2 and #3 are perfect for detail work)
- Candy eyes (optional, but kids love them)
- Edible glitter or sprinkles (for extra sparkle, especially for the feathers)
When choosing your butter, make sure it’s truly softened—you should be able to press your finger into it easily without it being greasy or melted. For the flour, I always recommend weighing it if you have a kitchen scale. Cup measurements can vary wildly depending on how you scoop, and sugar cookies are finicky about flour ratios. If you’re using cups, fluff the flour first with a fork, then spoon it into your measuring cup and level it off with a knife. That simple step prevents dry, crumbly cookies every time.
Equipment Needed
You don’t need a professional bakery setup for these cookies, but having the right tools makes the process much smoother. Here’s what you’ll need:
- Turkey cookie cutter (about 3-4 inches in size—I found mine at a craft store for under $5, but you can also find them online)
- Stand mixer or hand mixer (a hand mixer works perfectly fine; I actually prefer it for smaller batches)
- Baking sheets (heavy-duty aluminum sheets give the most even baking)
- Parchment paper (non-stick and makes cleanup a breeze)
- Cooling rack (essential for royal icing—cookies need to be completely cool before decorating)
- Piping bags and tips (if you don’t have piping bags, you can use zip-top bags with a tiny corner snipped off)
- Small bowls for separating icing colors
- Toothpicks (for spreading icing into tight spots and popping air bubbles)
- Damp paper towel (to keep over piping tips from drying out while you work)
If you don’t have a turkey cookie cutter, don’t worry—you can use a large round cutter and create turkey shapes freehand with the icing. I’ve done this before when I misplaced my cutter mid-baking session, and honestly, the freehand versions had more personality. Just trace a rough turkey outline with a toothpick before piping, and you’re good to go.
Preparation Method
Let me walk you through this step by step. I’ve made these cookies at least two dozen times, so I know exactly where things can go wrong and how to fix them.
- Preheat and prepare. Preheat your oven to 350°F (175°C). Line two baking sheets with parchment paper and set them aside. This seems basic, but having your pans ready before you start mixing makes everything flow better.
- Cream the butter and sugar. In a large mixing bowl, beat the softened butter and granulated sugar together on medium speed until light and fluffy—about 3 minutes. You’re looking for a pale yellow color and a texture that looks almost like wet sand. Scrape down the sides of the bowl halfway through. Don’t rush this step; proper creaming is what gives your cookies that tender texture.
- Add the wet ingredients. Beat in the egg, vanilla extract, and almond extract until fully combined. The mixture might look slightly curdled at this point—that’s totally normal. Just keep mixing until it comes back together into a smooth, glossy paste.
- Mix the dry ingredients. In a separate bowl, whisk together the flour, baking powder, and salt. Gradually add this to the wet mixture, mixing on low speed until just combined. Here’s the important part: stop mixing as soon as you don’t see any more streaks of flour. Overmixing develops gluten and makes your cookies tough. I’ve ruined countless batches by getting distracted and letting the mixer run too long.
- Roll and cut. Lightly flour your work surface and rolling pin. Roll the dough out to about ¼-inch thickness. If the dough feels sticky, dust with a little more flour—but go easy, because too much flour makes dry cookies. Cut out your turkey shapes and place them about 2 inches apart on the prepared baking sheets. Gather the scraps, re-roll, and cut again. You should get about 18-20 cookies depending on your cutter size.
- Bake. Bake for 8-10 minutes, or until the edges are just barely starting to turn golden brown. The centers will still look slightly soft—that’s perfect. They’ll continue cooking on the hot baking sheet after you pull them out. Let them cool on the baking sheet for 5 minutes, then transfer to a wire rack to cool completely. And I mean completely—warm cookies will melt royal icing into a sad, runny mess.
- Make the royal icing. While the cookies cool, make your icing. In a clean bowl, combine the sifted powdered sugar and meringue powder. Add 4 tablespoons of water and the vanilla extract, then beat on low speed for about 4 minutes. The icing should be thick but flow slowly—think honey consistency. If it’s too thick, add water a teaspoon at a time. If it’s too thin, add more powdered sugar. The perfect test: when you lift the beater, the icing should fall in a ribbon that holds its shape on the surface for about 5 seconds before sinking back in.
- Color and bag the icing. Divide your icing into separate bowls for each color you need. I usually make brown for the turkey body, orange for the beak and feet, red for the wattle, and then a mix of fall colors for the feathers. Add gel food coloring drop by drop until you reach your desired shade. Transfer each color to a piping bag fitted with a small round tip. If you don’t have multiple tips, you can use one and just wipe it clean between colors—it’s a bit more work but totally doable.
- Outline and flood. Start by outlining the turkey body with brown icing. Then thin that same brown icing with a few drops of water until it’s the consistency of warm maple syrup—this is your “flood” icing. Fill in the outlined area with the flood icing, using a toothpick to spread it into corners and pop any air bubbles. Repeat this process for the feathers, using your fall colors. Let the base colors dry for at least 30 minutes before adding details.
- Add details. Once the base colors are set, pipe on the beak, wattle, eyes, and feather details. This is where kids can really go wild—let them experiment with different patterns and colors. If you’re using candy eyes, press them gently into the wet icing on the turkey’s face.
- Let dry completely. Royal icing needs at least 4-6 hours to dry completely, but overnight is best. Don’t rush this step—stacking or storing cookies with wet icing will ruin all your hard work. I usually decorate in the evening and let them dry overnight on the counter.
Cooking Tips & Techniques
After making these cookies more times than I can count, I’ve collected a few tricks that make the process smoother and the results more consistent. Let me share the ones that saved my sanity.
The dough temperature trick. If your dough feels too soft to roll, don’t add more flour—pop it in the fridge for 15 minutes instead. Chilled dough rolls out much cleaner and holds its shape better during baking. I learned this the hard way after adding too much flour to sticky dough and ending up with cookies that tasted like cardboard. Now I chill first, flour second.
Consistency is everything with royal icing. This is the biggest hurdle for most home bakers. Your outline icing should be stiff enough to hold a peak but soft enough to pipe smoothly. Your flood icing should flow like warm honey—when you drizzle it from a spoon, it should disappear into the surface in about 10 seconds. Too thick, and it won’t self-level. Too thin, and it’ll run right off the cookie. I test every batch on a spare cookie before starting the real ones.
Keep your piping tips moist. Royal icing dries fast, and nothing is more frustrating than a clogged tip mid-pipe. When you’re switching colors or taking a break, cover your piping tips with a damp paper towel. This gives you a few extra minutes of working time before the icing starts crusting over.
Work in batches. Don’t try to decorate all 20 cookies at once. Outline and flood 4-5 cookies at a time, then move on. This prevents the icing from drying before you can flood it, which creates ugly ridges between the outline and the fill. I usually work in rounds—outline all cookies first, then flood them in small groups.
The toothpick method for air bubbles. Those tiny air bubbles in your flood icing are inevitable. Keep a toothpick handy and pop them as soon as you see them. If you wait until the icing starts to set, you’ll be left with little craters that are impossible to fix.
Variations & Adaptations
One of the best things about this recipe is how adaptable it is. Here are some variations I’ve tried and loved:
Gluten-Free Version: Swap the all-purpose flour for a 1:1 gluten-free baking flour blend. I’ve had great results with King Arthur’s Measure for Measure flour. Just add an extra tablespoon of milk to the dough since gluten-free flours tend to absorb more liquid. The texture is slightly more tender, but the flavor is spot-on.
Dairy-Free Option: Use vegan butter sticks instead of regular butter. I recommend Earth Balance or Miyoko’s—they have the right fat content for sugar cookies. The dough will be a bit softer, so definitely chill it for 30 minutes before rolling. The royal icing is naturally dairy-free as long as you skip the vanilla extract that contains alcohol (most pure vanilla extracts are fine, but check the label).
Different Holiday Shapes: This cookie and icing recipe works for any occasion. Use Christmas tree cutters in December, heart shapes for Valentine’s Day, or flower shapes for spring. The royal icing recipe is the same—just change your colors and decorating details. I’ve made these for every holiday since I perfected the recipe, and they’re always a hit.
Natural Food Coloring: If you’re avoiding artificial colors, you can use natural alternatives. Beet powder gives you pink and red, turmeric creates yellow, and matcha powder makes green. The colors will be more muted than gel food coloring, but they have a lovely earthy quality that I actually prefer for fall-themed cookies.
Mini Cookie Version: Use a smaller turkey cutter to make bite-sized cookies perfect for classroom parties or snack plates. Reduce the baking time to 6-7 minutes and watch them carefully—small cookies burn fast. Kids love having their own tiny turkey to decorate, and they’re less overwhelming for little hands to hold.
Serving & Storage Suggestions
These turkey cookies are best served at room temperature, and they actually taste even better the day after baking—the flavors have time to meld, and the royal icing sets to that perfect snap that contrasts with the soft cookie underneath.
Presentation ideas: Arrange them on a platter in a fan pattern, with the turkey feathers pointing outward. For Thanksgiving, I like to place them around a small pumpkin or gourd centerpiece. Kids love having their own cookie to decorate and then display on the dessert table before eating. If you’re bringing them to a party, arrange them in a single layer in a shallow box or on a large plate—stacking them, even with fully dried icing, can cause scratches.
Storage: Once the royal icing is completely dry (overnight is safest), store the cookies in an airtight container at room temperature. Place them in a single layer with parchment paper between layers if you must stack them. They’ll stay fresh for up to two weeks—though I doubt they’ll last that long. Don’t refrigerate them, as the moisture in the fridge can make the royal icing sticky and the cookies soft.
Freezing: You can freeze the undecorated baked cookies for up to three months. Just wrap them tightly in plastic wrap and then foil. When you’re ready to decorate, thaw them at room temperature for about an hour, then proceed with the royal icing. I’ve done this many times when I wanted to spread the baking and decorating across different days. The cookies taste just as fresh.
Reheating: These cookies don’t need reheating, but if you want that fresh-baked warmth, pop one in the microwave for 5-7 seconds. Just be careful not to overheat, or the royal icing can crack. Honestly, I prefer them at room temperature—the texture is better and the icing stays perfectly intact.
How flavors develop: The almond extract flavor actually becomes more pronounced after a day or two. I’ve noticed that cookies decorated and stored for 24 hours have a deeper, more complex flavor than freshly baked ones. So don’t feel bad about making them ahead—they’re actually better that way.
Nutritional Information & Benefits
Let’s be real—these are sugar cookies with royal icing, so they’re a treat, not a health food. But here’s what you should know:
Estimated nutrition per cookie (based on 20 cookies):
- Calories: 185
- Fat: 8g
- Carbohydrates: 28g
- Protein: 2g
- Sugar: 18g
- Sodium: 45mg
Dietary considerations: This recipe contains dairy (butter), eggs, and gluten (flour). For allergen-free versions, check the variations section above. The royal icing is egg-free since we use meringue powder, which is made from dried egg whites—but if you have an egg allergy, look for egg-free meringue powder or use a simple powdered sugar glaze instead.
Health benefits of key ingredients: On the positive side, butter contains vitamin A and healthy fats that support brain function in moderation. The almond extract adds flavor without extra sugar or calories. And honestly, the biggest benefit here is the joy of creating something beautiful with your kids—that’s good for the soul, even if it’s not on the nutrition label. These cookies are about connection, creativity, and celebration, not about counting calories.
Portion control tip: Because these cookies are so satisfying (that combination of soft cookie and sweet icing is really something), one or two is usually enough. I’ve found that having a smaller cookie that’s beautifully decorated feels more special than a giant, sloppy one—and you’re less likely to overeat.
Conclusion
These kid-friendly royal icing turkey sugar cookies have become so much more than just a recipe in my kitchen. They’re the reason my daughter finally admitted that sugar cookies can be amazing. They’re the activity that keeps little hands busy while the turkey roasts. They’re the dessert that makes everyone at the Thanksgiving table smile, from the youngest cousin to the grumpiest uncle.
What I love most about this recipe is how forgiving it is. The dough doesn’t require chilling, the icing dries hard enough to stack, and the decorating possibilities are endless. You can make them as simple or as elaborate as you want—they’ll be beautiful either way. And honestly, the slightly imperfect ones made by little hands are always my favorites.
I’d love to hear how your turkey cookies turn out. Did your kids come up with any creative decorating ideas? Did you try any of the variations? Drop a comment below and share your cookie creations—I read every single one and I always respond. And if you’re looking for more Thanksgiving baking ideas, don’t forget to check out my pumpkin pie bites and cranberry orange scones—they’re perfect for rounding out your holiday dessert table.
Happy baking, friends. May your icing be smooth, your cookies be soft, and your Thanksgiving be filled with love and laughter.
Frequently Asked Questions
Can I make the cookie dough ahead of time?
Absolutely. You can prepare the dough up to 3 days in advance and keep it wrapped tightly in the refrigerator. Let it sit at room temperature for about 15 minutes before rolling—it’ll be easier to work with. You can also freeze the unbaked dough for up to 3 months. Just thaw it overnight in the fridge before using.
Why did my royal icing turn out runny?
This usually happens when you add too much water. Royal icing is finicky about liquid ratios. If your icing is too thin, add more sifted powdered sugar a tablespoon at a time until it thickens up. If it’s too thick, add water a few drops at a time. The key is making small adjustments and testing the consistency frequently. Also, make sure you’re using meringue powder—it’s essential for structure.
How long do decorated cookies last?
Stored properly in an airtight container at room temperature, these cookies will stay fresh for up to 2 weeks. The royal icing will remain hard and shiny, and the cookie itself will stay soft. After about 2 weeks, the cookie may start to dry out slightly, but they’re still perfectly edible. I’ve never had a batch last that long though—they disappear fast!
Can I use liquid food coloring instead of gel?
You can, but I don’t recommend it. Liquid food coloring adds extra moisture to the royal icing, which can throw off the consistency. You’d need to add more powdered sugar to compensate, which changes the flavor and texture. Gel food coloring is much more concentrated, so you use less, and it doesn’t affect the icing’s structure. A small set of gel colors will last you through many baking projects.
My cookies spread too much during baking. What went wrong?
Spread usually happens for one of three reasons: the butter was too soft or melted, the dough wasn’t chilled enough, or there wasn’t enough flour. Make sure your butter is softened but not greasy—you should be able to press it without your finger sliding through. If your kitchen is warm, chill the cut-out cookies on the baking sheet for 10 minutes before baking. And always measure your flour correctly—spoon and level, never scoop directly from the bag.
Pin This Recipe!
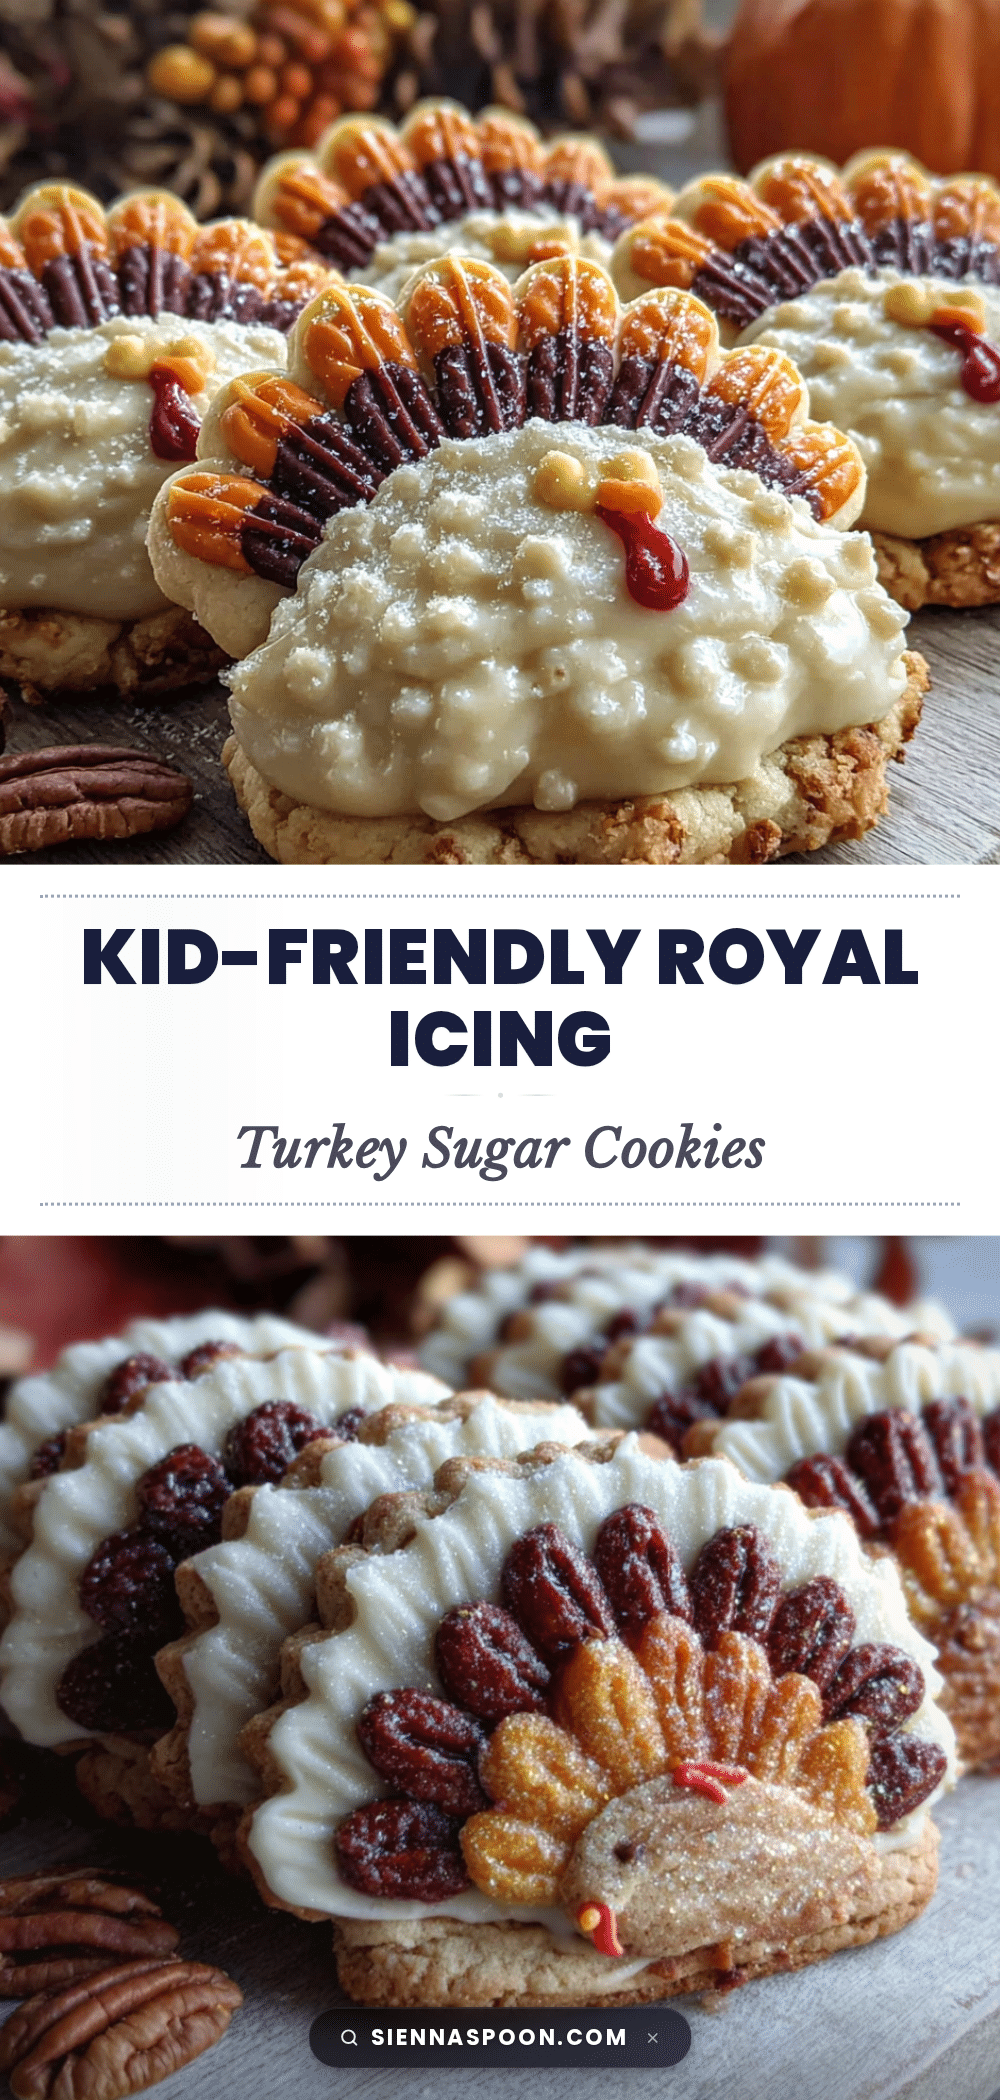
Perfect Kid-Friendly Royal Icing Turkey Sugar Cookies

These soft, buttery sugar cookies are topped with a perfectly set royal icing and decorated as adorable turkeys. They’re a foolproof, no-chill dough recipe that’s ideal for baking with kids and makes a festive Thanksgiving treat.
- Prep Time: 15 minutes
- Cook Time: 10 minutes
- Total Time: 45 minutes (plus decorating and drying time)
- Yield: 18-20 cookies 1x
- Category: Dessert
- Cuisine: American
Ingredients
- 1 cup (226g) unsalted butter, softened to room temperature
- 1 cup (200g) granulated sugar
- 1 large egg, room temperature
- 1 teaspoon vanilla extract
- ½ teaspoon almond extract
- 2 ½ cups (312g) all-purpose flour, spooned and leveled
- ½ teaspoon baking powder
- ¼ teaspoon salt
- 3 cups (360g) powdered sugar, sifted
- 2 tablespoons (30ml) meringue powder
- 4–5 tablespoons (60-75ml) water, room temperature
- ½ teaspoon vanilla extract (optional)
- Gel food coloring: brown, orange, red, yellow, and green
- Piping bags
- Small round piping tips (sizes #2 and #3)
- Candy eyes (optional)
- Edible glitter or sprinkles (optional)
Instructions
- Preheat oven to 350°F (175°C). Line two baking sheets with parchment paper.
- In a large bowl, beat softened butter and granulated sugar on medium speed until light and fluffy, about 3 minutes. Scrape down sides halfway through.
- Beat in egg, vanilla extract, and almond extract until fully combined and smooth.
- In a separate bowl, whisk together flour, baking powder, and salt. Gradually add to wet mixture on low speed until just combined. Do not overmix.
- Lightly flour work surface and rolling pin. Roll dough to ¼-inch thickness. Cut out turkey shapes and place 2 inches apart on prepared baking sheets. Re-roll scraps and cut again (yields about 18-20 cookies).
- Bake for 8-10 minutes, until edges just start to turn golden. Centers will look soft. Cool on baking sheet for 5 minutes, then transfer to wire rack to cool completely.
- For royal icing: In a clean bowl, combine sifted powdered sugar and meringue powder. Add 4 tablespoons water and vanilla extract. Beat on low speed for 4 minutes until thick but flows slowly (honey consistency). Adjust with water or powdered sugar as needed.
- Divide icing into bowls for each color. Add gel food coloring drop by drop. Transfer each color to a piping bag fitted with a small round tip.
- Outline turkey body with brown icing. Thin remaining brown icing with a few drops of water to flood consistency (warm maple syrup). Fill outlined area with flood icing, using a toothpick to spread and pop bubbles. Repeat for feathers with fall colors. Let base colors dry for at least 30 minutes.
- Pipe on beak, wattle, eyes, and feather details. Press candy eyes into wet icing if using.
- Let dry completely, at least 4-6 hours or overnight, before storing.
Notes
The dough does not require chilling. For best results, use gel food coloring instead of liquid to avoid thinning the icing. Royal icing must dry completely (overnight recommended) before stacking. Cookies can be stored in an airtight container at room temperature for up to 2 weeks. Undecorated baked cookies can be frozen for up to 3 months.
Nutrition
- Serving Size: 1 cookie
- Calories: 185
- Sugar: 18
- Sodium: 45
- Fat: 8
- Saturated Fat: 5
- Carbohydrates: 28
- Protein: 2
Keywords: turkey cookies, sugar cookies, royal icing, Thanksgiving cookies, kid-friendly, decorated cookies, fall baking


