Love this? Save it for later!
Share the inspiration with your friends
It was 10:47 PM on a random Tuesday in October, and I was standing in front of my pantry with the kind of craving that makes you question your life choices. I wanted pumpkin pie—the real thing, with the flaky crust and the wobble in the center. But I didn’t have a pie plate clean, I didn’t have the energy to make pastry dough from scratch, and honestly, I was wearing sweatpants that had already seen better days. What I did have was a box of yellow cake mix, a can of pumpkin puree from last week’s soup experiment, and a half-empty bag of white chocolate chips that were probably expired. And then the idea arrived—what if I just smashed all the flavors of pumpkin pie into a cake pop? No rolling pin, no pie weights, no fuss. Just pure, handheld pumpkin bliss.
I mean, let me be honest here—I wasn’t expecting much. Cake pops can be finicky, right? They crumble, they fall off the stick, they look like sad little meatballs. But that night, something clicked. Maybe it was the late hour loosening my usual perfectionism, or maybe it was the fact that I didn’t care if they turned out ugly. I just wanted that warm, spiced, pumpkin-y taste without the production of a full pie. So I mixed, I baked, I crumbled, I rolled, and I dipped. And when I bit into that first Easy Pumpkin Pie Cake Pop, I actually laughed out loud. It was ridiculous. It was perfect. It was everything I wanted and nothing I expected.
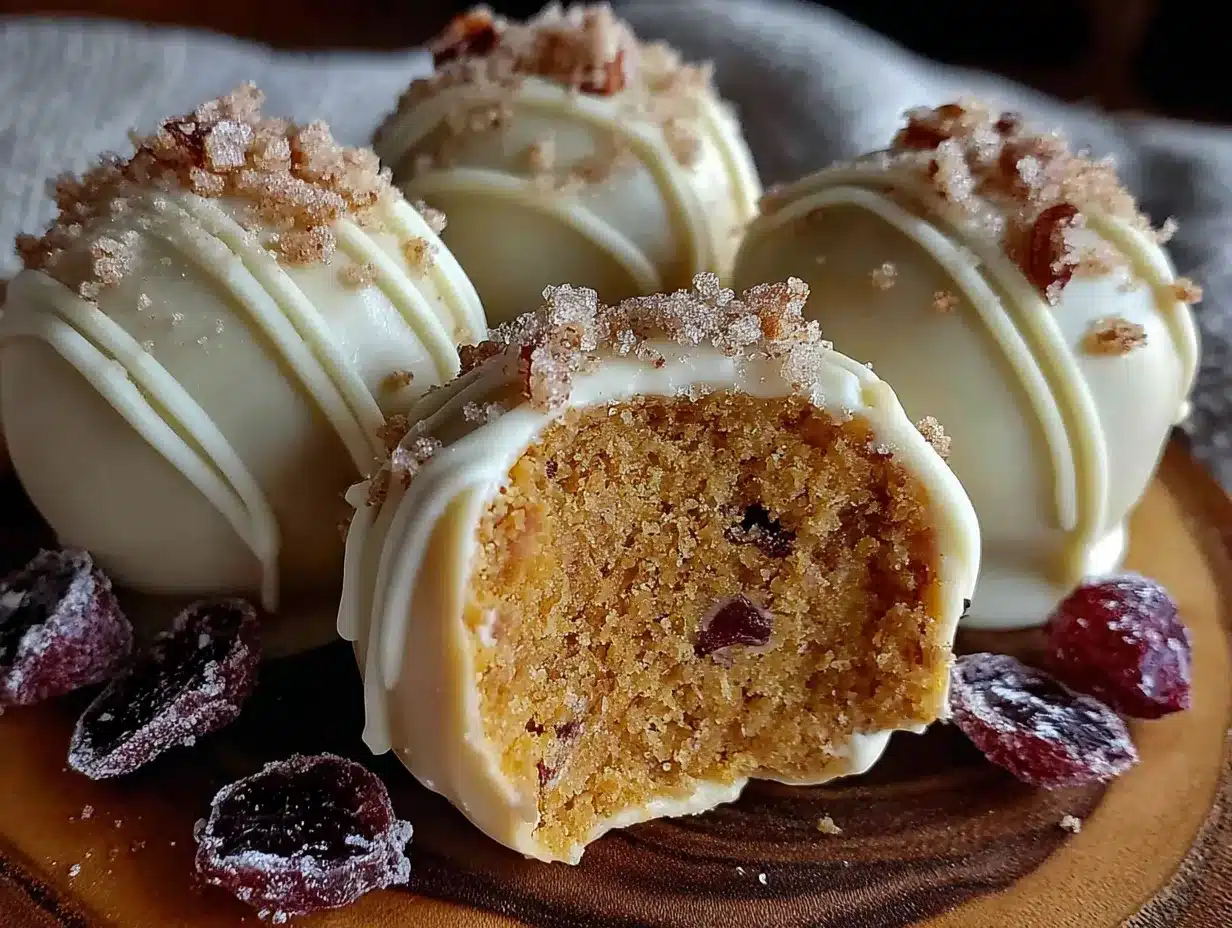
The texture was soft and tender, like the inside of a good pumpkin pie, but wrapped in a thin shell of white chocolate that cracked just slightly when you bit down. The spices—cinnamon, nutmeg, ginger—hit you right away, warm and familiar, like your grandma’s kitchen at Thanksgiving. But here’s the thing: these little guys take about half the time of a traditional pumpkin pie, and they don’t require any fancy piping skills or candy thermometers. They’re forgiving. They’re fun. They’re the kind of dessert you make when you want to impress people but also want to watch Netflix while you do it. And honestly? That’s my favorite kind of recipe.
Why You’ll Love This Recipe
These Easy Pumpkin Pie Cake Pops have become my secret weapon for fall gatherings, and let me tell you why they’re different from every other cake pop recipe you’ve seen. I’ve tested this method about seven times now, tweaking the moisture level, adjusting the spice blend, and figuring out the exact chilling time so the pops don’t slide off the stick. This isn’t just another version—it’s the version that actually works for real people with real kitchens and real time constraints.
- Quick & Easy: From start to finish, you’re looking at about 45 minutes of active time, plus some chill time. That’s way faster than making a full pumpkin pie from scratch.
- Simple Ingredients: You probably already have most of these in your pantry. Cake mix, pumpkin puree, eggs, oil, and basic spices. No weird extracts or specialty items.
- Perfect for Fall Gatherings: These are ideal for Halloween parties, Thanksgiving potlucks, or just a cozy night in when you want something sweet without the commitment of a whole pie.
- Crowd-Pleaser: I brought these to a Friendsgiving last year, and they disappeared before the actual pie did. Kids love them, adults love them, and they’re portable enough to take anywhere.
- Unbelievably Delicious: The combination of tender pumpkin cake with that creamy white chocolate coating creates a texture that’s honestly addictive. You’ve been warned.
What makes this recipe stand out is the technique. Instead of using traditional cake pop mix that can get gummy, I use a specific ratio of cake to frosting that keeps the center light and fluffy, almost like a pumpkin mousse. And the spice blend? I spent three batches getting it exactly right—enough warmth to feel like pumpkin pie, but not so much that it overpowers the pumpkin itself. This is the kind of dessert that makes you close your eyes after the first bite. It’s comfort food reimagined—faster, simpler, but with the same soul-soothing satisfaction that only pumpkin spice can deliver.
What Ingredients You Will Need
This recipe uses simple, wholesome ingredients to deliver big pumpkin flavor without the fuss. Most of these are pantry staples, especially if you do any fall baking. Here’s what you’ll need and why each ingredient matters.
For the Pumpkin Cake Base
- 1 box (15.25 oz) yellow cake mix (I prefer Duncan Hines for its consistent texture, but any brand works)
- 1 cup pumpkin puree (not pumpkin pie filling—make sure it’s 100% pure pumpkin. Libby’s is my go-to)
- 2 large eggs, room temperature (room temp eggs help the batter emulsify better)
- 1/3 cup vegetable oil (canola or melted coconut oil also works)
- 1 teaspoon pumpkin pie spice (or make your own blend—see note below)
- 1/2 teaspoon ground cinnamon (I add extra because I’m a cinnamon fiend)
- 1/4 teaspoon ground ginger (adds that little warmth in the back of your throat)
- 1/8 teaspoon ground cloves (just a pinch—cloves are powerful)
For the Binding Frosting
- 1/4 cup cream cheese frosting (store-bought is fine, or use my quick recipe in the notes)
- 2 tablespoons pumpkin puree (extra for moisture and flavor)
- 1/4 teaspoon vanilla extract (adds depth to the sweetness)
For Coating and Decoration
- 12 oz white chocolate melting wafers (I use Ghirardelli—they melt smoothly and set with a nice snap)
- 1 tablespoon coconut oil or shortening (this thins the chocolate for easier dipping)
- Orange gel food coloring (optional, but makes them look more pumpkin-y)
- Fall sprinkles (cinnamon sugar, orange jimmies, or crushed graham crackers work great)
- Lollipop sticks (about 20-24, depending on how big you roll your pops)
Ingredient Selection Tips: When choosing pumpkin puree, look for cans that say “100% pure pumpkin” and avoid anything labeled “pumpkin pie filling” which has added sugar and spices. For the cake mix, I’ve tested both generic and name-brand, and honestly, the name-brand mixes give a fluffier crumb. But in a pinch, store brand works—just add an extra tablespoon of pumpkin puree to compensate for the drier mix.
Substitution Guidance: If you’re gluten-free, use a gluten-free yellow cake mix and check your pumpkin puree label (most are naturally GF). For a dairy-free version, use dairy-free cream cheese frosting and vegan white chocolate. And if you don’t have pumpkin pie spice, mix 1/2 teaspoon cinnamon, 1/4 teaspoon nutmeg, 1/4 teaspoon ginger, and a tiny pinch of allspice.
Equipment Needed
You don’t need a ton of fancy equipment for these Easy Pumpkin Pie Cake Pops, which is part of the beauty. Here’s what I use and what you can substitute if you’re improvising.
- 9×13-inch baking pan (a standard sheet pan works too, but the cake will be thinner and bake faster)
- Large mixing bowl and whisk (or a hand mixer if you’re feeling fancy)
- Cookie scoop (I use a 1.5-tablespoon scoop for uniform pops—this is worth buying if you make cake pops often)
- Baking sheet lined with parchment paper (for chilling the pops before dipping)
- Microwave-safe bowl (for melting the white chocolate)
- Styrofoam block or floral foam (to hold the pops upright while they set—I’ve also used a cardboard box with holes poked in it)
- Lollipop sticks (available at craft stores or online; Wilton brand is reliable)
Personal Note: I used to skip the cookie scoop and just eyeball the portions, and let me tell you, my cake pops looked like they’d been in a fight. A uniform size isn’t just about aesthetics—it ensures even chilling and dipping. The scoop was like five bucks at a kitchen supply store, and it’s saved me so much frustration.
Preparation Method
Alright, let’s get into the nitty-gritty. I’ve broken this down into clear steps with all the little cues that tell you you’re on the right track. Take your time with the chilling steps—they’re not optional, even if you’re impatient like me.
Step 1: Bake the Pumpkin Cake
Preheat your oven to 350°F (175°C). Grease a 9×13-inch baking pan with non-stick spray or butter. In a large bowl, combine the yellow cake mix, 1 cup pumpkin puree, eggs, vegetable oil, pumpkin pie spice, cinnamon, ginger, and cloves. Mix until just combined—about 30 seconds with a whisk or 20 seconds with a hand mixer. Don’t overmix, or the cake will be dense. Pour the batter into the prepared pan and spread it evenly. Bake for 22-25 minutes, or until a toothpick inserted in the center comes out clean. The cake should be golden brown around the edges and spring back when lightly touched. Let it cool completely in the pan on a wire rack—this takes about 45 minutes, but you can speed it up in the fridge for 20 minutes.
Step 2: Crumble and Bind
Once the cake is completely cool, crumble it into a large bowl using your hands or a fork. You want fine, even crumbs—no big chunks. In a separate small bowl, mix the cream cheese frosting, 2 tablespoons pumpkin puree, and vanilla extract until smooth. Add the frosting mixture to the crumbled cake, starting with about 3/4 of it. Mix with your hands (yes, get in there—it’s the best way) until the mixture holds together when squeezed. It should feel like slightly damp sand. If it’s too dry, add the remaining frosting. If it’s too wet (sticky and gloppy), add a tablespoon of crushed graham crackers or vanilla wafer crumbs.
Step 3: Roll and Chill
Using your cookie scoop or a tablespoon, portion out the cake mixture and roll it into smooth balls. I aim for about 1.5 inches in diameter—roughly the size of a walnut. Place them on a parchment-lined baking sheet. You should get 20-24 pops depending on size. Cover the sheet with plastic wrap and refrigerate for at least 1 hour, or up to 24 hours. This step is crucial—if the pops aren’t cold, they’ll fall off the stick when you dip them. Trust me, I learned this the hard way after fishing three sad, chocolate-covered blobs out of my melting wafers.
Step 4: Insert Sticks
After the pops have chilled, remove them from the fridge. Melt about 2 tablespoons of the white chocolate wafers in the microwave (15-second bursts, stirring in between). Dip the tip of each lollipop stick into the melted chocolate, then insert it about halfway into a cake pop. The chocolate acts like glue, holding the stick in place. Return the pops to the fridge for another 15 minutes to set the chocolate.
Step 5: Melt and Color the Coating
Place the remaining white chocolate wafers and coconut oil in a microwave-safe bowl. Microwave in 30-second intervals, stirring thoroughly after each, until completely smooth. If you’re using orange food coloring, add it now—start with 2-3 drops and stir, then add more until you reach your desired shade. The mixture should be thin enough to coat the back of a spoon. If it’s too thick, add another teaspoon of coconut oil.
Step 6: Dip and Decorate
Working with one pop at a time, hold it by the stick and dip it into the melted white chocolate, covering the cake ball completely. Gently tap the stick on the edge of the bowl to let excess chocolate drip off. Don’t swirl—that can break the pop off the stick. Place the dipped pop into your styrofoam block or stand. While the chocolate is still wet, sprinkle with your chosen decorations. Repeat with all pops. Let them set at room temperature for about 30 minutes, or until the chocolate is firm to the touch.
Cooking Tips & Techniques
I’ve made more cake pops than I care to admit, and I’ve messed up plenty along the way. Here are the lessons I learned so you don’t have to repeat my mistakes.
The Temperature Trap: The biggest mistake people make is dipping pops that aren’t cold enough. If your cake pops are even slightly warm, the chocolate coating will seize up and look streaky. Pop them in the freezer for 10 minutes if you’re in a hurry—just don’t leave them in there for hours, or they’ll crack when dipped.
Thinning the Chocolate: White chocolate is notoriously thick. Adding coconut oil or shortening isn’t cheating—it’s smart. It lowers the melting point and gives you a thinner, more even coating. If you skip this step, you’ll end up with clumpy, thick pops that look like they’re wearing winter coats.
The Tap Technique: When you tap the excess chocolate off, tap gently and at a slight angle. If you tap straight down, the pop might fall off. I tap the stick against the side of the bowl about three times, then give it a little twist. This also helps the chocolate settle evenly.
Multitasking Strategy: I like to bake the cake the night before and let it cool overnight. Then the next day, I crumble, roll, and chill while I’m doing other things. The actual dipping only takes about 15 minutes, so it’s easy to fit into a busy afternoon.
The Crumble Test: Before you add all the frosting, take a small handful of crumbs and squeeze. If it holds together without falling apart, you’re good. If it crumbles, add more frosting. If it’s sticky, add more crumbs. This test has saved me more times than I can count.
Variations & Adaptations
One of the best things about these Easy Pumpkin Pie Cake Pops is how adaptable they are. Here are some variations I’ve tried and loved.
Vegan Pumpkin Cake Pops
Use a vegan yellow cake mix, replace the eggs with flax eggs (1 tablespoon ground flax + 3 tablespoons water per egg), and use vegan cream cheese frosting. For the coating, use vegan white chocolate—it’s available at most health food stores. The texture will be slightly denser, but the flavor is still spot-on.
Gluten-Free Version
Swap the yellow cake mix for a gluten-free yellow cake mix (King Arthur Flour’s is excellent). Add an extra 2 tablespoons of pumpkin puree to compensate for the drier gluten-free flour blend. Everything else stays the same. I’ve made these for my gluten-sensitive friends, and they couldn’t tell the difference.
Chocolate Pumpkin Pops
For a darker twist, use a chocolate cake mix instead of yellow. The chocolate-pumpkin combination is surprisingly good—think pumpkin pie meets brownie. Use dark chocolate melting wafers for the coating and sprinkle with sea salt. This version is less sweet and more sophisticated.
Spiced Maple Variation
Add 2 tablespoons of maple syrup to the cake batter and replace the cream cheese frosting with maple-flavored buttercream. For the coating, use white chocolate mixed with a teaspoon of maple extract. The maple-pumpkin combo is pure fall magic.
Serving & Storage Suggestions
These cake pops are best served at room temperature, which lets the coating soften slightly and the pumpkin flavor shine. If you’ve stored them in the fridge, let them sit out for 15-20 minutes before serving.
Presentation Ideas: Arrange them on a tiered serving tray for a party, or place each pop in a small treat bag tied with orange ribbon for party favors. I like to serve them on a bed of crushed graham crackers to mimic a pie crust—it’s a cute visual nod to the pumpkin pie inspiration.
Storage Instructions: Store the cake pops in an airtight container in the refrigerator for up to 5 days. Layer them between sheets of parchment paper to prevent sticking. For longer storage, freeze them for up to 3 months. To freeze, place the pops on a baking sheet and freeze until solid (about 2 hours), then transfer to a freezer-safe bag. Thaw in the refrigerator overnight before serving.
Flavor Development: Here’s a little secret—these actually taste better the next day. The spices meld with the pumpkin, and the cake becomes more moist. So if you can resist eating them all on day one, you’re in for a treat on day two.
Nutritional Information & Benefits
One Easy Pumpkin Pie Cake Pop (based on 24 pops) contains approximately:
- Calories: 185
- Fat: 9g
- Carbohydrates: 25g
- Protein: 2g
- Fiber: 1g
- Sugar: 16g
Health Benefits: Pumpkin is packed with vitamin A (over 200% of your daily needs in one cup), which supports eye health and immune function. It’s also rich in fiber and antioxidants. The cinnamon and ginger in the spice blend have anti-inflammatory properties. While this is definitely a treat, it’s a treat with some nutritional upside—unlike a lot of dessert options.
Dietary Considerations: This recipe contains gluten, dairy, and eggs. For allergen-friendly alternatives, see the variations section above. The recipe can be made nut-free by checking your ingredients (some white chocolates are processed on shared equipment).
Conclusion
These Easy Pumpkin Pie Cake Pops have become a staple in my fall baking rotation, and I honestly think they will in yours too. They capture everything I love about pumpkin pie—the warm spices, the tender texture, the nostalgic comfort—without the stress of rolling pastry dough or worrying about a soggy crust. They’re forgiving enough for beginners, impressive enough for guests, and quick enough for those late-night cravings that started this whole adventure.
I want you to make these your own. Add extra cinnamon if that’s your thing. Roll them bigger or smaller. Dip them in dark chocolate or drizzle them with caramel. The recipe is a starting point, not a rulebook. And when you make them, I’d love to hear how they turned out. Drop a comment below, tag me in your photos, or tell me about your own late-night kitchen experiments. Because honestly, that’s where the best recipes come from—when you stop trying to be perfect and start having fun with what you’ve got.
So go ahead. Grab that can of pumpkin, preheat your oven, and make some magic. Your taste buds will thank you, and honestly? You deserve it.
Frequently Asked Questions
Can I use pumpkin pie filling instead of pure pumpkin puree?
I wouldn’t recommend it. Pumpkin pie filling already has sugar and spices added, which will throw off the sweetness and spice balance of the cake. Stick with 100% pure pumpkin puree for the best results.
Why did my cake pops fall off the stick when I dipped them?
This usually happens for two reasons: the pops weren’t cold enough, or you didn’t use enough melted chocolate to glue the stick in place. Make sure your pops are thoroughly chilled (at least 1 hour) and dip the stick tip in melted chocolate before inserting it.
Can I make these ahead of time for a party?
Absolutely! You can make them up to 3 days in advance and store them in the refrigerator. They actually taste better the next day as the flavors meld. Just let them sit at room temperature for 15-20 minutes before serving.
My white chocolate coating is too thick. What do I do?
Add a teaspoon of coconut oil or shortening and microwave for 10 seconds, then stir. This will thin the chocolate without affecting the flavor. If it’s still too thick, add another teaspoon. The coating should be thin enough to drip off the back of a spoon.
Can I freeze these cake pops?
Yes! Freeze them in a single layer on a baking sheet until solid, then transfer to a freezer-safe bag or container. They’ll keep for up to 3 months. Thaw in the refrigerator overnight before serving. Don’t microwave them to thaw—it will ruin the coating.
Pin This Recipe!
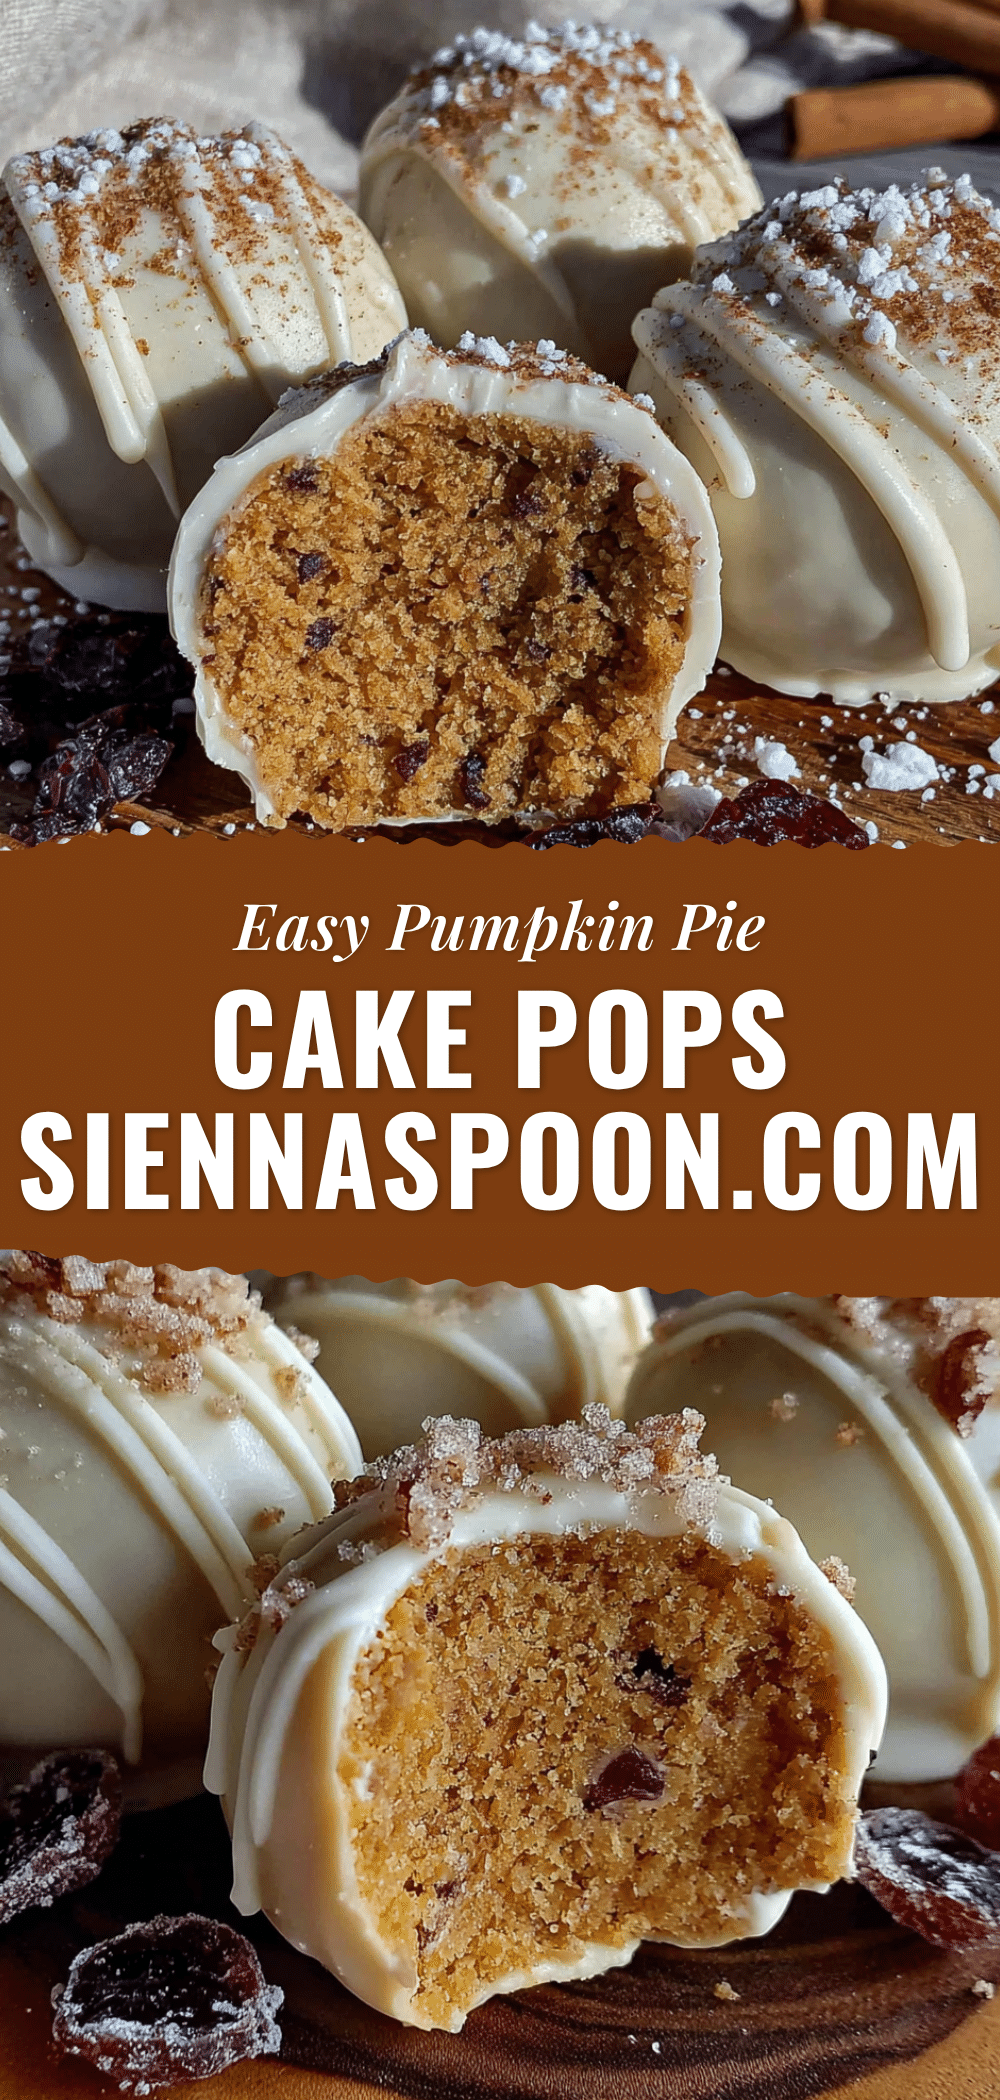
Easy Pumpkin Pie Cake Pops: Best Homemade Dessert
These Easy Pumpkin Pie Cake Pops capture all the warm, spiced flavor of pumpkin pie in a handheld treat. Made with simple ingredients like yellow cake mix and pumpkin puree, they’re quick to prepare and perfect for fall gatherings.
- Prep Time: 45 minutes
- Cook Time: 25 minutes
- Total Time: 1 hour 10 minutes (plus chilling time)
- Yield: 20-24 servings 1x
- Category: Dessert
- Cuisine: American
Ingredients
- 1 box (15.25 oz) yellow cake mix
- 1 cup pumpkin puree
- 2 large eggs, room temperature
- 1/3 cup vegetable oil
- 1 teaspoon pumpkin pie spice
- 1/2 teaspoon ground cinnamon
- 1/4 teaspoon ground ginger
- 1/8 teaspoon ground cloves
- 1/4 cup cream cheese frosting
- 2 tablespoons pumpkin puree
- 1/4 teaspoon vanilla extract
- 12 oz white chocolate melting wafers
- 1 tablespoon coconut oil or shortening
- Orange gel food coloring (optional)
- Fall sprinkles (optional)
- Lollipop sticks (20-24)
Instructions
- Preheat oven to 350°F (175°C). Grease a 9×13-inch baking pan.
- In a large bowl, combine yellow cake mix, 1 cup pumpkin puree, eggs, vegetable oil, pumpkin pie spice, cinnamon, ginger, and cloves. Mix until just combined.
- Pour batter into prepared pan and spread evenly. Bake for 22-25 minutes, or until a toothpick inserted in the center comes out clean. Cool completely in pan on a wire rack.
- Crumble the cooled cake into fine crumbs in a large bowl.
- In a small bowl, mix cream cheese frosting, 2 tablespoons pumpkin puree, and vanilla extract until smooth. Add to crumbled cake and mix with hands until mixture holds together when squeezed.
- Using a cookie scoop, portion mixture into 1.5-inch balls and place on a parchment-lined baking sheet. Cover and refrigerate for at least 1 hour.
- Melt 2 tablespoons of white chocolate wafers in the microwave. Dip the tip of each lollipop stick into melted chocolate, then insert halfway into a cake pop. Return to fridge for 15 minutes.
- Melt remaining white chocolate wafers and coconut oil in a microwave-safe bowl in 30-second intervals, stirring until smooth. Add orange food coloring if desired.
- Dip each cake pop into melted white chocolate, covering completely. Tap gently to remove excess. Place in a styrofoam block or stand. Decorate with sprinkles while wet.
- Let set at room temperature for about 30 minutes, until chocolate is firm.
Notes
Chilling the cake pops thoroughly is crucial to prevent them from falling off the sticks when dipping. For best results, bake the cake the night before and let it cool overnight. The pops taste even better the next day as flavors meld.
Nutrition
- Serving Size: 1 cake pop
- Calories: 185
- Sugar: 16
- Fat: 9
- Carbohydrates: 25
- Fiber: 1
- Protein: 2
Keywords: pumpkin pie cake pops, easy pumpkin dessert, fall treats, cake pops, pumpkin spice


