Love this? Save it for later!
Share the inspiration with your friends
I was at the hardware store, of all places, picking up a new trash can after mine finally gave up the ghost. The guy at the counter, an older fella named Larry with sawdust on his cap, started talking about dessert while ringing me up. “You know what my grandkids go crazy for?” he said, not even looking up from the register. “That dirt stuff with the worms. Tastes like childhood.” I almost laughed. I mean, here was a man who probably spends his days talking about lumber and pipe fittings, and he’s giving me a dessert recommendation. But honestly, he was right. That conversation stuck with me, and I found myself in the baking aisle the very next day, grabbing a package of Oreos and a box of instant pudding.
Maybe you’ve been there. You need a dessert that looks like you spent hours on it, but you’ve got about fifteen minutes of actual energy left. Or maybe you’re looking for something that’ll make the kids at a party actually squeal with delight. These Easy Oreo Dirt Pudding Cups with Gummy Worms are that recipe. They are the kind of no-bake treat that feels a little bit like a secret weapon. No oven, no fancy mixer, just a bowl and a spoon. I made a batch for a last-minute cookout last summer, and I swear, the adults were just as excited as the kids. There’s something about digging into a cup of creamy chocolate pudding topped with crumbled Oreo “dirt” and finding a gummy worm that makes everyone feel about seven years old again.
Let me tell you, the first time I made these, I forgot to crush the Oreos finely enough. I ended up with these giant chunks of cookie floating in the pudding, which looked less like dirt and more like a construction site. It still tasted amazing, but the presentation was a mess. So, I learned my lesson. A little bit of effort on the crumb makes all the difference. This recipe stayed with me because it is pure, unapologetic fun. It’s the dessert you make when you want to bring a smile to someone’s face without breaking a sweat.
Why You’ll Love This Recipe
This isn’t just another pudding recipe. After testing this about four times in one week (tough job, I know), I can tell you exactly why this version works so well. It’s been kid-approved, neighbor-approved, and even picky-eater-approved. Here is what makes it a keeper:
- Quick & Easy: This comes together in about 10 minutes of actual work. The hardest part is waiting for the pudding to set in the fridge. It is the perfect last-minute dessert for a busy weeknight or a surprise guest.
- Simple Ingredients: You likely have most of these in your pantry right now. Instant pudding mix, cold milk, Oreos, and some gummy worms. No fancy grocery trips required.
- Perfect for Parties: Whether it’s a kid’s birthday party, a Halloween gathering, or a summer barbecue, these cups are a guaranteed crowd-pleaser. They are also super easy to transport.
- Crowd-Pleaser: I have yet to meet a person who doesn’t crack a smile when handed one of these. They are nostalgic, delicious, and just plain fun to eat.
- Unbelievably Delicious: The combination of creamy chocolate pudding and crunchy, crumbly Oreo is pure comfort food. The gummy worms add a chewy, fruity surprise that cuts through the richness perfectly.
What makes this recipe different from the rest? It is the texture. We aren’t just dumping crushed Oreos on top. We layer them. A bit of cookie crumb on the bottom, a generous scoop of pudding, and a thick layer of “dirt” on top. This ensures every single spoonful has that perfect creamy-crunchy balance. It is comfort food at its finest—fast, easy, and with the same soul-soothing satisfaction as a much more complicated dessert.
What Ingredients You Will Need
This recipe uses simple, everyday ingredients to deliver a dessert that looks impressive and tastes incredible. Most of these are pantry staples, making this a great go-to when you need something fast.
- Instant Chocolate Pudding Mix (3.9 oz box): I use the Jell-O brand, but any instant pudding mix works. You need the “instant” kind, not the cook-and-serve variety, for this to set up quickly. (Trust me on this one—cook-and-serve takes forever and doesn’t have the same creamy texture.)
- Cold Milk (2 cups): Whole milk gives the richest, creamiest pudding, but 2% works perfectly fine. I have even used oat milk in a pinch, and it set up beautifully, though the flavor is slightly less rich.
- Oreo Cookies (about 24): These are the star of the show. You can use regular Oreos, Double Stuf, or even the golden ones if you want a different look. I find that the classic Oreo gives the best “dirt” color. You will need about 20 for the crumb and 4 for a final garnish if you want a few extra cookie pieces.
- Gummy Worms (about 12-16): This is where the fun comes in. I prefer the classic sour gummy worms for a little tang, but regular ones are great too. You can find them in the candy aisle at any grocery store. I like to use a mix of colors for the most visual appeal.
- Whipped Topping (optional, 8 oz): This is not strictly necessary, but folding a cup of Cool Whip into the prepared pudding makes it incredibly light and mousse-like. It also stretches the pudding a bit further, which is great if you are making a big batch. I usually add it because it makes the texture absolutely dreamy.
For ingredient selection, look for a box of instant pudding that isn’t close to its expiration date. Fresh pudding mix sets up much faster. If you are using a dairy-free milk, make sure it is a barista blend or one that is thicker, as thinner milks can sometimes result in a runny pudding.
Equipment Needed
You don’t need a lot of fancy gear for this recipe, which is part of the beauty of it. Here is what you will need:
- Mixing Bowls: One large bowl for the pudding and a smaller one if you are folding in whipped topping.
- Whisk: A good whisk is essential for getting the pudding smooth. A hand mixer works too, but a whisk is faster for cleanup.
- Measuring Cups: For the milk. A liquid measuring cup is best.
- Plastic Ziploc Bag (gallon size): This is my secret weapon for crushing Oreos. It keeps your hands clean and contains the mess. You can also use a food processor, but the bag method is more satisfying.
- Rolling Pin or Heavy Can: To crush the Oreos inside the bag. A regular rolling pin works, or you can just use the bottom of a heavy skillet.
- Small Cups or Jars (6-8): Clear plastic cups are classic for this recipe because you can see the layers. I use 8-ounce mason jars, but small dessert cups or even disposable party cups work great.
- Spatula: For scraping every last bit of pudding into the cups.
I have a confession: I used to use a food processor for the Oreos, and it was a nightmare to clean. The bag method is so much easier. Just put the cookies in, seal it, and go to town with the rolling pin. It is also a great stress reliever after a long day!
Preparation Method
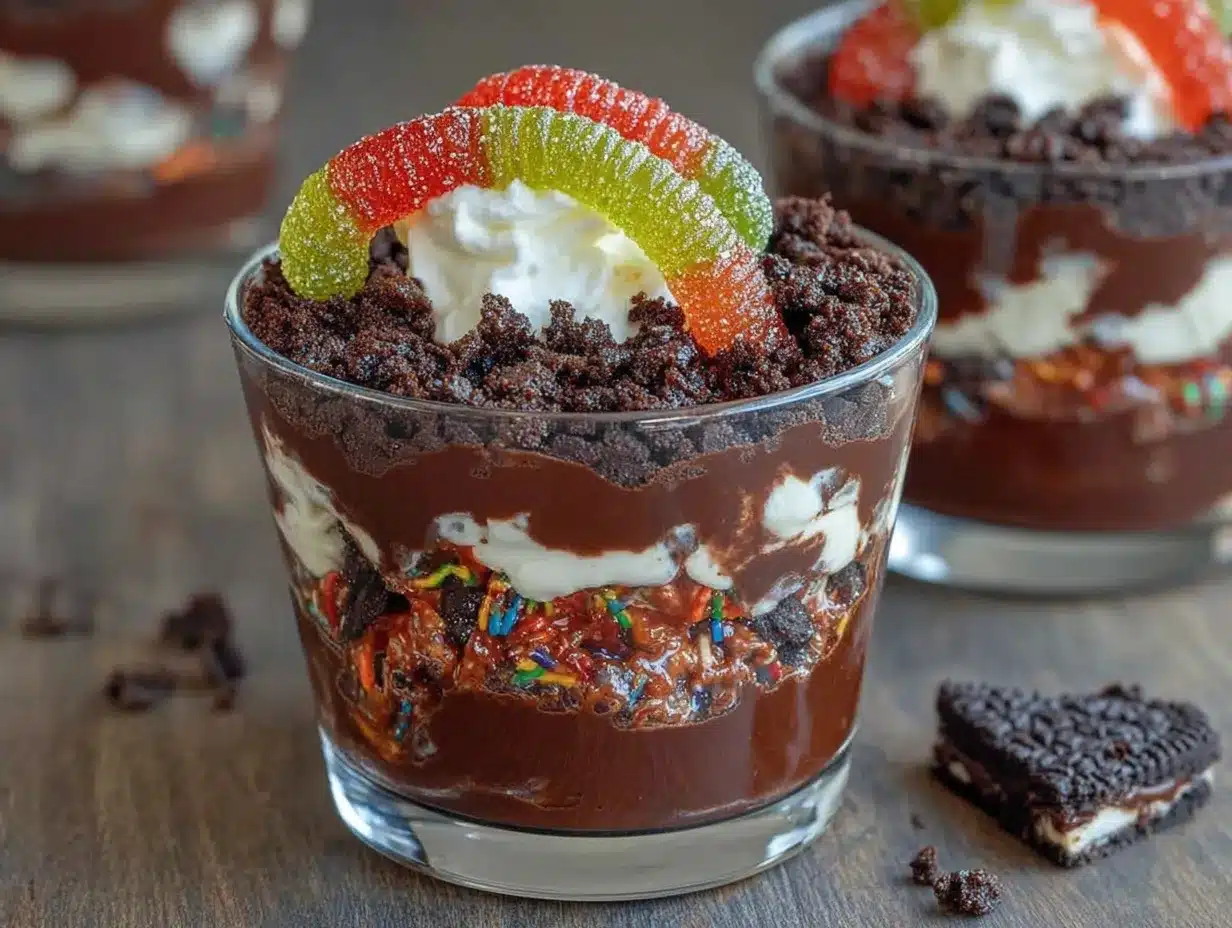
Follow these steps carefully, and you will have perfect dirt pudding cups in no time. The key is patience with the chilling time, but the actual work is minimal.
- Crush the Oreos (5 minutes): Place about 20 Oreo cookies (cream filling and all) into a large Ziploc bag. Seal it tightly, squeezing out as much air as possible. Use a rolling pin or the bottom of a heavy pan to crush the cookies into fine crumbs. You want a texture that resembles potting soil. A few slightly larger chunks are fine, but try to get it mostly fine. Set the bag aside.
- Make the Pudding (5 minutes): In a large mixing bowl, pour the 2 cups of cold milk. Add the instant chocolate pudding mix. Whisk vigorously for about 2 minutes, until the pudding is thick and smooth. It will start to set almost immediately. If you are adding whipped topping, gently fold in 1 cup of Cool Whip now until it is fully combined and the mixture is light and airy.
- Prepare the Cups (2 minutes): Take your serving cups and spoon about 2 tablespoons of the crushed Oreo crumbs into the bottom of each cup. This creates the first layer of “dirt.” Press it down lightly with the back of the spoon.
- Add the Pudding (5 minutes): Divide the pudding mixture evenly among the cups. Fill them about 2/3 full. You want to leave enough room for the top layer of Oreo crumbs. Use a spatula to get every last bit of pudding out of the bowl.
- Top with “Dirt” (2 minutes): Sprinkle the remaining crushed Oreo crumbs generously over the top of the pudding in each cup. Cover the surface completely so no pudding is visible. This is your “dirt” layer.
- Add the Worms (1 minute): Gently poke 2 or 3 gummy worms into the top of each cup. You can have them crawling out of the “dirt” or half-buried. This is the fun part, so get creative. I like to have one worm fully visible and one peeking out.
- Chill (30-60 minutes): Place the cups in the refrigerator for at least 30 minutes. This allows the pudding to fully set and the Oreo crumbs to soften slightly, mimicking the texture of real dirt. If you are in a hurry, 20 minutes will work, but an hour is best.
Pro Tip: If your pudding seems too thick after mixing, don’t panic. It will loosen up as you fold in the whipped topping (if using). If you aren’t using topping, just make sure you whisked it for the full 2 minutes. It should be thick but pourable.
Cooking Tips & Techniques
I have made this recipe more times than I care to count, and I have learned a few things the hard way. Here are my best tips to ensure success every time.
Don’t Overmix the Pudding: I know it is tempting to keep whisking until it is perfectly smooth, but overmixing can actually thin out the pudding. Whisk for exactly 2 minutes, then stop. It will continue to set as it sits.
Use Cold Milk: This is crucial. The pudding mix needs cold milk to activate the thickening agents. If your milk is even slightly warm, the pudding will be runny and won’t set properly. I keep my milk in the fridge right up until I need it.
The Oreo Crumb Consistency: The first time I made this, I had giant chunks of Oreo in the pudding. It was a mess. You want the crumbs to be fine and uniform. A few small chunks are fine for texture, but if they are too big, they won’t stick to the pudding and will just fall off your spoon. Take the extra minute to crush them well.
Layering is Key: Don’t just dump everything in the cup. The bottom layer of crumbs gives a nice crunch at the end, and the top layer looks like a tiny garden bed. If you mix it all together, it just looks like muddy pudding. Take the time to layer.
Make Ahead: These cups are actually better the next day! The flavors meld together, and the Oreo crumbs soften into a cake-like texture. I often make them the night before a party. Just add the gummy worms right before serving so they stay chewy.
Variations & Adaptations
This recipe is incredibly flexible. Here are a few of my favorite ways to change it up.
- Peanut Butter Cup Dirt: Swap the chocolate pudding for chocolate peanut butter pudding. You can find it in most stores, or just add 2 tablespoons of peanut butter to the chocolate pudding mix before adding the milk. Top with crushed Reese’s cups instead of (or in addition to) the gummy worms.
- Halloween Spooktacular: Use orange and black gummy worms and add a few candy eyeballs on top. You can also use a ghost-shaped cookie cutter to cut a marshmallow ghost and place it on the “dirt.” It is a huge hit at Halloween parties.
- Gluten-Free Version: This is easy. Just use a gluten-free chocolate sandwich cookie, like the ones from Glutino or Kinnikinnick. Use a gluten-free instant pudding mix (most are, but check the label). Everything else is naturally gluten-free.
- Dairy-Free Version: Use your favorite dairy-free milk (I recommend oat or soy for the best texture) and a dairy-free whipped topping. Most instant pudding mixes are dairy-free, but you need to use a milk alternative that is high in protein and fat for it to set. I have had great luck with Oatly Barista Edition.
- Adult Version: Add a splash of Kahlua or Bailey’s Irish Cream to the milk before whisking the pudding. It adds a lovely coffee or cream flavor that pairs beautifully with the chocolate. Just don’t add too much, or the pudding won’t set.
I once made a version with mint Oreos and regular chocolate pudding for St. Patrick’s Day. I used green gummy worms and added a few drops of green food coloring to the pudding. It looked like a little patch of grass with worms. It was a huge hit!
Serving & Storage Suggestions
These cups are best served cold, straight from the fridge. The contrast between the cold, creamy pudding and the slightly softened Oreo crumb is what makes them so good. Here is how to serve and store them.
Serving: Serve these in clear cups so everyone can see the layers. I like to put them on a tray with a few extra gummy worms scattered around for decoration. They are perfect for birthday parties, barbecues, or just a fun weeknight dessert. If you are serving them at a party, you can pair them with a glass of cold milk or a scoop of vanilla ice cream on the side.
Storage: Store any leftover cups in the refrigerator, covered with plastic wrap or a lid. They will keep for up to 3 days. The gummy worms will soften over time, so if you are making them ahead, I recommend adding the worms no more than a few hours before serving. The pudding itself stays perfectly creamy.
Reheating: You don’t want to reheat these. They are meant to be eaten cold. If you have leftovers that have been in the fridge for a day, the Oreo crumbs will have softened significantly, creating a texture almost like a chocolate mousse cake. It is actually really delicious in its own way.
Freezing: I don’t recommend freezing these. The pudding will become watery and grainy when thawed, and the texture of the Oreos will be ruined. They are best enjoyed fresh from the fridge.
Nutritional Information & Benefits
Let’s be honest—this is a treat, not a health food. But knowing what is in it can help you enjoy it mindfully. Here is the estimated nutritional breakdown for one serving (based on a recipe that makes 8 cups).
| Nutrient | Amount per Serving |
|---|---|
| Calories | 320 |
| Total Fat | 12g |
| Saturated Fat | 5g |
| Cholesterol | 10mg |
| Sodium | 450mg |
| Total Carbohydrates | 52g |
| Dietary Fiber | 2g |
| Sugars | 38g |
| Protein | 5g |
Potential Allergens: This recipe contains wheat (from the Oreos), dairy (from the milk and pudding mix), and soy (also from the Oreos). The gummy worms may contain gelatin or corn syrup. If you are using the gluten-free or dairy-free variations, be sure to check all labels carefully.
From a wellness perspective, I see this as a fun, occasional treat. It is perfect for celebrations or for when you just need a little bit of joy in your day. The small serving size (a cup) makes it easy to enjoy without overdoing it. Plus, the protein from the milk and the fiber from the Oreos (yes, there is a tiny bit!) helps keep you satisfied.
Conclusion
These Easy Oreo Dirt Pudding Cups with Gummy Worms are more than just a dessert. They are a little bit of magic in a cup. They are the recipe you turn to when you need a guaranteed smile, a quick win in the kitchen, or a way to make a regular Tuesday feel a little bit special. The best part? They take almost no effort, and the payoff is huge.
I encourage you to make this recipe your own. Use different cookies, try different candies, or add a layer of fresh fruit. The base is so simple that the possibilities are endless. I love this recipe because it reminds me not to take cooking so seriously all the time. Sometimes, the best thing you can make is something that is just pure, unadulterated fun.
I would love to hear how yours turn out! Did you use a different type of worm? Did your kids help you crush the Oreos? Drop a comment below and let me know. And if you loved this recipe, please share it with a friend who needs a little dessert inspiration. Happy cooking, friends!
Frequently Asked Questions
Can I make these dirt pudding cups ahead of time?
Absolutely! You can make these up to 24 hours in advance. Just hold off on adding the gummy worms until right before you serve them. The worms will soften and become chewy if they sit in the fridge for too long. The pudding and Oreo layers actually taste even better the next day.
Why is my pudding runny?
This usually happens for one of two reasons. Either your milk wasn’t cold enough, or you didn’t whisk it for the full 2 minutes. Make sure your milk is straight from the fridge, and set a timer when you start whisking. If you are using a dairy-free milk, make sure it is a thicker variety like oat or soy.
Can I use a different type of cookie?
Yes! This recipe is very forgiving. You can use golden Oreos for a “sand” look, mint Oreos for a different flavor, or even a gluten-free chocolate cookie. Just make sure you are using a sandwich cookie with a cream filling, as the cream helps the crumbs stick together.
How do I crush the Oreos without making a huge mess?
The Ziploc bag method is the way to go. Put the cookies in a gallon-sized bag, squeeze out the air, and seal it. Then, use a rolling pin or the bottom of a heavy pan to crush them. You can also use a food processor, but the bag method is easier to clean up.
Can I use homemade pudding instead of instant?
You can, but it will change the texture and the time required. Homemade pudding needs to cool completely before you assemble the cups, which takes much longer. Instant pudding is really the best choice for this recipe because it sets up quickly and has the right creamy consistency.
Pin This Recipe!

Easy Oreo Dirt Pudding Cups: Best 5-Minute Recipe

These no-bake Oreo dirt pudding cups with gummy worms are a quick, fun dessert that looks impressive with minimal effort. Layers of creamy chocolate pudding and crushed Oreo ‘dirt’ create a nostalgic treat perfect for parties or a weeknight indulgence.
- Prep Time: 10 minutes
- Cook Time: 0 minutes
- Total Time: 40 minutes (including chilling)
- Yield: 8 servings 1x
- Category: Dessert
- Cuisine: American
Ingredients
- 1 (3.9 oz) box instant chocolate pudding mix
- 2 cups cold milk (whole or 2%)
- 24 Oreo cookies (about 20 for crumbs, 4 for garnish)
- 12–16 gummy worms
- 1 cup whipped topping (optional, for a lighter texture)
Instructions
- Crush the Oreos: Place about 20 Oreo cookies (cream filling and all) into a large Ziploc bag. Seal tightly, squeezing out air. Use a rolling pin or heavy pan to crush into fine crumbs resembling potting soil. Set aside.
- Make the pudding: In a large mixing bowl, pour 2 cups cold milk. Add instant chocolate pudding mix. Whisk vigorously for about 2 minutes until thick and smooth. If using, gently fold in 1 cup whipped topping until fully combined.
- Prepare the cups: Spoon about 2 tablespoons of crushed Oreo crumbs into the bottom of each serving cup. Press down lightly.
- Add the pudding: Divide the pudding mixture evenly among the cups, filling each about 2/3 full.
- Top with ‘dirt’: Sprinkle remaining crushed Oreo crumbs generously over the pudding, covering the surface completely.
- Add the worms: Gently poke 2-3 gummy worms into the top of each cup, partially burying them for a fun effect.
- Chill: Refrigerate for at least 30 minutes (up to 1 hour) to allow the pudding to set and the crumbs to soften slightly.
Notes
For best results, use cold milk straight from the fridge. Don’t overmix the pudding—whisk for exactly 2 minutes. The Oreo crumbs should be fine and uniform for the best texture. These cups can be made up to 24 hours in advance; add gummy worms just before serving to keep them chewy. For a dairy-free version, use oat or soy milk and dairy-free whipped topping. For a gluten-free version, use gluten-free chocolate sandwich cookies and check the pudding mix label.
Nutrition
- Serving Size: 1 cup
- Calories: 320
- Sugar: 38
- Sodium: 450
- Fat: 12
- Saturated Fat: 5
- Carbohydrates: 52
- Fiber: 2
- Protein: 5
Keywords: Oreo dirt pudding, no-bake dessert, gummy worms, chocolate pudding, easy dessert, kid-friendly, party dessert


