Love this? Save it for later!
Share the inspiration with your friends
I was at the hardware store last Saturday—a place I usually avoid unless absolutely necessary—when the woman behind me in the checkout line started talking about chicken. Not just any chicken, mind you. She was describing these honey garlic chicken thighs that her husband had made for a neighborhood block party, and honestly, I was so captivated I almost forgot to pay for my paintbrushes. She was maybe seventy, with silver hair and the kind of no-nonsense voice that makes you listen. “The secret,” she said, “is letting the honey get dark and sticky before you add the garlic. Most people rush it.” I scribbled the rough idea on the back of a receipt, right there between the screwdrivers and the lightbulbs.
Look, I’m not usually the type to take cooking advice from strangers in line at the hardware store. But something about the way she described it—the glossy, caramelized skin, the way the sauce clings to every bite—stuck with me. I went home, threw together a version of what she described, and let me tell you, it was a revelation. The honey caramelizes into this almost-burnt-sugar crust, the garlic gets sweet and mellow, and the chicken thighs stay so tender they practically fall apart. My kitchen smelled like a fancy restaurant, and I hadn’t even broken a sweat.
Maybe you’ve been there—you overhear a recipe in the weirdest place and think, “No way that actually works.” But this one does. I’ve made it for every dinner party since, and it’s the first dish to disappear every single time. It’s the kind of recipe that makes you look like you spent hours in the kitchen when really, you just let the oven do the heavy lifting. So here it is, my take on that hardware store chicken, perfected through many, many test batches. Trust me on this one.
Why You’ll Love This Recipe
I’ve tested this recipe more times than I care to admit—burned the honey twice, oversalted a batch, even tried it with chicken breasts (don’t do it). What I landed on is a version that works every single time, whether you’re cooking for two or hosting a crowd. Here’s what makes it special:
- Quick & Easy: From fridge to table in under 40 minutes. Minimal prep, maximum payoff.
- Simple Ingredients: You probably have everything already—honey, soy sauce, garlic, chicken thighs. No fancy trips required.
- Perfect for Hosting: This dish was literally designed for a dinner party. It scales beautifully, looks impressive on a platter, and stays juicy even if it sits out for a bit while guests grab seconds.
- Crowd-Pleaser: Kids love the sweet-savory combo, adults go back for thirds. I’ve served it to picky eaters and food snobs alike, and it wins every time.
- Unbelievably Delicious: The honey caramelizes into a sticky, glossy glaze that’s honestly addictive. The garlic softens into buttery little pockets of flavor. It’s comfort food that feels fancy—the best kind of cooking trick.
This isn’t just another honey garlic chicken recipe. The technique matters here: searing the thighs skin-side down until deeply golden, then letting the honey and garlic meld in the oven. It’s the kind of dish that makes you close your eyes after the first bite. Perfect for impressing guests without stress, or turning a simple Tuesday dinner into something memorable.
What Ingredients You Will Need
This recipe uses simple, pantry-friendly ingredients to deliver that signature sticky-sweet glaze and tender, juicy meat. Most of these are things you likely already have on hand, which makes it perfect for last-minute hosting.
For the Chicken
- 6 bone-in, skin-on chicken thighs (about 2.5 lbs total) – The skin gets crispy and renders fat that flavors the whole dish. Boneless works in a pinch, but you’ll lose some of that glorious texture.
- 1 teaspoon salt – I use fine sea salt. Adjust if using kosher.
- ½ teaspoon black pepper – Freshly ground, if you can.
- 1 tablespoon olive oil – For searing. Avocado oil works too.
For the Honey Garlic Sauce
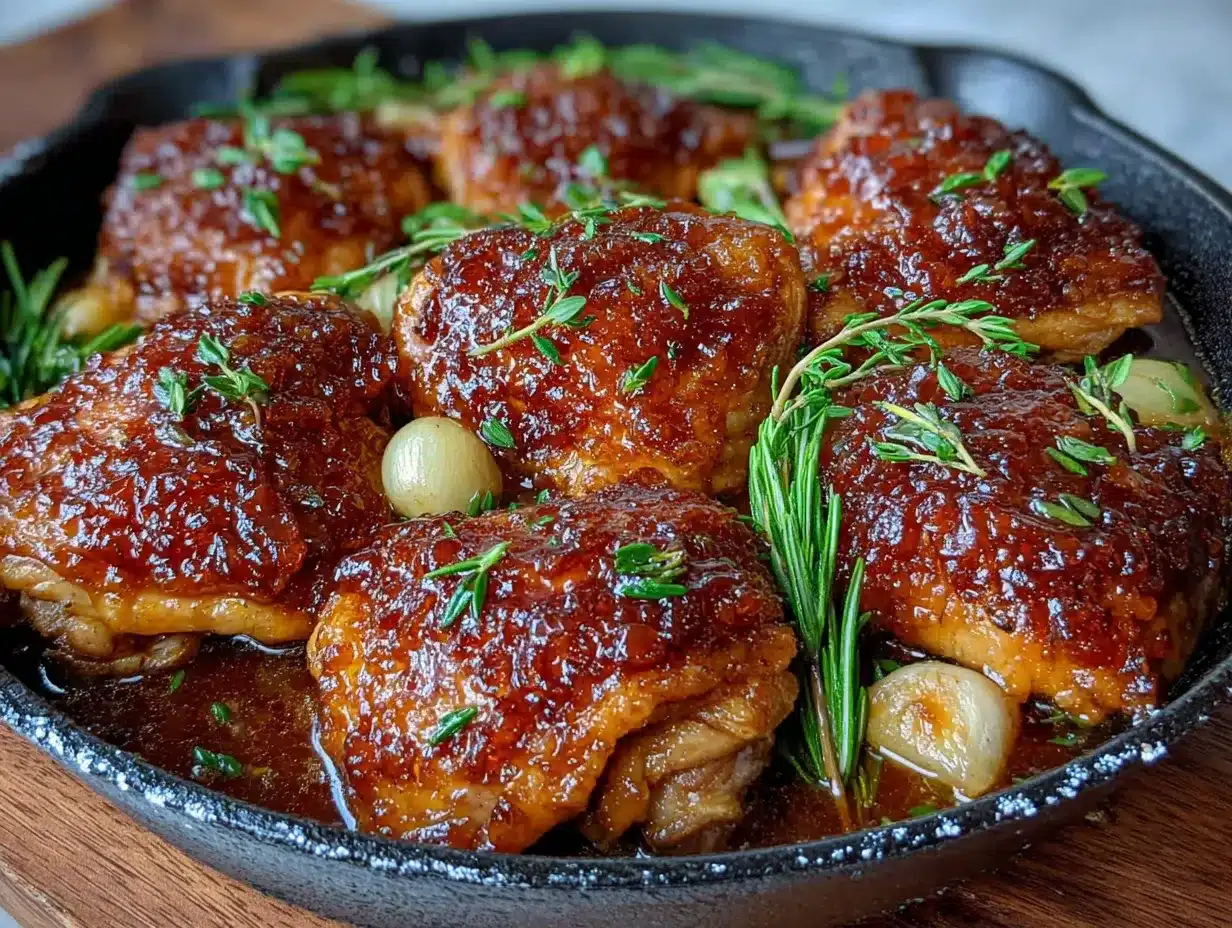
- ⅓ cup honey – Go for a runny, good-quality honey. Local honey adds nice floral notes, but any kind works. (Pro tip: if your honey has crystallized, warm the jar in hot water for a few minutes.)
- 4 cloves garlic, minced – Fresh garlic is non-negotiable here. The pre-minced stuff in a jar gets bitter when caramelized.
- 3 tablespoons soy sauce – I prefer low-sodium to control saltiness. Tamari or coconut aminos work for gluten-free.
- 2 tablespoons rice vinegar – Adds brightness to balance the sweetness. Apple cider vinegar works as a substitute.
- 1 tablespoon sriracha or chili garlic sauce – Optional, but I recommend it. The heat cuts through the honey and keeps the dish from being cloying.
- 1 teaspoon sesame oil – For that nutty, toasty finish. Don’t skip it—it’s the secret weapon.
- 1 tablespoon butter – Adds richness and helps the sauce thicken. Unsalted is best.
For Garnish
- Sesame seeds – Toasted white or black, for looks and a little crunch.
- Chopped green onions – Fresh pop of color and mild onion flavor.
- Fresh cilantro or parsley – Optional, but I love the freshness.
Equipment Needed
You don’t need a fancy kitchen for this one. Here’s what I use:
- Large oven-safe skillet or cast-iron pan – A 12-inch skillet is ideal. Cast iron gives the best sear, but any oven-safe pan works. If you don’t have one, sear in a regular skillet and transfer to a baking dish for the oven.
- Tongs – For flipping the chicken without tearing the skin. Silicone-tipped ones are gentle on nonstick pans.
- Small bowl – For whisking the sauce together.
- Meat thermometer – Honestly, this is worth buying. Chicken thighs are done at 165°F, but I pull them at 175°F for extra tenderness.
- Basting brush – For painting the sauce onto the chicken halfway through. A spoon works too, but the brush makes it look gorgeous.
I picked up my cast-iron skillet at a thrift store for eight dollars, and it’s my most-used pan. You don’t need expensive equipment—just something that holds heat well.
Preparation Method
- Preheat your oven to 400°F (200°C). Let it come to temperature while you prep. Rack should be in the middle position.
- Pat the chicken thighs dry with paper towels. This is crucial—wet skin won’t crisp up. Season both sides generously with salt and pepper. Let them sit at room temperature for 10 minutes while you make the sauce.
- Make the honey garlic sauce: In a small bowl, whisk together honey, minced garlic, soy sauce, rice vinegar, sriracha (if using), and sesame oil. Set aside. Don’t add the butter yet—that goes in later.
- Heat olive oil in your skillet over medium-high heat until it shimmers. Place the chicken thighs skin-side down in a single layer. Don’t crowd the pan—work in batches if needed. Let them sear undisturbed for 5-6 minutes, until the skin is deep golden brown and crispy. The skin should release easily from the pan; if it sticks, give it another minute.
- Flip the chicken using tongs and cook for 2 minutes on the other side. This second side doesn’t need as long—we’re just getting a little color.
- Pour the sauce around the chicken (not directly on the skin, or it’ll get soggy). Add the butter to the pan, letting it melt into the sauce. Carefully tilt the pan to swirl everything together.
- Transfer the skillet to the oven and bake for 15 minutes. At the 10-minute mark, pull the pan out and baste the chicken with the pan sauce using a brush or spoon. This is where the magic happens—the sauce thickens and glazes the skin.
- Check for doneness: The chicken should register 165°F at the thickest part, but I aim for 175°F for fall-apart tenderness. If it’s not there yet, return to the oven for 3-5 more minutes.
- Rest and serve: Let the chicken rest in the pan for 5 minutes. The sauce will thicken further as it cools. Transfer to a platter, spoon the extra sauce over the top, and garnish with sesame seeds and green onions.
Sensory cue: The sauce should be bubbling and thick enough to coat the back of a spoon. The chicken skin will look like lacquered glass—dark amber and glossy. Your kitchen will smell like a mix of caramel, garlic, and soy. It’s impossible to resist.
Cooking Tips & Techniques
I’ve burned my fair share of honey garlic sauce, so let me save you the trouble. Here are the lessons I learned the hard way:
- Don’t rush the sear. That deep golden crust isn’t just for looks—it adds flavor and texture. Let the chicken sit undisturbed. If you try to flip too early, the skin will tear and stick to the pan.
- Watch the honey. Honey burns faster than you think. If your pan gets too hot during the stovetop phase, the sugar in the honey can scorch. Keep the heat at medium-high, not screaming hot. If you see smoke, pull the pan off the heat for a sec.
- Baste halfway through. This is the step I almost skipped once, and the chicken came out dry on top. Basting keeps the meat moist and builds that gorgeous glaze layer by layer.
- Let it rest. I know you’re hungry, but those 5 minutes let the juices redistribute. Cut into it too early, and all that goodness runs onto the cutting board instead of staying in the meat.
- Double the sauce if hosting. For a crowd, I always make 1.5x the sauce recipe. It reduces in the oven, and you want enough to drizzle over rice or spoon onto the plate.
One time, I forgot to add the butter entirely. The sauce was still good, but thinner and less glossy. The butter really does make a difference—it emulsifies the sauce and gives it that restaurant-quality sheen.
Variations & Adaptations
This recipe is forgiving, and I’ve played around with it more than I’d like to admit. Here are some twists that worked:
- Spicy Honey Garlic: Double the sriracha or add a teaspoon of red pepper flakes. The heat cuts the sweetness beautifully. My spice-loving friends beg for this version.
- Garlic Lover’s Version: Use 6-8 cloves of garlic instead of 4. Roast a whole head of garlic alongside the chicken and squeeze the softened cloves into the sauce before serving. It’s decadent.
- Gluten-Free: Swap the soy sauce for tamari or coconut aminos. Everything else is naturally gluten-free. Serve with rice or quinoa.
- Lemon-Herb Twist: Add the zest of one lemon and a tablespoon of fresh thyme to the sauce. The citrus brightens everything up, and it’s perfect for spring gatherings.
- Air Fryer Adaptation: Sear the chicken in a skillet, then transfer to an air fryer basket. Cook at 375°F for 12-15 minutes, basting halfway. The skin gets extra crispy.
I tried a version with maple syrup instead of honey once, and it was good—but different. The maple flavor was more pronounced, and the sauce didn’t get quite as sticky. Stick with honey for that signature glaze.
Serving & Storage Suggestions
For a dinner party, I serve these honey garlic chicken thighs on a large white platter, garnished generously with sesame seeds and green onions. The contrast of dark, glossy chicken against white ceramic is stunning. Pair it with:
- Steamed jasmine rice or coconut rice – The rice soaks up that extra sauce like a dream.
- Roasted green beans or broccoli – A simple veggie side balances the richness.
- A crisp cucumber salad – Toss sliced cucumbers with rice vinegar, a pinch of sugar, and chili flakes for a refreshing counterpoint.
- For drinks: A dry Riesling or a light lager cuts through the sweetness. For non-alcoholic, try iced green tea with a squeeze of lime.
Storage: Leftover chicken keeps in an airtight container in the fridge for up to 4 days. The flavors actually deepen overnight—the garlic mellows and the honey permeates the meat. Reheat gently in a 350°F oven for 10 minutes, or in a skillet with a splash of water to loosen the sauce. The microwave works in a pinch, but the skin won’t be crispy.
Freezer: Freeze the cooked chicken in a single layer on a baking sheet, then transfer to a freezer bag. It keeps for up to 3 months. Thaw in the fridge overnight and reheat as above. The sauce might separate a little, but a quick stir fixes it.
Make-ahead tip for hosting: Sear the chicken and make the sauce up to a day ahead. Keep them separate in the fridge. When guests arrive, pour the sauce over the chicken and bake. It saves you 15 minutes of active cooking time and lets you actually enjoy your party.
Nutritional Information & Benefits
Per serving (based on 6 servings, one thigh each):
- Calories: ~410
- Protein: 28g
- Fat: 22g (mostly from the skin and olive oil)
- Carbohydrates: 22g (from honey and soy sauce)
- Sugar: 18g (natural from honey)
- Sodium: 680mg (can be reduced with low-sodium soy sauce)
Chicken thighs are higher in fat than breasts, but that fat is what keeps them juicy and flavorful. They’re also rich in B vitamins, selenium, and iron—great for energy and immune health. Honey provides antioxidants and can help soothe a sore throat (bonus!).
If you’re watching your sugar intake, you can reduce the honey to ¼ cup, but the glaze will be thinner. For a low-carb option, serve with cauliflower rice instead of regular rice.
I’m not a nutritionist, but I do try to balance indulgent meals with plenty of veggies. This dish is rich, so I pair it with a big green salad or roasted vegetables to round things out.
Conclusion
This honey garlic chicken thighs recipe is the one I turn to when I want to impress without stress. It came from a chance encounter at a hardware store, of all places, and it’s become my go-to for dinner parties, potlucks, and even quiet weeknights when I need a little comfort. The combination of crispy skin, tender meat, and that sticky-sweet-savory glaze is honestly unbeatable.
I hope you give it a try—and I’d love to hear how it turns out. Did you add extra garlic? Serve it with something unexpected? Drop a comment below and let me know. And if you loved it, share it with a friend. After all, the best recipes are the ones we pass along.
Happy cooking, friend. Your guests are about to be very impressed.
Frequently Asked Questions
Can I use chicken breasts instead of thighs?
You can, but I don’t recommend it. Chicken breasts cook faster and dry out more easily. If you must, use boneless, skinless breasts and reduce the oven time to 12-15 minutes. Check for doneness early.
How do I prevent the honey from burning?
Keep your heat at medium-high, not high, during the stovetop sear. If the pan starts smoking, pull it off the burner for a moment. The oven heat is gentler, so the sauce caramelizes without scorching there.
Can I make this recipe dairy-free?
Absolutely. Skip the butter or substitute it with a vegan butter or a tablespoon of coconut oil. The sauce will still be delicious, just slightly less rich.
What if I don’t have an oven-safe skillet?
No problem. Sear the chicken in any skillet, then transfer everything to a baking dish or sheet pan. Pour the sauce around the chicken and bake as directed. Just make sure the dish is large enough to hold the chicken in a single layer.
How do I get the sauce extra thick?
After baking, transfer the chicken to a plate and simmer the sauce on the stovetop over medium heat for 3-5 minutes. It will reduce and thicken. Stir in a teaspoon of cornstarch mixed with a tablespoon of cold water if you want it even thicker.
Pin This Recipe!
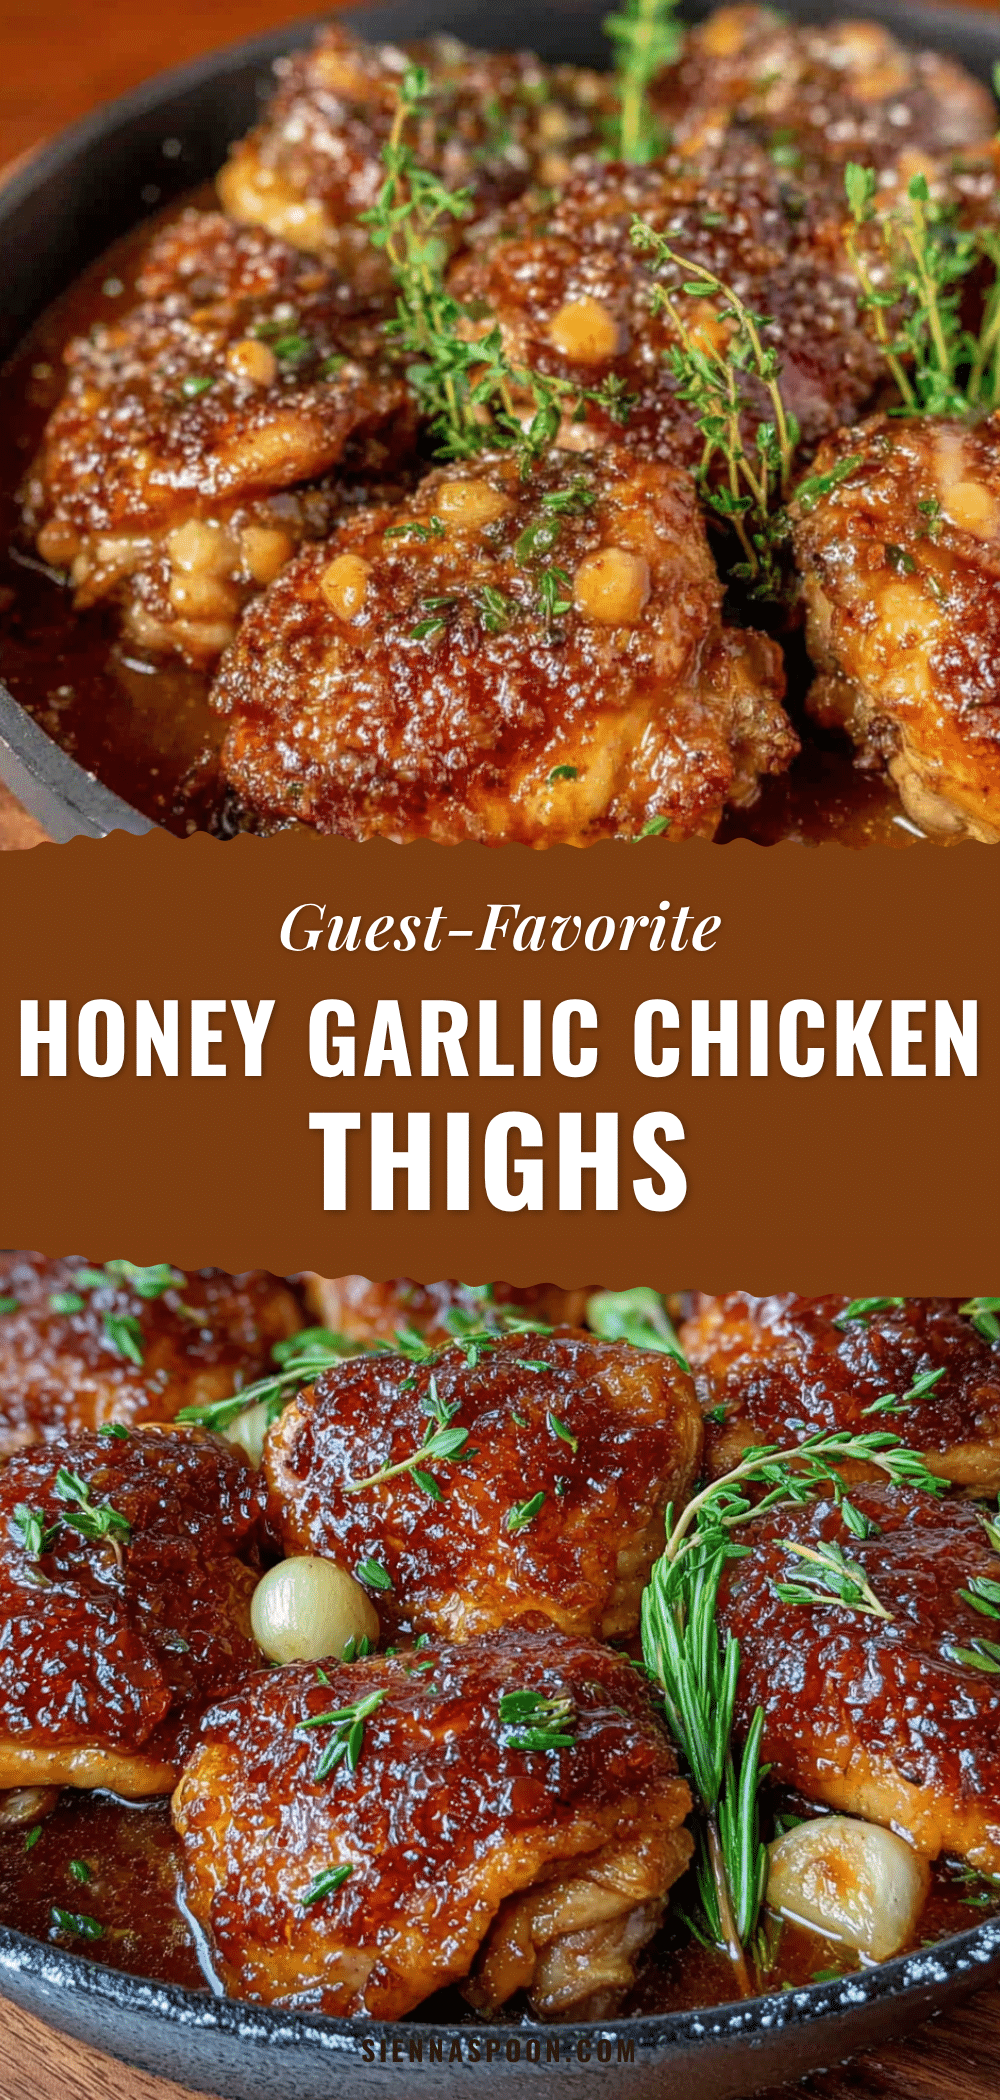
Best Easy Honey Garlic Chicken Thighs (Guest Favorite)

These honey garlic chicken thighs feature crispy skin, tender meat, and a sticky-sweet-savory glaze. Perfect for impressing guests without stress, or turning a simple Tuesday dinner into something memorable.
- Prep Time: 15 minutes
- Cook Time: 25 minutes
- Total Time: 40 minutes
- Yield: 6 servings 1x
- Category: Main Course
- Cuisine: American
Ingredients
- 6 bone-in, skin-on chicken thighs (about 2.5 lbs total)
- 1 teaspoon salt
- ½ teaspoon black pepper
- 1 tablespoon olive oil
- ⅓ cup honey
- 4 cloves garlic, minced
- 3 tablespoons soy sauce (low-sodium preferred)
- 2 tablespoons rice vinegar
- 1 tablespoon sriracha or chili garlic sauce (optional)
- 1 teaspoon sesame oil
- 1 tablespoon butter (unsalted)
- Sesame seeds for garnish
- Chopped green onions for garnish
- Fresh cilantro or parsley for garnish (optional)
Instructions
- Preheat your oven to 400°F (200°C). Rack should be in the middle position.
- Pat the chicken thighs dry with paper towels. Season both sides generously with salt and pepper. Let them sit at room temperature for 10 minutes.
- In a small bowl, whisk together honey, minced garlic, soy sauce, rice vinegar, sriracha (if using), and sesame oil. Set aside. Do not add the butter yet.
- Heat olive oil in a large oven-safe skillet over medium-high heat until shimmering. Place the chicken thighs skin-side down in a single layer. Sear undisturbed for 5-6 minutes until deep golden brown and crispy.
- Flip the chicken using tongs and cook for 2 minutes on the other side.
- Pour the sauce around the chicken (not directly on the skin). Add the butter to the pan, letting it melt into the sauce. Carefully tilt the pan to swirl everything together.
- Transfer the skillet to the oven and bake for 15 minutes. At the 10-minute mark, pull the pan out and baste the chicken with the pan sauce.
- Check for doneness: the chicken should register 165°F at the thickest part (aim for 175°F for extra tenderness). If not done, return to the oven for 3-5 more minutes.
- Let the chicken rest in the pan for 5 minutes. Transfer to a platter, spoon extra sauce over the top, and garnish with sesame seeds and green onions.
Notes
Don’t rush the sear; let the chicken skin get deeply golden. Watch the honey to prevent burning. Baste halfway through baking. Let the chicken rest for 5 minutes before serving. Double the sauce if hosting a crowd.
Nutrition
- Serving Size: 1 thigh
- Calories: 410
- Sugar: 18
- Sodium: 680
- Fat: 22
- Saturated Fat: 6
- Carbohydrates: 22
- Protein: 28
Keywords: honey garlic chicken, chicken thighs, easy dinner, party recipe, sticky chicken, garlic chicken, honey chicken


